I was measuring lengths to 1/32 and splitting hairs with the bubbles on the level.
Hollywood remarked, “We aren’t building furniture here,” to which I replied, “No, but we are storing the building blocks of furniture here, and if the supports are crooked, the wood in the furniture will soon be crooked, too.”
We had that conversation more than once. Hollywood was not a fast learner.
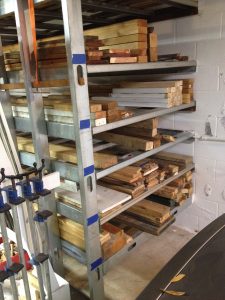
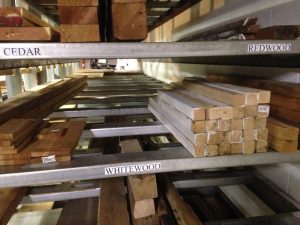
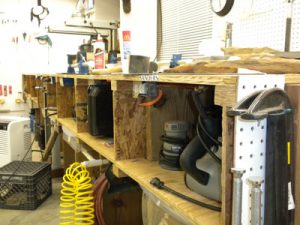
The three-level system worked well, except that wood with “character,” the kind I like best, often has twist, warp and bend along with its other defects. That makes it nearly impossible to store the wood flat and makes tall stacks fall over. Also, being restricted to three levels makes it difficult to conveniently segregate lumber by species. At best, two or more species had to share a level, often with species rubbing shoulders.
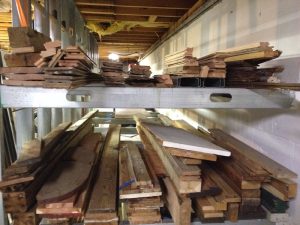
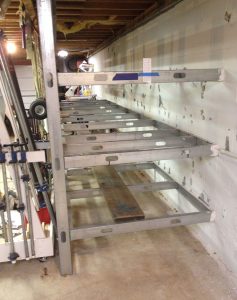
As you can see, little of the lumber here is “prime.” There was a lot of wasted space above the top crossmember. The twisted and bent lumber refused to be stacked neatly, and fell over if the stacks were too high.
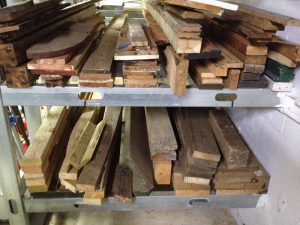
On the bottom two levels, several species are crammed together and few of the boards are “cooperative.”
One day I got inspired (read “fed up”), and took every single piece of wood and plyboard out of storage and stacked it neatly in the middle of the garage. I made a plan to split each existing level in half, and double the number of levels. Vertically, I’d have less room, but isolating species from each other would make it worthwhile.
My first trip to the steel building supply store resulted in a mistake.
26 gauge steel is thinner than newspaper, and I worried that it might not be rugged enough to last a lifetime. I went back and got 20 gauge. The cost was almost quadruple, but the peace of mind was worth the extra expense.
My original plan was to put the crossmembers on edge, like Hollywood and I had installed the originals. While I was explaining my plan to Brenda, she said, “Aren’t you going to lose a lot of storage space?”
That made me reconsider an alternative I’d already thought of, then rejected: laying the crossmembers flat. I knew that would cost me some strength, but figured I had more strength than I needed anyway. To test, I installed one piece, then put one foot on it. So far, so good. I put my full weight on it. No ER visit yet. I jumped up and down on it. It had plenty of strength.
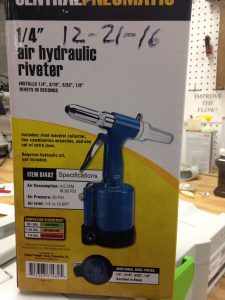
Hollywood’s boss had us attaching the studs to the track with self-drilling, Phillips-head screws. With their round heads they had a fairly low profile, but it occurred to me that a rivet, with its even smaller head, would be even less likely to scratch the stored wood so I went with those. Each crossmember would require four rivets.
Self-drilling screws are fast. And one step. Rivets, not so much. A pilot hole must be drilled, followed by a slightly larger hole the size of the rivet’s outside diameter. Then, you insert the rivet, slide a pop-rivet tool’s head over the pin, and squeeze. And squeeze. And squeeze.
A 3/16″ pop rivet is fairly easy to, well, pop. But, I was using 1/4″ rivets, and the chore became massive. It was so hard to squeeze the gun that it left my hands hurting. And weak.
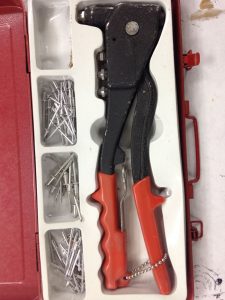
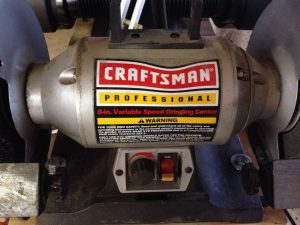
This is the basic, Chinese version of the generic pop rivet gun. Fine for little rivets. Too hard to squeeze for the 1/4″ size.
Seeking relief, I put cheater bars on the gun handles. That made the action easier, but now, when the rivet popped, the gun and both pipes went flying.
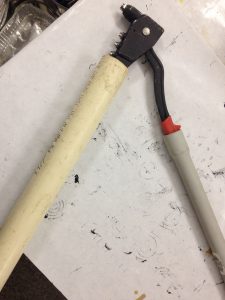
To give the little pop rivet gun more leverage, and make pin-popping a little easier, I used these cheater pipes. It wasn’t a perfect solution.