Highland Staff

Nov 252016
 

With the holiday season approaching far too rapidly to be able to accomplish all the gifts I thought I would have time to make for family, friends, and good customers, I settle in on a rainy afternoon to give some thought to what I might like to receive as a gift, the creation of my “wish list.”

1I am among the fortunate. My shop is over-equipped with all sorts of tools that are focused on woodturning as well as several antique hand-tools and the more generalized contractors’ tools that every shop collects. Not only did one of my sons make major contributions (see blog “Resolutions for 2016”), I have been guilty of pursuing the philosophy of “wait until you see what I can do when I buy my next tool!”

Most of my accumulation are well-loved legacy tools from the busy shops of my grandfather, father, our family farm, my father-in-law, an uncle-in-law, a brother-in-law, and two older friends with whom I shared a project or two and the passion for design/build years ago. Some of the tools even came from two of my sons, cast-off tools they no longer need or already replaced with a must-have newer model. Many others came from the irresistible “bargain-shelf” marked-down jumble of inexpensive tools that my father or others were unable to pass by without purchasing on their way to the cash register with the item they originally went in to buy.

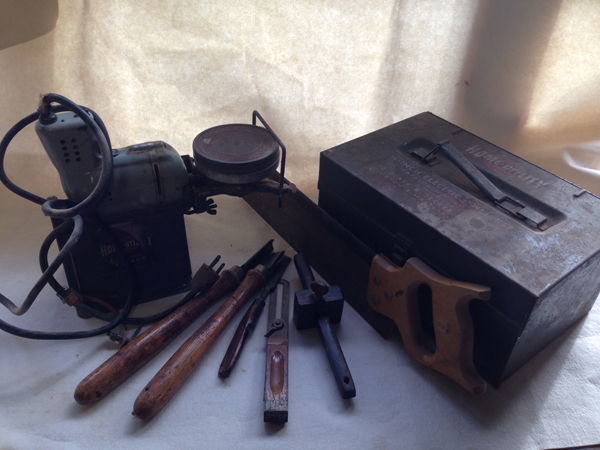
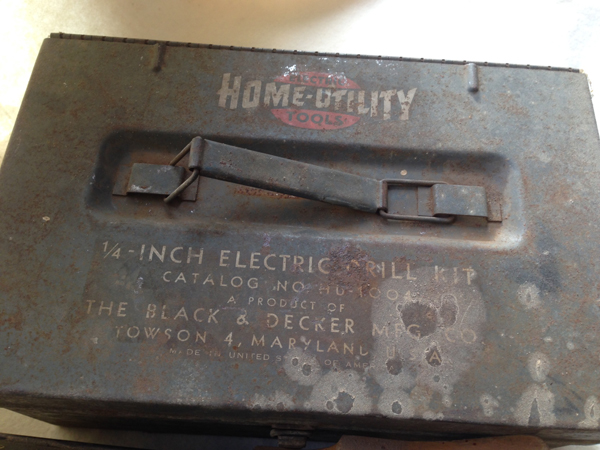
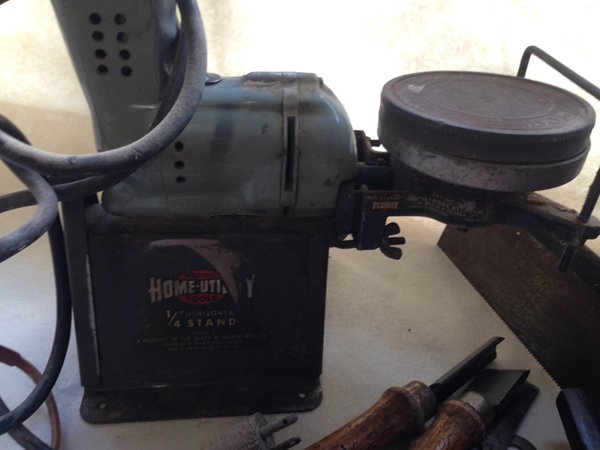
One of my favorite antique treasures is my father’s first ¼” electric drill from either the late 40’s or early 50’s which survives in working order with its complete kit of honing wheel, stand, and an assortment of accessories.

2

3

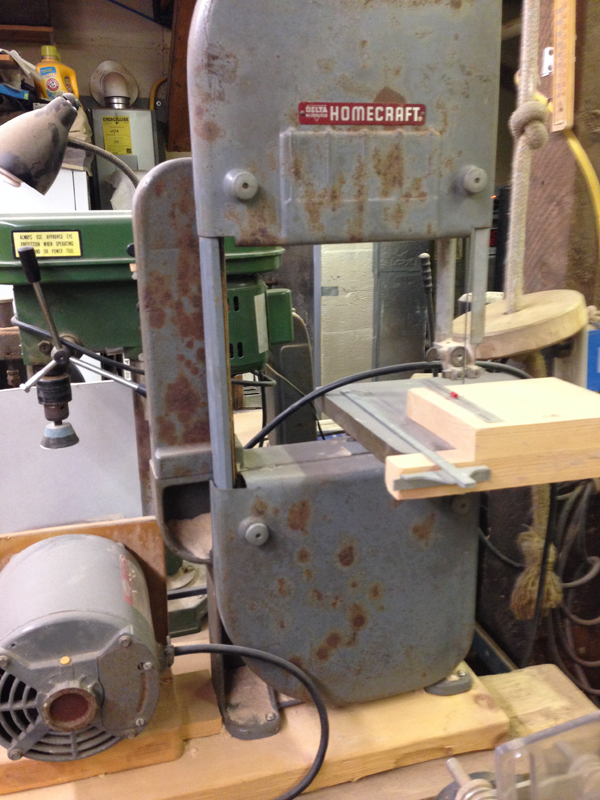
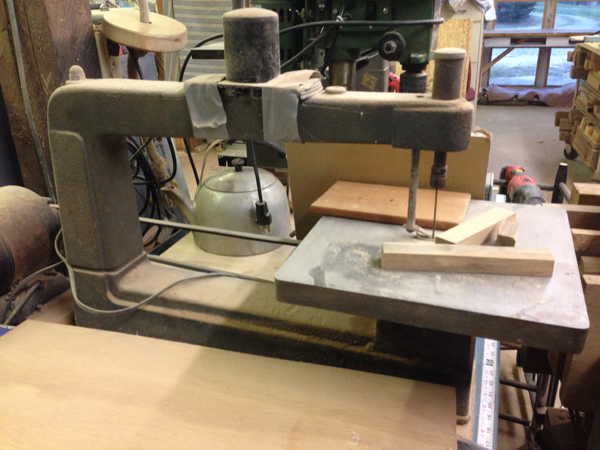
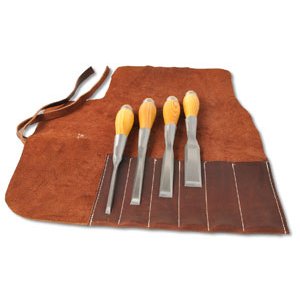
Others of my legacy tools — a working 1940’s 10” bandsaw from Homecraft, a reciprocating cast-iron jigsaw, and many assorted chisels, planes, saws, and scribes – all deserve better than the metal shelving storage in the dark back corner of the shop where I keep them – just in case.

4

5

Using these older tools has the benefit of reminding me of their original owners, and occasionally they have just the right feature for a special job, reinvigorating their value. But the reality is that they take up a great deal of space, have worn electric cords and ancient heavy motors, work inefficiently, and have long ago earned a more dignified retirement. Like the ever-growing pile of “valuable” future turning blanks (the logs out in front of my shop) that I am destined to leave as part of my legacy one day, the assortment of old tools needs to be addressed.

One way I decided to address these is to build a wish list of the selected tools that I have the greatest use of and replace them with new, modern, precise, and fully functional upgrades. For example, I have an old set of Milwaukee drill/drivers from the mid-1990’s that my son gave me when the first set of batteries wore out. I replaced those clunky and expensive batteries twice (amazing), and they now need to be charged frequently.

The new Festool PDC 18/4 Quadrive Cordless Drill, perhaps even the Set, looks like it might be just the step in the right direction. It is lighter, stronger, more versatile, and has the new batteries that will last longer than I am likely to work in a day. I will put that high on the list because that is a universally desirable tool for many different applications.

Given the steady dimming light of my aging eyes, the Magnetic Flexible Arm LED Work Light adds just the right note to my list. I am forever adjusting and adding clamp-on lights to whatever I am working on, and moving into the LED age offers many benefits – more light, less power, greater life.

Although I already run a large Bridgewood dust collector in the shop (as a woodturner I have far more chips than dust) and a standard aging Jet ceiling filtration unit that I purchased in the late 1990’s, I am far more aware today of the dangers of accumulated dust throughout the shop and the challenge it poses to health and safety. Adding a second Air Filtration Unit would make a great deal of sense, particularly given my regular parade of students in the shop and my own seven-day week there.

Another old technology, from about 1994 if I recall correctly, is my old-model airshield face- protection, the one that had built-in triangular rechargeable batteries that are no longer available and no longer recharge. Because it was inefficient and battery life short-lived, I have used it in the past ten or so years. On one recent cedar porch-post turning job, I struggled with filtered facemasks, steamed-up glasses, and frustration. The newer Trend Airshield Pro would appear to be a prudent and valuable addition to my list that I can resolve to use.

One tool that might be just for fun extremely helpful is the Air-Filled Cushion Contour Sander with sleeve assortments. I end up doing a great deal of repair sanding to various jobs, and from what I have read it fills a need.

6
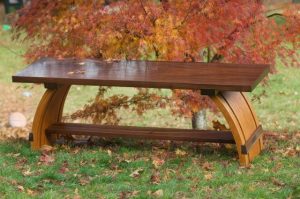
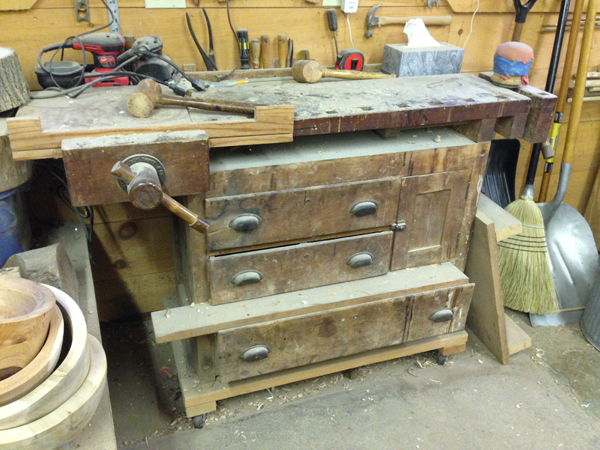
One other tool, often overlooked, that I do not need to put on my list is my primary workbench, an antique relic that my grandmother gave my grandfather in kit form as a wedding gift (did I ever tell you what a wonderfully insightful woman she was?). Pictured here, I use it regularly every day and appreciate its sturdy versatility and value. Ironically I inherited another identical one from my father-in-law that my oldest son spirited away to his loft shop at Brooklin Boatyard. Other than having to put it up on wheeled blocks to raise it to a more convenient height for my taller use, this bench has been through it all, and I plan to make special mention of it in my will for my grandson. The new high-quality benches are terrific, but I am not wooed from my old favorite in this case.

Good tools with lasting value make a difference. In a world where too many things are used and discarded too easily, committing to buying the best of tools, like the best of materials, is the secret to demanding the best from yourself in your work. Life it far too short to use inferior tools or materials.

Nov 232016
 

I have a large 1000 sqft shop full of tools and I am privileged to write a monthly tool review for Highland Woodworking so what tools could I possibly wish for? Well, there is always room for a new tool in the shop and there is always a ‘need’ for a new tool as well! So, I’ve picked my Top Ten tools for my holiday wish list:

Benchcrafted Planing Stop – This is a new item from Benchcrafted and I am always looking for better ways to hold boards on the bench while planning. This one has sharpened teeth that look like they will hold my boards without slipping.

Benchcrafted Glide Leg Vise – I’ve always used small cast iron vises but the long lever-arm in a leg vise’s geometry provides a more powerful overall grip. I plan to have one of these on my bench in the near future.

Blue Spruce Toolworks Joiners Knife – I use a knife instead of a pencil to mark out my joinery to increase precision. You can’t beat Blue Spruce for quality.

Barr Cabinet Maker’s Chisel Set – If you haven’t looked at Barr Quarton tools yet, you better take a look. These chisels are hand forged from A2 steel and I would love to have a set in my shop.

Auriou Rat Tail Rasp – I have a number of Auriou rasps and there is nothing like using a hand stitched rasp for nice clean cuts. I need a rat tail rasp for getting into those pesky curved areas.

Sterling Tool Works Roubo Curves Set – I already have a couple of Sterling Tool Works products (1:4 dovetail guide and plane setting hammer) and would love to add these french curves on steroids to my shop. Small french curves are fine for scaled drawings but these are the real things for laying out curves directly on a project.

Woodpeckers 1281 Precision Woodworking Square – The name Woodpeckers is synonymous with the word quality. The number of Woodpeckers tools around my shop are too many to count. The better your measuring and marking tools the more accurate your layout.

Veritas Bench Hold Down – I am always pounding away on hold downs to keep boards snug on my bench. I like the idea of controlling the pressure I apply to a board and the clamping screw and large brass knob provide the perfect control. I already have one and wish I had more.

Veritas Beam Compass Heads – I seem to be always drilling a hole for a pencil on one end of a stick and putting a nail in the other to make a ‘big’ compass. I wish I had a set of these compass heads on a beam to make drawing a circle or arc a whole lot easier!

Using the Versatile Chisel with Jeff Miller (DVD) – Finally, anything by Jeff Miller is worth reading or watching. He is a master craftsman and both beginners and advanced woodworkers will learn something by watching his DVDs . This is a new DVD by Jeff and it will definitely be in my library in the near future.

Well, there’s my top ten items for my wish list. I hope you all have a very happy and healthy holiday season.

Nov 222016
 

custom-modern-bench-furniture
Recently I’ve been finishing a bench for a client. And I mean that literally: applying finish. The finishing process can be quite confusing but I find it enjoyable – watching the piece become what I had always had in my minds eye. During this process, I use quite a few shop supplies. So for this years Wish List, I’m going to focus on how to re-up my finishing supplies. This is a great list to help any woodworker with that final step which really effects the outcome.

Norton Sandpaper Assorted GritsFirst of course is sandpaper. I use all kinds, but often just need plain old sheets of various grits. I use these as I’m building for smoothing, shaping and cleaning up. So, let’s grab a couple of these packs of assorted grits.

Once the build is complete, it’s time to go over it all with finer grits. I’ll use 220 and 320 on all the flat and curved surfaces. I can use quite a bit of paper, depending on the size of the project, so I’ll go with packs of just those two grits (5 or 20 sheets).

At this time, I’ll also break all the edges. I like crisp, beveled edges instead of rounding over. So I use a block plane on all my 90 degree intersections. And once I’ve got those bevels, I’ll go back over with 320 grit lightly. I use either my Hock Tools Block Plane or this Lie-Nielsen Block Plane. (But you don’t actually need both, right?)

Now it’s time to apply some finish. Almost. First, let’s make sure that the wood is clean from all that dust. I use my Festool Dust Collector to first suck up all the dust. Then I’ll go over it with some tack cloths for a final wiping. Or try one of these new Norton Red Dry Tack Cloth. You can also use some mineral spirits on a rag to wipe up the dust.

Behlen Pure Tung Oil
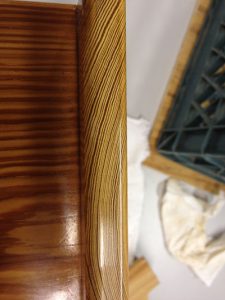
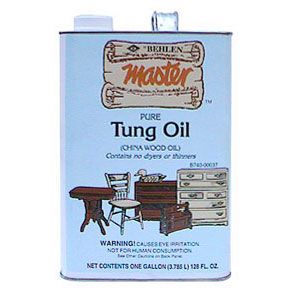
Now (finally!) to the finish. My favorite is an oil/varnish blend. I’ll start with 50/50 oil/thinner (turpentine or mineral spirits) to the bare wood. Then each successive coat, I’ll add in some varnish and reduce the thinner. So by coat 5-6 the blend might be about 30/50/20 oil/varnish/thinner. For the oil, I prefer tung oil but it takes a long time to dry, so I’ll substitute boiled linseed oil for projects that have a timeline. I’ve been using Epifanes Varnish for years – but this one from Highland is probably just as good. I like spar varnish for a longer-lasting finish that holds up really well. And of course, grab some thinner. You might want to be careful of the cheapest thinner at the big box stores – look for something a little pricier that will give you better results. You don’t need much.

Behlen Pure Tung Oil
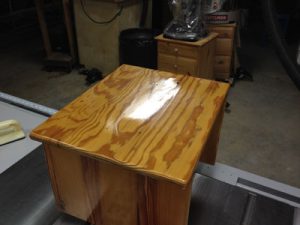
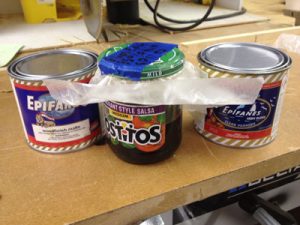
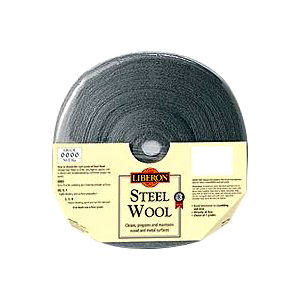
How to apply the finish? I’ll wipe on with rags, which get used up quickly so grab a couple of few of these packs from Highland. I’ll also use foam brushes for coats of finish – it doesn’t have to be fancy. Again, they get used quickly so grab a bunch. Between coats of finish I’ll use some wet/dry sandpaper (400-600 grit) and/or some steel wool to knock back the finish and smooth it out.

Behlen Pure Tung Oil
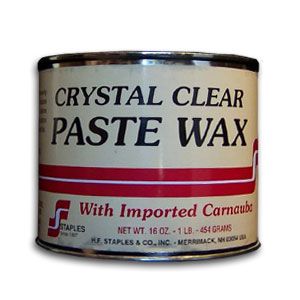
After the last coat of finish is all dry, it’s time for a final rubbing out and smoothing. For this I’ll turn again to the steel wool and use some wool lube to create a satin finish. The wool lube helps the steel wool create smaller scratches and hence a more polished finish. After all that, a coat of wax on top! I like this paste wax (or use the dark version for darker woods) or I’ll use Renaissance Wax.

While not as sexy as a set of new chisels, I find that I use up finishing supplies pretty quickly and they are critical for me to create stunning furniture.


Wish List

Nov 182016
 

Well, it’s that time of year again, when thoughts turn to what I’d like to receive this holiday season. Holding my work has gotten to the top of my list. I’ve finally decided to install a leg vise on my workbench. I’m going to be hand cutting stopped tapered sliding dovetails and I need a way to hold my workpieces firmly in a vertical position. Frankly, I thought I could get away without this until I used one in Scott Meek’s handplane class. Now I can see why no shop, at least one that uses hand tools for more than planing, should be without one. It can bring the wood up to eye level and make it much easier to work.

I’ve settled on Benchcrafted’s retro style crisscross assembly, since my installation will be on an existing bench. I’m pairing that with the Lake Erie wooden screw. Why? I know the Benchcrafted wheels work wonderfully, but something about the wooden screw just calls out to me. Call me traditional.

I’ve got up a short list of stocking stuffers as well. I’d like to give the Old Brown Hide Glue a try; I’ve heard good things about it. I need some more blades for my Knew Concepts fret saw. And I’d like a Hock paring knife blade kit to upgrade the collection in my kitchen.

Now, with a list this short, is that too much to hope for?


Norm Reid is a woodworker, writer, and woodworking instructor living in the Blue Ridge Mountains with his wife, a woodshop full of power and hand tools and four cats who think they are cabinetmaker’s assistants. He is the author of the forthcoming book Choosing and Using Handplanes. He can be contacted at nreid@fcc.net.

Nov 162016
 

One of the earliest challenges I had in woodworking was deciding how to store sandpaper.

Disks for random orbit sanders come in boxes. The disks curl, like all sandpaper, but it’s OK because the platen flattens them back out again.

Sandpaper pre-attached to sanding blocks stays flat, but it seems to be such a wasteful way to purchase sandpaper. When the grit is used up you have a big chunk to put in a landfill. That just doesn’t feel good.

The day I realized 9″ x 11″ sandpaper would fit a gallon zipper-locking bag, I thought my sandpaper-storage problems were over forever.

That illusion lasted about 24 hours. Given South Mississippi’s heat and humidity, it’s a bit surprising it took that long to turn them into a bag of potato chips.

However, I stuck with that system for years. It was transparent, so I could see the size and color at a glance. It took up almost no room, well, except for the real estate on one wall. Also, that wall was close to where I most often sanded, making it easy to change grits or renew with a fresh sheet.

My first attempt at sandpaper storage. Mostly used zipper-locking bags (LINK, July ‘13, Tip 10), sandpaper bought in bulk and an effort to keep it from curling by holding it against the wall. In retrospect, I’m pretty sure screws would be required to keep sandpaper flat!

My first attempt at sandpaper storage. Mostly used zipper-locking bags filled with sandpaper bought in bulk with an effort to keep it from curling by holding it against the wall. In retrospect, I’m pretty sure screws would be required to keep sandpaper flat!

At one point I moved the Ziplocs to the rolling stand my oscillating spindle sander lives on. I already had sanding disks in the drawers, so it just made sense to have all of the sanding resources in one place.

I made this stand from a “solid wood furniture” bedside table Brenda bought. With a universal mobile base under it, it’s an any-terrain, go-everywhere tool stand. Once, I even rolled it out to the deck to sand some treated lumber. Sanding disks are in the drawers, along with the Porter-Cable sander that went into semi-retirement after Festool sanders took over.

I made this stand from a “solid wood furniture” bedside table that Brenda bought. With a Universal Mobile Base under it, it’s an any-terrain, go-everywhere tool stand. Once, I even rolled it out to the deck to sand some treated lumber. Sanding disks are in the drawers, along with the Porter-Cable sander that went into semi-retirement after Festool sanders took over.

Still, I longed for a better means of storage, one that would achieve that Nirvana-state of perfect sandpaper flatness.

I was making a filing system for shop tools one day, when it hit me: “I can put sandpaper in these hanging folders, push them to the back of the box and they’ll stay perfect. And, with labels on top, it will be easy to see which folder holds the grit I’m looking for.”

That system kept the sandpaper flat longer than the Ziploc system.

About five minutes longer.

That’s when I realized it was going to take some real force to stop the curl.

Months went by, and I thought about alternatives a lot, but wasn’t coming up with any new ideas until I picked up a couple of drawers in someone’s trash one Friday morning. I didn’t know what I was going to do with them, but they were too big and too well-made to let go of. I’ve had been stepping over them for close to a year, but one day, sandpaper in hand, I looked down at the drawers and saw my solution: “A box, 9″ by 11″, with a heavy weight on top.”

Unintended consequences with a good outcome: these so-far-useless, in-the-way drawers served to inspire me to a solution for keeping sandpaper flat!

Unintended consequences with a good outcome: these so-far-useless, in-the-way drawers served to inspire me to a solution for keeping sandpaper flat!

Now, if I could just find a discarded drawer or a wooden box with those dimensions I’d be in business! Then, one Saturday morning, I walked past the solution, and it was right in my shop: an old milk crate. Even better, it had a handle for carrying!

The first iteration sent the sandpaper back to Ziploc bags. They were already labeled, so it was just a matter of transferring them out of their folders.

A milk crate is the perfect dimension for sandpaper sheets, and this concrete-form 2x12 cutoff is just the right amount of weight to hold the paper flat.

A milk crate is the perfect dimension for sandpaper sheets, and this concrete-form 2×12 cutoff is just the right amount of weight to hold the paper flat.

See how nice and flat this sandpaper is? Finally!

See how nice and flat this sandpaper is? Finally!

Which, by the way, should have told me something, because, months later it occurred to me to put them back in their “hanging” folders, which then gave me ready access to the grit I needed.

No, it’s not pretty, but the price was right. I found the milk crate in someone’s discarded trash. The 2×12 is left over from the construction of our home. Someday, I might sand and paint it. I might even make a proper wooden box with a handle.

Going back to storing sandpaper in tabbed file folders allows me to quickly find the exact grit I’m looking for.

Going back to storing sandpaper in tabbed file folders allows me to quickly find the exact grit I’m looking for.

But, probably not. The sandpaper stays flat just fine like it is.


Jim Randolph is a veterinarian in Long Beach, Mississippi. His earlier careers as lawn mower, dairy farmer, automobile mechanic, microwave communications electronics instructor and journeyman carpenter all influence his approach to woodworking. His favorite projects are furniture built for his wife, Brenda, and for their children and grandchildren. His and Brenda’s home, nicknamed Sticks-In-The-Mud, is built on pilings (sticks) near the wetlands (mud) on a bayou off Jourdan River. His shop is in the lower level of their home.Questions and comments on woodworking may be written below in the comments section. Questions about pet care should be directed to his blog on pet care, www.MyPetsDoctor.com. We regret that, because of high volume, not all inquiries can be answered personally.

Oct 312016
 

I recently started a log called, “What I learned during this project.” What was the inspiration for such a file?

Mistakes.

I suspect there are three kinds of woodworkers when it comes to mistakes: those who make a few, those who make a lot (yours truly) and liars.

I was assembling the stool pictured below when I realized that not only had I swapped the left and right legs, I had the middle panel in backwards, too.

At least the top was on top!

Fortunately, the legs’ thicknesses were within 1/64″ of each other. Still, I had cut the mortises using relative dimensioning, a slightly narrower mortise for the slightly thinner board. Since the whole leg was the tenon, there was no shoulder to cover imperfections in the mortises.

As Popeye once said, “All’s well that ends in the well.” While one leg was a little tight and the other was quite loose, you can see that there isn’t enough difference to even detect in the photo.

Distractions caused me to switch positions on these project components. Lesson learned.

By the time I realized my mistake glue and clamps had been mobilized, and there was no way I was going to try to take anything apart. In the heat and humidity of South Mississippi, chemical reactions happen very rapidly. While it may take hours before glue is cured, only seconds need pass to prevent repositioned parts from being reseated in their intended locations.

After the clamps were on, there was time for reflection: “How in the world did this happen?”

I believe I know.

A while back I wrote about watching television during mindless tasks like sanding. Now, I believe I’ve let that practice bleed over into duties that require more of my attention.

Here’s what really brought it home for me the very next day: I wheeled my hand truck across the garage floor toward the south wall. The hand truck hangs on the frame of the wood storage rack on that wall. The stench of mold from my late mother-in-law’s coffee table was heavy in my nose. Moisture in the storage unit had not been kind to its particle-board construction. The smell made me realize, “Wait, where am I going? I’m not headed to hang up the hand truck, I’m putting this moldy furniture in the trailer, and I just walked right past it!

Listening to a podcast, I was paying so much attention to what the participants were saying that I totally spaced out on the simple task I was doing.

How much easier, then, to slip up and make a mistake on a project?

I’ve resolved to limit podcasts and videos to truly mindless tasks, like sanding.

For 150-year-old pine this child’s stool project must be OK, as its recipient likes it.

My favorite part of this old, old pine: the end grain finishes so beautifully.

My favorite part of this old, old pine: the end grain finishes so beautifully.

Another resolution I made: Use painter’s tape to identify pieces. On this project pencil marks on the ends of tenons and inside mortises specified location and direction. Chalk on the large area of a panel denoted left and right. For me, the chalk rubbed off too easily. And, the pencil instructions were on parts that were hidden during dry as well as glue-up assembly. IDs written on 2″ pieces of tape will be nearly foolproof, helping to minimize mistakes.

We encourage your comments below. How do you avoid mistakes in your projects?

Oct 282016
 

No Southern-fried Southern boy wants to be called a Yankee, but we share the characteristics of shrewdness and thrift. Thus, each month I share a money-saving tip. It’s OK if you call me “cheap.”

When a friend advised me to thin my Epifanes varnish 50% to 75%, my first thought was, “I don’t want to pour this expensive stuff into a measuring device and lose 10% of it.” The perfect solution was a Tostitos salsa jar.

Its volume is small enough to make tiny batches, big enough to do a small project and the mouth is wide enough for a 2½” brush. One doesn’t need a high degree of accuracy in dilution. Fill the jar half-full of varnish and fill it the rest of the way with mineral spirits and you’ve got 50:50. Or, close enough.

Perhaps its best characteristic is the rubber-sealed lid that allows one to shake the dickens out of the contents with no spilling.

The rubber seal, however, is a two-edged sword. That same rubber will soak up finish and cement the lid to the jar until the cows come home. I found out the hard way. Had to resort to my Mama’s technique of smacking the lid in the direction that would open it. The next time I doubled a small sheet of waxed paper over the mouth before closing the lid. No more sticking.

Of course, any jar with a lid can do the same thing, but one with a narrow mouth will require decanting the mixture into another vessel.

Be sure to label the jar so you know whether it contains matte or gloss varnish and the degree to which it was diluted.

A salsa jar makes a good, splash-free, resealable finish-mixing container. A shallow jar like this can also be stirred with a credit-card ministrip.

A salsa jar makes a good, splash-free, resealable finish-mixing container. A shallow jar like this can also be stirred with a credit-card ministrip.


Jim Randolph is a veterinarian in Long Beach, Mississippi. His earlier careers as lawn mower, dairy farmer, automobile mechanic, microwave communications electronics instructor and journeyman carpenter all influence his approach to woodworking. His favorite projects are furniture built for his wife, Brenda, and for their children and grandchildren. His and Brenda’s home, nicknamed Sticks-In-The-Mud, is built on pilings (sticks) near the wetlands (mud) on a bayou off Jourdan River. His shop is in the lower level of their home.Questions and comments on woodworking may be written below in the comments section. Questions about pet care should be directed to his blog on pet care, www.MyPetsDoctor.com. We regret that, because of high volume, not all inquiries can be answered personally.