Highland Staff

Nov 032017


Do you use the built-in ruler on your saw fences?

Many people don’t trust them, especially when they need a super-accurate cut.

Whether on the table saw or miter saw, some use a rule to measure the distance between the blade and fence.

And, certainly, that’s the way to get the best-fitting parts.

I spent a lot of time calibrating the scale on my Delta cabinet saw, and it’s quite accurate, but it’s set for my Forrest Woodworker II. If I use my thin-kerf, coarse-tooth Craftsman blade, that measurement changes. I use the scale only when the cut doesn’t have to be perfect.

It takes little time to make that measurement, and, if you’re batching parts, you need measure only once.

It would take a lot longer to make all those pieces a second time.

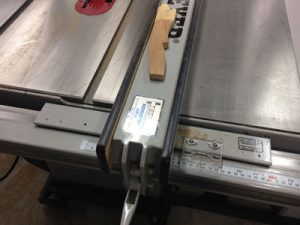
I’ve fine-tuned the scale on the Delta cabinet saw to its best accuracy, but I still measure the distance between the blade and the fence when cutting furniture parts.

I put a scale on my Norm Abram miter saw stand, but I don’t use it. The plans included instructions for a movable stop, but, when I got through with the project I was out of time and never got around to making that clamp.

I would use the stop, if I ever got around to making one, because I perform a lot of repetitive cuts. However, I still measure the distance between the blade and the stop, despite the fact that I’ve checked the tape repeatedly, and it’s always right on the money.

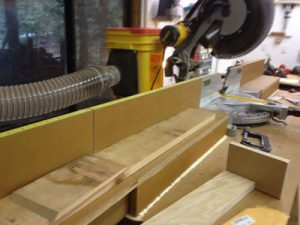
The tape on this Norm Abram-style miter stand is very, very accurate, but I still don’t use it.

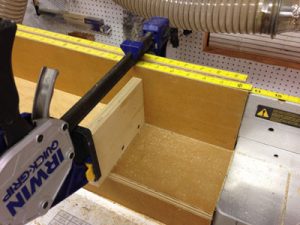
One day I’ll make Norm’s movable stop, but, in the meantime, this setup works quite well.

And, what do you use to measure? I’m not trusting of tapes when perfection is on the line. After all, a movable hook is the antithesis of accuracy. I will use a tape and start at the 1″ mark sometimes, but that doesn’t work when measuring against a blade or fence.

That’s when I drag out my father’s old folding rule. There’s no disputing the meaningfulness of a measurement from one of those!

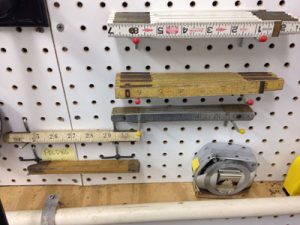
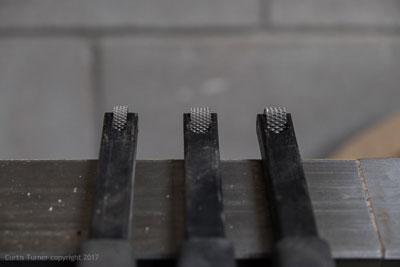
I often keep a folding rule in my pocket when building furniture. Their accuracy is without peer. The bottom four were Daddy’s. He’s 95 and still very spry, but no longer needs his measuring tools. We are blessed.

Nov 022017
 

No Southern-fried Southern boy wants to be called a Yankee, but we share the characteristics of shrewdness and thrift. Thus, each month we include a money-saving tip. It’s OK if you call me “cheap.

The Festool Vacuum Hose Boom Arm is a great invention, and Steve Johnson thinks I’m absolutely nuts because I don’t have one.

What good is it? There are lots of uses.

Relating to attaching one’s Festool Dust Extractor to any sander, it keeps the hose from dragging across your work, possibly scratching a nicely-prepared surface.

Also, when used with the belt sander, it prevents the hose from holding back your progress when you wish to cover a lot of ground with the sander, which is what a belt sander does best.

For any sander, it helps you maintain the surface of the sandpaper coplanar with the surface being sanded. You can do that with brute strength, or you can utilize the boom arm by adjusting its height to match the job you’re on.

If I don’t have a boom arm, then, how do I accomplish these things?

Bungee cords!

I have screw-hooks in the ceiling all over the shop and outdoors on the deck where I do some work too. If one bungee cord is too short, I can double up. If it’s too long, I can double over. There are lots of ways to make things work.

Under threat of rain, I moved the sanding of this mantle under the First Up tent. Now, the work, the sander and the Festool Dust Extractor are all protected. Notice the bungee cord holding the dust extractor hose at just the right angle for easy, comfortable sanding.


Jim Randolph is a veterinarian in Long Beach, Mississippi. His earlier careers as lawn mower, dairy farmer, automobile mechanic, microwave communications electronics instructor and journeyman carpenter all influence his approach to woodworking. His favorite projects are furniture built for his wife, Brenda, and for their children and grandchildren. His and Brenda’s home, nicknamed Sticks-In-The-Mud, is built on pilings (sticks) near the wetlands (mud) on a bayou off Jourdan River. His shop is in the lower level of their home.Questions and comments on woodworking may be written below in the comments section. Questions about pet care should be directed to his blog on pet care, www.MyPetsDoctor.com. We regret that, because of high volume, not all inquiries can be answered personally.

Nov 012017
 

Welcome to “Tips From Sticks-In-The-Mud Woodshop.” I am a hobbyist who loves woodworking and writing for those who also love the craft. I have found some ways to accomplish tasks in the workshop that might be helpful to you, and I enjoy hearing your own problem-solving ideasPlease share them in the COMMENTS section of each tip.  If, in the process, I can also make you laugh, I have achieved 100% of my goals.

Few power tools can take off more material in less time than a belt sander. Prior to Katrina, I had a Craftsman 4″, and it was a beast. The Porter-Cable I replaced the flooded one with is its equal.

Of course, sanding dust accumulation goes hand-in-hand with material removal. The Porter-Cable came with a dust collection bag, and the Festool Dust Extractor Hose fits its exhaust port.

However, if you, like me, get tired of filling that little dust bag and the constant emptying, and you don’t yet have your first Festool Dust Extractor (Betcha’ can’t stop with just one!), you can do what I did back in the day. I discovered that a piece of under-sink plumbing pipe fits the exhaust perfectly if you bush it with a little electrical tape. Now, the dust is directed away from you.

I would commonly use the powerful fan I salvaged from my neighbor’s greenhouse to pull the dust away from my work area.

A bit of electrical tape, a piece of sink plumbing and sanding dust is on its way to the fan.

My neighbor threw out this three-speed, two-directional fan when he did away with his greenhouse. A little cleaning, a lot of Rust-OLeum and a frame made from scraps, and I had a nice, rolling fan to cool me off or suck away sanding dust.

Of course, there is no substitute for a proper dust-filtering mask, and I always use my Elipse P100 Dust Mask, along with the fan.

Your spouse will appreciate the shower you take after sanding.


Jim Randolph is a veterinarian in Long Beach, Mississippi. His earlier careers as lawn mower, dairy farmer, automobile mechanic, microwave communications electronics instructor and journeyman carpenter all influence his approach to woodworking. His favorite projects are furniture built for his wife, Brenda, and for their children and grandchildren. His and Brenda’s home, nicknamed Sticks-In-The-Mud, is built on pilings (sticks) near the wetlands (mud) on a bayou off Jourdan River. His shop is in the lower level of their home.Questions and comments on woodworking may be written below in the comments section. Questions about pet care should be directed to his blog on pet care, www.MyPetsDoctor.com. We regret that, because of high volume, not all inquiries can be answered personally.

Oct 262017
 

Looking for a new way to construct cabinet drawers for a project? In this video series by The Down to Earth Woodworker, Steve Johnson, you’ll learn his process for building drawer boxes, mounting drawer slides, and more.

Take a look at the first video below and then get started on your own cabinet drawers!

Oct 242017
 

We are excited to present the highly anticipated third issue of Mortise & Tenon Magazine! Here’s a snippet of what Norm Reid had to say about it:

As with the previous two issues, I was thrilled when Issue No. 3 of Mortise & Tenon Magazine recently arrived in my mailbox. In part, my delight was due to the intriguing photo of a handheld drawknife on the cover. But even more, it was from anticipating the 10 articles that lay within. Enhanced by a wealth of beautiful photography and drawings and delightfully laid out, the issue promised a feast for the eyes as well as for the mind. It did not disappoint.

Click here to read the rest of Norm’s review

Click here to purchase your own copy of Mortise & Tenon Magazine

Oct 192017
 

In the October 2017 issue of The Highland Woodturner, Curtis Turner takes a closer look at the Rotary Texturing Tools available at Highland.

I have other types of texturing tools and enjoy using them, so I was eager to try out something new. I have only had these a short time, however, it is clear to me these tools can easily add new embellishments to a range of turned wood items. They are so simple to use and there is virtually no learning curve.

Click here to read more of Curtis’s review of the Rotary Texturing Tools.

Oct 172017
 

If you’ve been looking for an affordable workbench to take your shop to the next level, look no further than the European Workbench, available at Highland Woodworking.

In the video below, Morton shows off the diverse capabilities of the European Workbench.