Highland Staff

May 082018


Spring cleaning.

It’s almost a cliché.

Even the City of Long Beach is having a Spring Cleaning event.

Sometimes, it’s a joke, laughing about the cleaning we should be doing in the spring, even as we put it off.

We’ve discussed before how much I like cleaning my shop. Right now, because of the painting project,  almost everything in the shop is on hold, as I’m trying to finish painting completely so I can have that behind me.

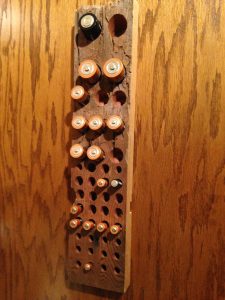
That means the shop, indeed, my entire garage, is a huge mess.

I have a brand new Tormek T-8 that I’m dying to use and write about, and I’ve had time to take it out of the box, put it on my sharpening table and do the initial setup. There’s been no time to do much beyond that. I hope to have that article for you soon.

Meanwhile, the shop is just a mess, which is a problem for me, because I have to see it every morning when I leave for work and every evening when I get home.

When I do get to it, I like to vacuum with the Festool Dust Extractor. A separator ahead of your vacuum, regardless of brand, is a great way to save on replacement filter bags and HEPA filter elements. Highland carries a unit you can put on top of your metal garbage can, and another that works on a 5-gallon bucket.

I don’t believe there is a vacuum cleaner made that will clean the air coming out of it better than the Festool units (the Mirka is a rival), but a separator is terrific for everything from Shop Vac to Craftsman. Even the canister filters in those aren’t cheap.

A separator works by catching both large and fine particles before they get to your suction-producing unit. You could think of it as a filter ahead of a filter, except the separator has no parts (filters) that ever need replacing. Periodically, you just empty all of the refuse from the separator’s container, reassemble and go back to work.

Oh, well, I will get it done someday. Meanwhile, I’ll just apply the old saying, “This, too, shall pass.”


Jim Randolph is a veterinarian in Long Beach, Mississippi. His earlier careers as lawn mower, dairy farmer, automobile mechanic, microwave communications electronics instructor and journeyman carpenter all influence his approach to woodworking. His favorite projects are furniture built for his wife, Brenda, and for their children and grandchildren. His and Brenda’s home, nicknamed Sticks-In-The-Mud, is built on pilings (sticks) near the wetlands (mud) on a bayou off Jourdan River. His shop is in the lower level of their home.Questions and comments on woodworking may be written below in the comments section. Questions about pet care should be directed to his blog on pet care, www.MyPetsDoctor.com. We regret that, because of high volume, not all inquiries can be answered personally.

May 072018
 

No Southern-fried Southern boy wants to be called a Yankee, but we share the characteristics of shrewdness and thrift. Thus, each month we include a money-saving tip. It’s OK if you call me “cheap.

When I went to look for scraps for the battery storage project, I didn’t have to look far.

And, I didn’t spend much on storage for those scraps. Whenever one of our refrigerators dies, I always save the old drawers and shelves. I keep the standards and runners, too, although sometimes it works out to use those and sometimes it doesn’t. Below, I’ve pictured some places in the garage I’ve installed this free storage and some of the things I’ve squirreled away.

Save the runners for the drawers and you can use them just like they were still in the refrigerator. This one glides as easily as the day it came off the Kenmore assembly line.

Sometimes the original equipment requires a shim to fit.

For this drawer to fit between joists, all that was required was a couple of scraps of plywood to act as runners.

I use these three drawers for scraps that make good cauls and shims, handy to the table I work from most.

Old refrigerator shelves are handy, too. I used the original standards and supports. This tile storage in Brenda’s ceramic studio demonstrates that they can hold a tremendous amount of weight.


Jim Randolph is a veterinarian in Long Beach, Mississippi. His earlier careers as lawn mower, dairy farmer, automobile mechanic, microwave communications electronics instructor and journeyman carpenter all influence his approach to woodworking. His favorite projects are furniture built for his wife, Brenda, and for their children and grandchildren. His and Brenda’s home, nicknamed Sticks-In-The-Mud, is built on pilings (sticks) near the wetlands (mud) on a bayou off Jourdan River. His shop is in the lower level of their home.Questions and comments on woodworking may be written below in the comments section. Questions about pet care should be directed to his blog on pet care, www.MyPetsDoctor.com. We regret that, because of high volume, not all inquiries can be answered personally.

May 042018
 

Welcome to “Tips From Sticks-In-The-Mud Woodshop.” I am a hobbyist who loves woodworking and writing for those who also love the craft. I have found some ways to accomplish tasks in the workshop that might be helpful to you, and I enjoy hearing your own problem-solving ideasPlease share them in the COMMENTS section of each tip.  If, in the process, I can also make you laugh, I have achieved 100% of my goals.

Recently, I was having trouble with my indoor/outdoor weather station, and I thought low battery power in the outdoor unit might have been the problem. A computer reminder triggers routine preemptive changing of the batteries so that corrosion doesn’t damage the unit. The reminder still had a few months to go, but it has been such a brutally cold winter, I thought the batteries might have aged prematurely.

As it turned out, that wasn’t the problem, which left me with a dilemma: what do I do with these batteries that are probably still good?

Now, the last thing I wanted to do was put them in something that might be destroyed by them. Still, several options existed.

I needed to use a device that would tell me when the batteries were dead, and wouldn’t get missed, allowing the corrosion to ruin the device.

My first thought was a clock. Or clocks. I have several in the garage, so I’m never far from knowing the time. I like staying on schedule, and, even on my time off, my activities are pretty regimented. When a clock with a second hand goes dead, it’s pretty obvious.

Another option was the garage stairs “dinger.” It’s the alert system I use to let me know when visitors are coming down the stairs, a safety system that prevents me from being startled while operating machinery. I’d hate for the table saw blade to spew blood all over company.

Then came another question, “What do I do with these batteries while I’m waiting for them to be used?” I’d have to come up with a storage system.

Previously, I’d made some battery holders for new batteries. The holders are mounted in our laundry room. The garage storage system needn’t use such nice wood, but the job still needed to be done well. Also, I’d have no use for “C,” “D” storage in this system, so a “AAA” and “AA”-only unit would be a quick and easy project. Here’s how I made it:

I made this battery storage for our laundry room. Someday, I should put some finish on it. A couple of coats of varnish would look nice.

Of course, to keep the project cheap, I chose a scrap piece of wood. My first thought was to use treated pine, but I considered that the chemicals might be corrosive to the batteries or their intended device. The slab needs to be at least 1-1⁄2″ thick to provide sufficient hole depth to prevent the batteries from falling out on their own, or if vibrations shake the wall.

Step two was to decide on a good angle. The Woodpecker’s 12-in-1 Tool says 10i worked well on the previous holder.

Set the drill press table to 10i with a support you can drill into if necessary. I wanted a long board to support the entire project length.

A sharp Forstner bit makes a clean hole with a flat bottom.

Take the holes to a depth of 1-1/4” for all sizes except D, which needs full-thickness. The depth stop makes for quick and accurate work.

Use 7/16″ diameter for AAA batteries, 5/8″ for AA, 1″ for C and 1-3/8″ for D. You can chisel a rectangular hole for 9-volt batteries, or they will fit in a 1-3/8″ round hole. If there are sizes for which you have no Forstner bit, a spade bit will do, but the hole might not be quite as pretty.

A keyhole bit in the router table makes for an elegant, hidden mounting method.

And, the final product, a miniature of the original, right next to one of the clocks its batteries will one day electrify.


Jim Randolph is a veterinarian in Long Beach, Mississippi. His earlier careers as lawn mower, dairy farmer, automobile mechanic, microwave communications electronics instructor and journeyman carpenter all influence his approach to woodworking. His favorite projects are furniture built for his wife, Brenda, and for their children and grandchildren. His and Brenda’s home, nicknamed Sticks-In-The-Mud, is built on pilings (sticks) near the wetlands (mud) on a bayou off Jourdan River. His shop is in the lower level of their home.Questions and comments on woodworking may be written below in the comments section. Questions about pet care should be directed to his blog on pet care, www.MyPetsDoctor.com. We regret that, because of high volume, not all inquiries can be answered personally.

May 032018
 

Make your grinder more effective for tool sharpening with the Veritas Grinder Tool Rest and add on the Veritas Chisel and Plane Iron Jig to make sharpening even more easy and repeatable. Justin Moon walks through the setup and use of these extremely helpful tools in this short video.

Click here to find out more information about the Veritas Grinder Tool Rest available at Highland Woodworking.

May 012018


We are excited to present the brand new fourth issue of Mortise & Tenon Magazine! Take a look at what Highland Blogger, Terry Chapman had to say about it:

There was always a standing joke around our house when we would see a truck with a big sign on it that said “Baled Pine Straw, Inc”. Inevitably, someone would say, wonder what they sell? When I first saw “Mortise and Tenon Magazine”, I couldn’t help but think about that old joke and wonder, what is that book about? Like the pine straw from the truck, this one is about mortises and tenons and woodworking from many years ago. As little as you think about it, electricity for woodworking tools is only about a hundred years old. Mortise and Tenon is aimed at those of us who treasure and appreciate those times before electricity in woodworking.

Click here to read the rest of Terry’s review

Click here to purchase your own copy of Mortise & Tenon Magazine

Apr 122018
 

Back in the December 2016 issue of Wood News, Norm Reid reviewed actor/woodworker Nick Offerman’s newest title Good Clean Fun. This excellent book provides a look inside the inner-workings of the well-known Offerman Woodshop and much more!

If you’re looking for a good time reading about wood, woodworking and woodworkers, you need go no further. In this, his third book, actor, humorist, author and, yes, woodworker Nick Offerman tells all about the Offerman Woodshop. It’s a quirky read and as the cover suggests full of “assorted tomfoolery.” And fun. Once I had it in my hands, I could hardly put it down.

We are excited to have Nick Offerman (plus several other special guests) set to visit our store in Atlanta for our 40th Anniversary Celebration on Saturday, April 28th. Come out and enjoy the day with us!

Click here to read the rest of Norm’s review

Click here for more information about our 40th Anniversary celebration

Apr 102018
 

In the April 2018 issue of Wood News, Jeff Fleisher take a closer look at the all new Leigh B975 Box Joint & Beehive Jig, a great new tool that simplifies the process of making box joints and ensures the consistency of your joints.

The Leigh Box Joint & Beehive Jig is the perfect jig for you to have in the shop to make box joint joinery. Since boxes are one of the first projects that woodworkers make, the box joint is one of the first joints that a woodworker might try, so having this jig on hand is highly recommended!

Click here to read more of Jeff’s review