Welcome to “Tips From Sticks-In-The-Mud Woodshop.” I am a hobbyist who loves woodworking and writing for those who also love the craft. I have found some ways to accomplish tasks in the workshop that might be helpful to you, and I enjoy hearing your own problem-solving ideas. Please share them in the COMMENTS section of each tip. If, in the process, I can also make you laugh, I have achieved 100% of my goals.
A Domino mortising machine is an incredibly versatile tool.
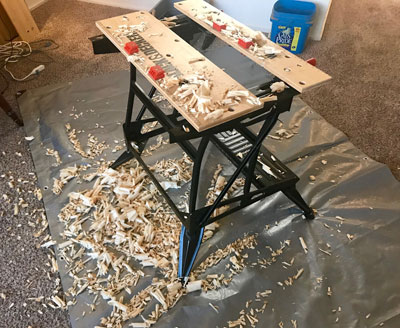
Recently, I had the opportunity to use it in a bench mount.
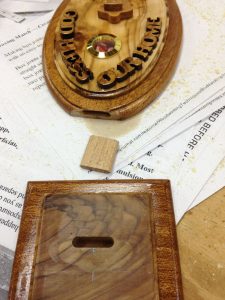
One of our employees made this statue as a Christmas present. It is made of olive wood from the Holy Land, which is really gorgeous material. It’s about 6″ high.
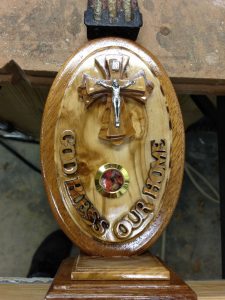
I’d had it only a few days when the top broke away from the base, revealing that the craftsman had simply glued the two parts together. It was destined to fail. Now, I could have drilled a hole through the base, a pilot hole in the statue, run a drywall screw in and been finished, but, where’s the fun in that? I wanted an elegant fix.
Step 1 was to remove the finish from the two surfaces, because varnish buildup was going to prevent the top from sitting flat on the base. Olive wood requires no stain, so refinishing would be easy with clear laquer.
Next, I needed perfect positioning. In a piece this small, any deviation from center, in either direction, would be very noticeable. Fortunately, the base is rectangular, which made finding the center quite easy.
With accurate marks in place on the base, the stable platform of the Domino’s fence and frame would make the alignment easy enough. One might think that the oscillating bit would tend to cause the machine to move about, but it doesn’t. I simply positioned the Domino vertically on the base, lined up the marks with the fence centering marks, and drilled away.
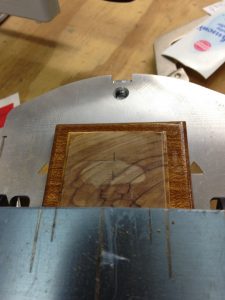
Sand off the finish, mark the center exactly, mortise perfectly.
Enter the next challenge.
The top was as rounded and irregular as the base was square. If it leaned in any direction, the statue was ruined. Ditto if I oriented the Domino bit incorrectly. Nothing could move during the drilling of the top mortise, and I didn’t want my fingers too close to the oscillating bit, either. I needed a way to clamp the statue to the fence that wouldn’t mar the finish.
After wracking the ol’ brain a few minutes, I remembered my Vise-Grip, Kreg-style clamps with rubber cushions. Non-slip and non-marking! I clamped the Domino to the workbench upside down, “benchtop style.”
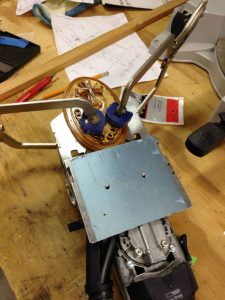
These Vise-Grip clamps are perfect for many uses beyond pocket screws, and they fit the bill on this job, too.
I took my time with centering, measuring with dividers. Measure five times, mortise once.
To ensure I was square and not too deep, I aligned the statue with the frame using a piece of rigid plastic.
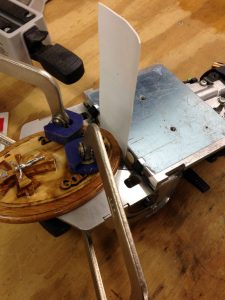
This plastic was the perfect fit to keep the top from going too deep into the mouth of the Domino, rigid but thin.
When the moment of truth was done, I had a perfect mortise to match the perfect alignment of the base.
Whew! Made it!
Some glue and finish and we could return our special Christmas gift to its honored location.
Clamping was probably overkill, but I wanted the base and top in tight alignment, not having to depend on finish to fill any gap.
Jim Randolph is a veterinarian in Long Beach, Mississippi. His earlier careers as lawn mower, dairy farmer, automobile mechanic, microwave communications electronics instructor and journeyman carpenter all influence his approach to woodworking. His favorite projects are furniture built for his wife, Brenda, and for their children and grandchildren. His and Brenda’s home, nicknamed Sticks-In-The-Mud, is built on pilings (sticks) near the wetlands (mud) on a bayou off Jourdan River. His shop is in the lower level of their home.Questions and comments on woodworking may be written below in the comments section. Questions about pet care should be directed to his blog on pet care, www.MyPetsDoctor.com. We regret that, because of high volume, not all inquiries can be answered personally.