Welcome to “Tips From Sticks-In-The-Mud Woodshop.” I am a hobbyist who loves woodworking and writing for those who also love the craft. I have found some ways to accomplish tasks in the workshop that might be helpful to you, and I enjoy hearing your own problem-solving ideas. Please share them in the COMMENTS section of each tip. If, in the process, I can also make you laugh, I have achieved 100% of my goals.
Discarded doors have a million uses. Just as good or better, they’re usually free.
Believe it or not, I actually paid for the reject door in this story. As you might imagine, I didn’t pay much.
What’s so great about doors? For starters, they’re flat. Even a cheap interior door is likely to be reliably flat unless it’s been wet or lain in a garbage pile for a week.
What else? They’re pretty strong. In order to stay flat, a door has internal structures that keep it stable. That may be a wooden frame or, in the cheapest of doors, corrugated cardboard on edge.
Sometimes a door is even waterproof, like this one I made my sharpening station from.
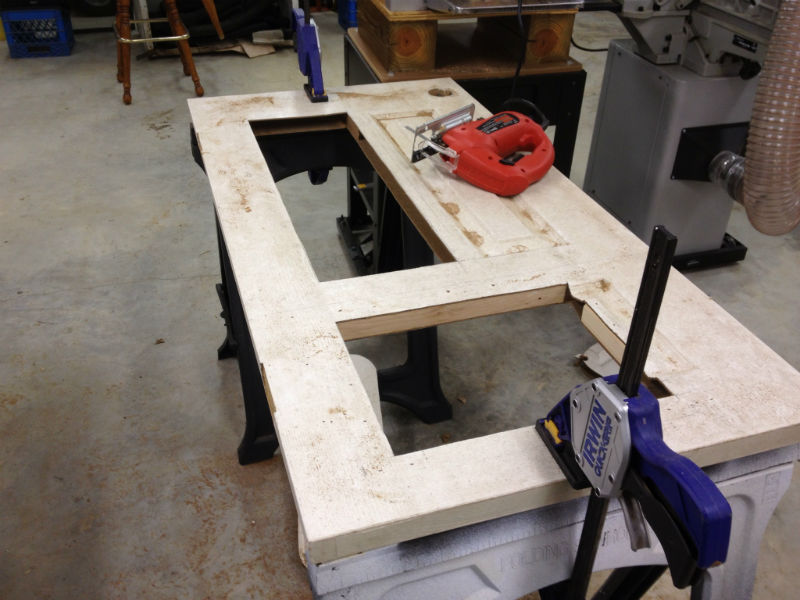
I found this PVC-coated interior door lying in someone’s yard on garbage day. I had absolutely no use for it, but I stored it in the garage at work until the need arose. I’m glad I did! It made the perfect foundation for the sharpening center.
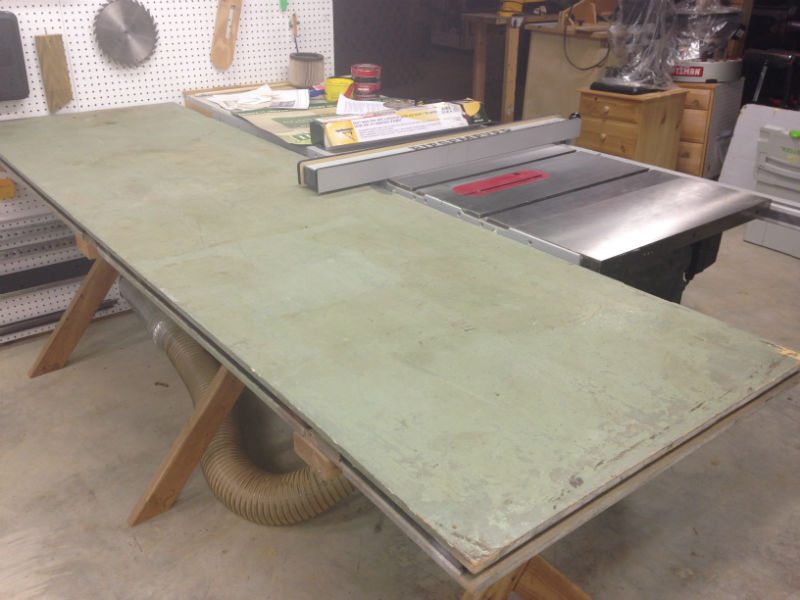
After years and years of using roller stands around my table saw when I had wide and/or long materials to cut, I finally decided I wanted an outfeed table.
I built this “table” from a door my work next-door-neighbor had acquired. A Bell Telephone building in Biloxi was being torn down, and my friend got word that there were accordion doors inside. As you might imagine, Ma Bell didn’t buy cheap doors. Although this is only one panel of a long, long partition, it weighs a ton.
I asked my friend if I could buy a couple, and he graciously agreed.
I took one to a sheet metal shop and asked them to wrap it in galvanized steel. I use it for wet and dirty things that require the surface be protected.
This table is impervious to oil, solvents and light banging. When I hired the sheet metal company to encase it, I should have asked the cost. I nearly lost my breakfast when I picked it up! Still, it’s been invaluable.
I made the other door into a general working table. It wouldn’t have hurt my feelings if it had been wider, but two together would have been too much. It’s flat. It’s solid. It’s green. Not that green is an advantage of any kind. In fact, it’s kind of ugly, but you ignore it after a while.
Here is the finished product: my simple outfeed table. I don’t need the table to contain storage, so there was no need to make a cabinet out of it. The picnic-style legs make it extremely steady.
Challenge Number One was getting it home to my shop, as it was in the clinic garage. It took three of us to load it into the utility trailer. I put it upside down on a thick blanket. It’s pretty top-heavy and I didn’t want the rough floor of the trailer ruining the door-smooth top on the way home.
That went well.
But, I got home and realized, “Wait a minute. I don’t have any help. I have to get this off the trailer and diagonally across the garage, around the table saw, past the planer and jointer and into position.” For the solution to that problem, click on this month’s Tip Number Two.
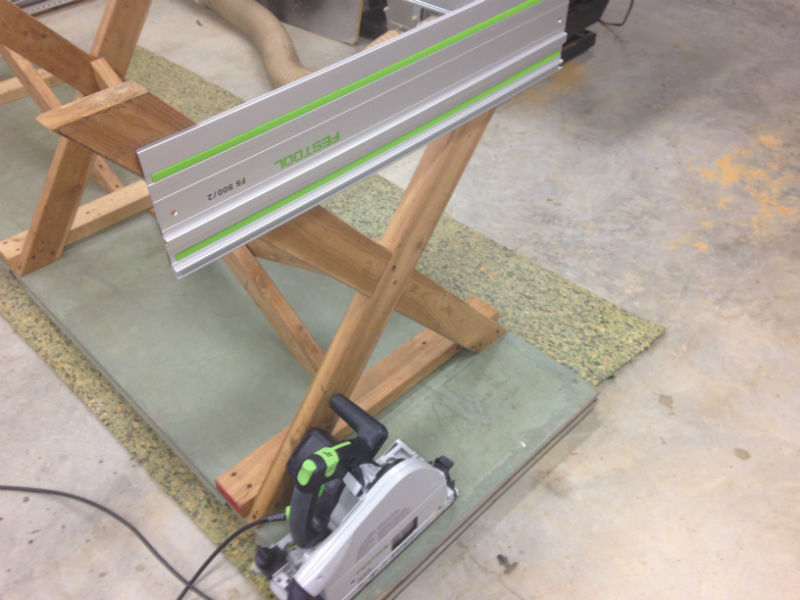
OK, now it was behind the table saw. And, it was too tall. Arrgghh! I needed to turn this monstrosity over to trim the legs! I had to keep reminding myself it was free!
Regular readers already know I’m into overkill. What I was about to do next is overkill, but with no good justification. I’d only recently bought my Festool TS 75 Track Saw, and I was dying for any excuse to use it. “Besides,” I thought, “I want the bottom of these legs to be as flat as possible.” With that in mind, I carefully attached a Festool track to each pair of legs and cut. Perfection!
Festool TS 75 Track Saw at the ready, track almost in position. These are going to be the flattest, straightest leg feet in the history of shop furniture!
Like most people, I use my “outfeed table” as an assembly table and everything else you can imagine. While I might like it to be a bit wider, the improvement when cutting full sheets of plywood all by myself is incomparable.
Although, now that I have the Festool TS 75 Track Saw, I might not be doing that much anymore.
Jim Randolph is a veterinarian in Long Beach, Mississippi. His earlier careers as lawn mower, dairy farmer, automobile mechanic, microwave communications electronics instructor and journeyman carpenter all influence his approach to woodworking. His favorite projects are furniture built for his wife, Brenda, and for their children and grandchildren. His and Brenda’s home, nicknamed Sticks-In-The-Mud, is built on pilings (sticks) near the wetlands (mud) on a bayou off Jourdan River. His shop is in the lower level of their home.Questions and comments on woodworking may be written below in the comments section. Questions about pet care should be directed to his blog on pet care, www.MyPetsDoctor.com. We regret that, because of high volume, not all inquiries can be answered personally.
No Southern-fried Southern boy wants to be called a Yankee, but we share the characteristics of shrewdness and thrift. Thus, each month we include a money-saving tip. It’s OK if you call me “cheap.”
The solution to the moving problem (from Tip #1) started with an almost-freebie. I got some free 3/4″ plywood I found on the side of the road and made a dolly. I framed it with scrap 2x4s and all I had to spend on it was the locking wheels, some paint, bolts, nuts and washers.
When I got home, I put an old blanket on the back of the trailer so the iron frame wouldn’t scratch the top. I put my little dolly, covered in another old blanket, where I thought the end of the table would end up and began to slide it out. While the table is heavy, it was manageable to work with one end at a time. Once the first end was secure, I climbed into the trailer and lowered the other end out. After the table was horizontal again it was easy to balance it on the dolly and move it into place.
What of the planer and jointer that were in the way? Almost all of my power tools are on wheels. Unplug the tool, push down the lever that puts the wheels on the floor and soon the tool is out of the way.
If I need to move the Delta UniSaw, there’s no calling the neighbor, just roll it wherever it needs to go. Ditto for the band saw, grinder table, oscillating spindle sander, router table and scroll saw. More on that next month.
I chose the dimensions simply: 4 feet by 2 feet. There are lots of screws attaching the plywood to the lumber, and 5/16″ bolts holding the substantial wheels. This cart could haul Godzilla around!
Heavy duty and low-cost. That’s the way I like my equipment. Make one of these for yourself. Being flat, it’s easy to store, too!
Jim Randolph is a veterinarian in Long Beach, Mississippi. His earlier careers as lawn mower, dairy farmer, automobile mechanic, microwave communications electronics instructor and journeyman carpenter all influence his approach to woodworking. His favorite projects are furniture built for his wife, Brenda, and for their children and grandchildren. His and Brenda’s home, nicknamed Sticks-In-The-Mud, is built on pilings (sticks) near the wetlands (mud) on a bayou off Jourdan River. His shop is in the lower level of their home. Questions and comments on woodworking may be written below in the comments section. Questions about pet care should be directed to his blog on pet care, www.MyPetsDoctor.com. We regret that, because of high volume, not all inquiries can be answered personally.
Mr. Organized likes to finish one thing before starting another.
Mr. Organized also likes to clean his entire shop between projects.
Mr. Organized’s mother used to say, “You’re old enough to know you can’t always have everything you want.”
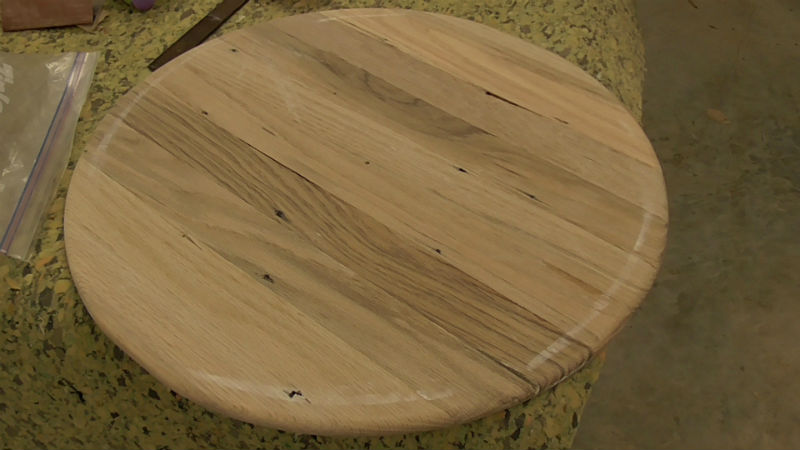
When I was working on the grandkids’ round picnic table, it took so long that I had many other things I had to do. It was a challenge, because the table and its parts took up so much room.
It also meant I had to work on other things while that was going on. There’s always something that needs to be made or fixed. But, invariably, the tool you need is on the bench with the other project. Or the size drill bit is being used on that other project.
It’s a recipe for frustration.
Right this minute I have some birdhouses I started years ago lying on the saw table, a stool I’m making for Brenda (like she needs another stool from me) sitting on the table saw outfeed table, the unfinished setup of my new Tormek T-8, and a Kapex that needs a stand.
I believe this is going to be a nice surprise for Brenda when it’s finished. Will that be before the next millennium?
I’m not sounding much like Mr. Organized, am I?
What about you? Are you up for working on more than one project at a time?
Jim Randolph is a veterinarian in Long Beach, Mississippi. His earlier careers as lawn mower, dairy farmer, automobile mechanic, microwave communications electronics instructor and journeyman carpenter all influence his approach to woodworking. His favorite projects are furniture built for his wife, Brenda, and for their children and grandchildren. His and Brenda’s home, nicknamed Sticks-In-The-Mud, is built on pilings (sticks) near the wetlands (mud) on a bayou off Jourdan River. His shop is in the lower level of their home.Questions and comments on woodworking may be written below in the comments section. Questions about pet care should be directed to his blog on pet care, www.MyPetsDoctor.com. We regret that, because of high volume, not all inquiries can be answered personally.
As a continuation from last month, we are sharing Christopher Schwarz’s ‘Sharpen This’ series. In Part 2 of his series on sharpening, Chris discusses how there are many different methods and systems out there related to sharpening, but what you need to do as the woodworker is pick the one system/method that works for you and your woodworking habits.
There isn’t a silver bullet when it comes to sharpening, but some tools certainly make the process easier. The Tormek Sharpening System is one of those tools, providing accuracy and repeatability time and time again.
To get a good sense of what a Tormek can do, take a look at the video below. Watch how the Tormek transforms a wrecked chisel into a perfect razor-sharp cutting edge in just 6 minutes. It may not be a silver bullet, but it is fast!
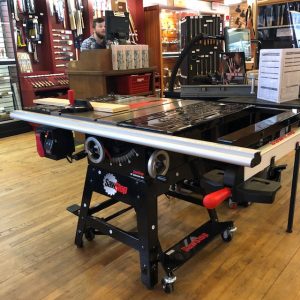
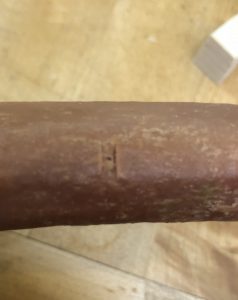
On Saturday, February 9th, we held a small demonstration of the SawStop brake system, which is responsible for the technology behind the quick shutdown of the SawStop Table Saw when it senses flesh. These demos are often done with hot dogs as they are the most similar to a human finger, though Roy Underhill once did one with a fried chicken drumstick.
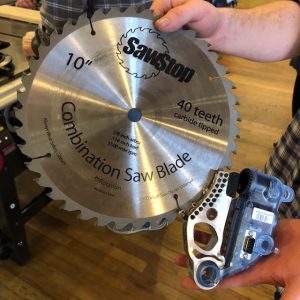
Highland employee, Jeff Dillon, performed the demo by first explaining the technology behind the brake system followed by the hot dog demonstration. He then pulled out the blade and brake cartridge to further show how the brake stops the blade when it comes into contact with flesh.
While the blade still nicks the hot dog, it is much less damage then going straight through it
The blade and brake cartridge. You will need to replace the brake cartridge and evaluate the condition of the blade for future use.
To find out more information about SawStop or to purchase your own saw, you can visit Highland Woodworking online or in-person.