Highland Staff

Oct 042019
 

Welcome to “Tips From Sticks-In-The-Mud Woodshop.” I am a hobbyist who loves woodworking and writing for those who also love the craft. I have found some ways to accomplish tasks in the workshop that might be helpful to you, and I enjoy hearing your own problem-solving ideasPlease share them in the COMMENTS section of each tip.  If, in the process, I can also make you laugh, I have achieved 100% of my goals.

Chains, my baby’s got me locked up in chains, And they ain’t the kind, that you can see, Whoa, these chains of love got a hold on me, yeah.” That great old song was first done by The Cookies, then The Beatles and Carole King and untold numbers of garage bands.

Chains. I don’t want to break away from my chains because I use the heck out of them, and, if my chains did break, my woodworking projects would suffer.

I first got the idea to install chains in the TrusJoist McMillan wooden I-beams in the ceiling of our garage when I was building swings.

Hanging chains from chains. It just came naturally. I made a bunch of these swings when we first moved to the Bayou. One day I got home from work and Brenda said, “I saw one of our swings going up the Bayou in a johnboat today.” Yep, the rat stole it right out of our yard.

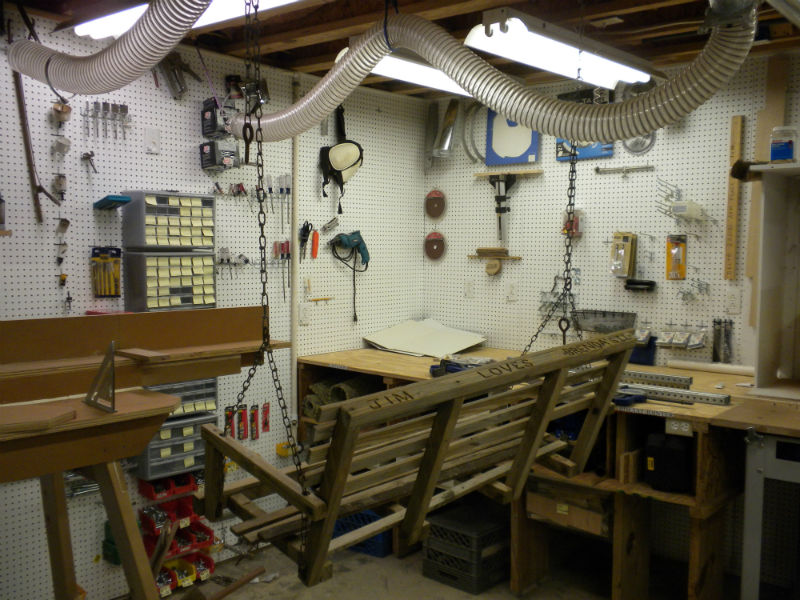
Once I had the frame made, it was the perfect way to access the seat and back to apply the slats. It’s great positioning for finishing, too; you can easily access every surface.

After the chains were installed, I found even more uses for them.

These wooden I-joists have knockouts in the webbing for passing pipes and wires. They worked perfectly for threading chains for hanging.

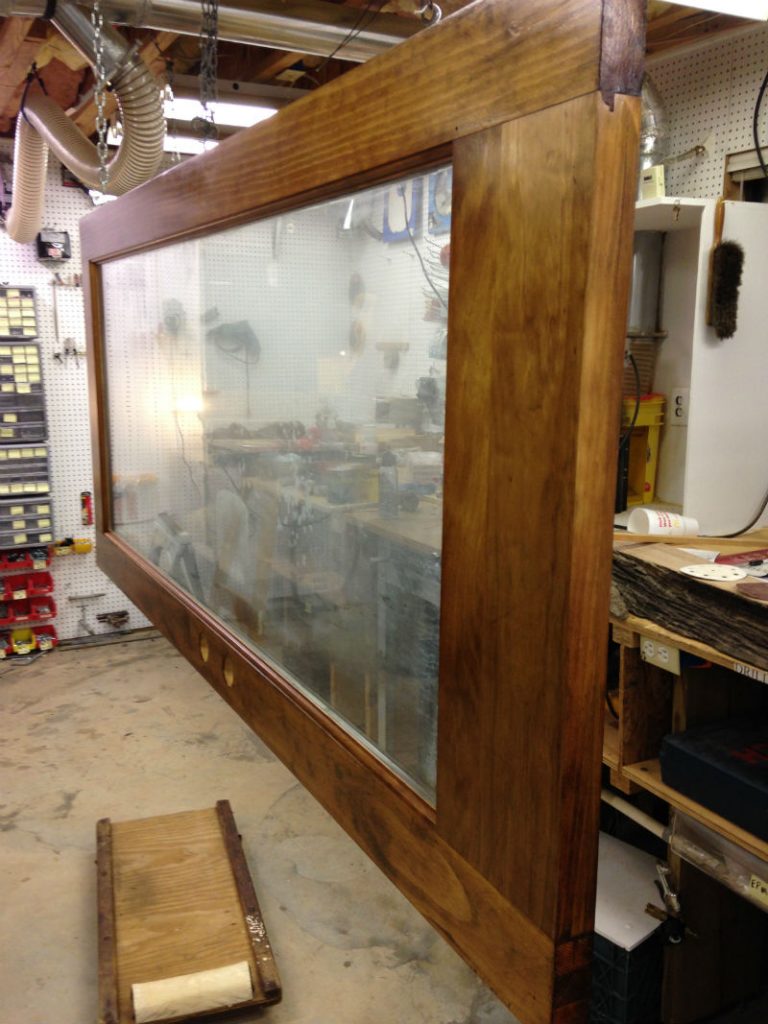
In last month’s column you saw that I hung our back door from those chains to do the finishing. There wasn’t a single spot on the door I couldn’t access, and the oversize hooks held the door securely.

I sanded this door lying flat on horses, but finish application was a cinch in this hanging orientation.

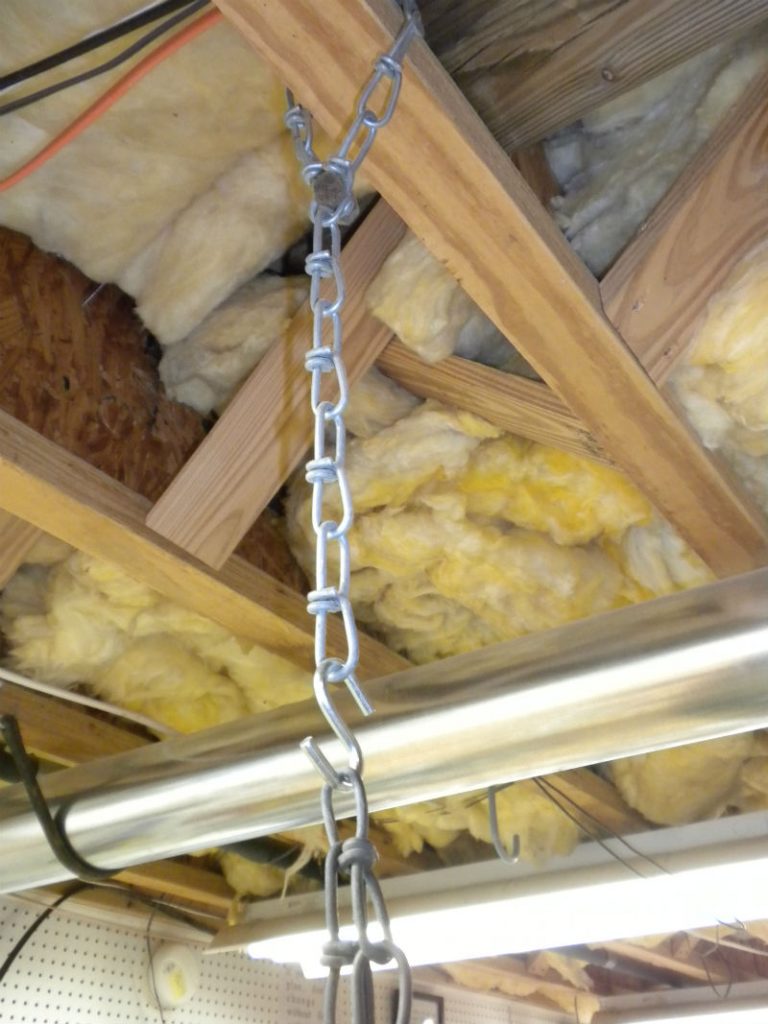
Chains have a natural adjustment system built right in. If something hangs down too low, move it up a notch. If it’s too far off the floor, go down one link or two.

Be sure you purchase substantial chain. Double-link chain (the most common type used on porch swings) is a good choice because it’s very strong, yet the wire is of a small gauge relative to the size of the openings. That can be a valuable characteristic because it maximizes your height-hanging options. It’s unlikely you will ever need more strength than that type of chain provides, and you want to use good judgment and not overload your home’s rafters. Don’t be pulling the engine out of your Datsun B-210 with your ceiling joists!

The length of your chain is important, too. Too short and your smallest projects may require you to stand on staging to work on them. If the chain hangs down too low you can always gather the excess and fasten it out of your way. The next project might need to take advantage of that length.


Jim Randolph is a veterinarian in Long Beach, Mississippi. His earlier careers as lawn mower, dairy farmer, automobile mechanic, microwave communications electronics instructor and journeyman carpenter all influence his approach to woodworking. His favorite projects are furniture built for his wife, Brenda, and for their children and grandchildren. His and Brenda’s home, nicknamed Sticks-In-The-Mud, is built on pilings (sticks) near the wetlands (mud) on a bayou off Jourdan River. His shop is in the lower level of their home.Questions and comments on woodworking may be written below in the comments section. Questions about pet care should be directed to his blog on pet care, www.MyPetsDoctor.com. We regret that, because of high volume, not all inquiries can be answered personally.

Oct 022019
 

In last month’s Tips column, I wrote that I’m a wipe-on poly kind of guy. What’s to like about wipe-on poly?

Gee! Just about everything! It’s reasonably priced. There are a kazillion (sorry, Steve) manufacturers, so, if you have a favorite brand, you can choose it. It’s relatively non-toxic, and you can even purchase water-based wipe-on polyurethane, if you like. Equipment needs are minimal. No air compressor. No airless sprayer. No fancy brushes. All the gear you need is a metal spring binder clip and some old T-shirt material. If you’re not saving your old T-shirts, you should begin to. You can click this link to read about how I do it.

Does it get any simpler than this? A binder clip, make it BIG, a strip of soft cloth and a container with an impervious surface.

When I’m done, I unroll the fabric, lay it on the rim of the trash can to cure, and throw it out a few days later, once it is totally dry.

Now, I know there are advantages to other methods and other products, and this month we’d like to know what your favorites are. Give us your vote and leave us a comment, too.


Jim Randolph is a veterinarian in Long Beach, Mississippi. His earlier careers as lawn mower, dairy farmer, automobile mechanic, microwave communications electronics instructor and journeyman carpenter all influence his approach to woodworking. His favorite projects are furniture built for his wife, Brenda, and for their children and grandchildren. His and Brenda’s home, nicknamed Sticks-In-The-Mud, is built on pilings (sticks) near the wetlands (mud) on a bayou off Jourdan River. His shop is in the lower level of their home.Questions and comments on woodworking may be written below in the comments section. Questions about pet care should be directed to his blog on pet care, www.MyPetsDoctor.com. We regret that, because of high volume, not all inquiries can be answered personally.

Sep 242019
 

Finally, outfeed support for a tablesaw that doesn’t take up a lot of valuable space in the shop!

If you’ve ever tried to cut a large work piece on your tablesaw, you know it can be dangerous without some sort of outfeed support. And if you are already hard pressed to find space for new tools in your shop, a dedicated outfeed table might seem out of the question.

In this short video, Matthew Morris demonstrates how SawStop’s Folding Outfeed Table is a perfect solution to both of these problems – it offers great support and then folds up out of the way when you are done using it.

Sep 192019
 

You’re invited to stop by Highland Woodworking on Saturday, September 21st, 2019 anytime between 10am-1pm to watch the Atlanta Woodcarvers Club demonstrate their carving techniques on our sales floor! Several members of the club will be on hand doing different carving demonstrations and answering any questions you may have about their carving processes.

Visit the Highland Woodworking Woodcarving department

Sep 172019
 

In the August issue of Hock Tool’s monthly newsletter, we saw the familiar face of perennial Highland instructor Jim Dillon in a fantastic interview.

Many woodworkers local to Atlanta have taken classes with Jim and many more of you have seen some of the videos he has produced on the Highland YouTube channel, including ones on Broad Axes, the Narex Spoon Carving Kit, SawStop Router Tables, and Adding a Hock Blade to Your Hand Plane.

Read the interview with Jim and perhaps it will inspire you to take a class or watch a video and improve your own woodworking skills.

Sep 122019
 

I had some visitors in my shop this week and one of them noted all the mallets and hammers. I explained that sometimes you want things to move and most of the time you want them to move quickly. I spread some of the movers out on the table saw to take a photo and I was a little surprised myself to see the range and number of them. There was a whole family of Movers!

At the bottom mid-right is my new Papa Mover, the two pound baby “sludge” hammer from Christopher Schwarz and Crucible Tools. Beautifully made, it is a Prime Mover and gives a good solid blow to anything that needs to get out of the way fast. Mama Mover is the slim rounded mallet in the top center that I bought from Highland a couple of years ago. You can buy a one pound or a one and a half pound size in the metal head. It is beautiful, well made and a joy to use as well as surprisingly effective for moving a carving chisel. You may not think it is easily controlled with the round shape, but that shape has been around for centuries and works like a champ. In fact I was watching a video on stone carving the other day and even with stone the guy choked way up on his round mallet and using a little tap-tap motion that I thought was too delicate for stone, he was able to cut the rock very effectively. This mallet by Shenandoah Tool Works has turned into my favorite and the one I pick up first for any kind of chisel work.

Two younger daughters at the top are ones I made just for the fun of it. The top right is a mallet made from a dogwood tree root. You can see it split to the pith cause I didn’t know any better at the time, but dogwood is one of the tougher woods and the root is the toughest part of all. The baby sister on the top left is a whim from the lathe too light to be useful. Lesson learned.

Cousins Ralphi and Vin down on the bottom left are the ones I use when I want to move a board without leaving a mark and where a round head like Mama will not work. Vin is a dead blow hammer with lead shot inside the non-marring head and serves very well for tightening up a furniture joint. I made Ralphi out of maple a few years back and the handle is too big for my hand — wait!! I know how to fix that, but you can bring a blow with it. Not bad on leaving a mark, but you can set a wood scrap between if you need to.

Course down on the bottom right is a brother to Papa Mover, the ever faithful trim/claw hammer, Carl. Uncle Carl is that middle weight trim hammer with the smooth head that is fairly difficult to find these days. There seem to be a lot fewer hammer manufacturers around than there used to be. I looked a long time to find Carl with his wooded replaceable handle. It is a beautiful hammer and my favorite on any carpentry project. I have a smaller trim plus a much larger straight claw framer and and I am a fan of all of them.

Bottom line, it takes a family to keep things moving quickly and efficiently.

Sep 102019
 

If you’ve been thinking about getting a Dovetail Jig for your shop but you aren’t sure which is the right one for you, this video might help you decide. With a comparison of the Leigh D4R Pro and the Leigh Super Dovetail Jig, the video breaks down the body construction, finger style & joint spacing, capacity, joint options and more!