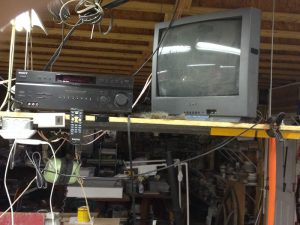
 One of the first things that drew me to woodworking was the high school shop. Not the fact that I was taking “shop class” really, more the shop space itself. It was a large room with the machines and several “team” work benches. (large, square benches that had a vise on each of the four sides.) It had windows on the east side of the room, high up on the wall, that let the morning sunlight in and warmed the room nicely. It also had a couple of old Sansui speakers up on the high wall and a receiver in Mr. Rauh’s office that he had hooked up to a Walkman tape player. Between the smell of the wood, the natural light, the music, and the warmth of the sun, the place was an absolute oasis for me.
As I progressed in my career, I have worked in small shops with one or two other guys, bad light, and the need for super human physical flexibility in order to get any work done. I have also worked in CNC driven shops that had what seemed to be miles of floor space and many computer driven machines that spit out cabinet parts and MDF or particle board dust.
 During my journeymanship, I often dreamed about what my own shop would be like were I able to actually put one together for myself. I knew I wanted to try to recreate the feel I got from my wood shop experience in school, but on a smaller scale. I also knew that it had to be a welcoming and pleasing place to come to.
As woodworkers, much of what we do flows from a culmination of what comes from our mind, our gut, and our hands. At least, that’s how I imagine it. Because of this, I think that we are often times affected, for good or ill, by the environment we choose to work in.
Now, I realize that for the vast majority of woodworkers the shop space is often limited by what basement space or garage space is available. My own circumstances are no exception.
With that caveat though, I submit that as woodworkers we owe it to ourselves to pay close attention to how our space feels when we are in it. In my opinion, the vibe and personality of the shop space is at least as important as what machines or hand tools we collect to put in it. The shop needs to be a comfortable place, lest our ability to work wood fearlessly be hampered.
So then, let’s take a look at some things that contribute to what makes my shop, “The Tiny Shop,” comfortable to me.
Disclaimer: I do not intend to give the impression that I feel that the attributes of The Tiny Shop are the end – all and be – all of a soulful shop. I assure you that I am not so brash as to assume that I have ANY of the answers, let alone ALL of the answers when it comes to cultivating a shop’s personality. I only wish to share my own experience in the hope that it may resonate with someone out there.
The Tiny Shop is actually the latest in a collection of shops that I have been fortunate enough to put together. I have helped others stand their own shops up, helped employers set up, start, and run their business, and had one other shop that was my very own prior to a “parting of the ways” in my previous marriage.
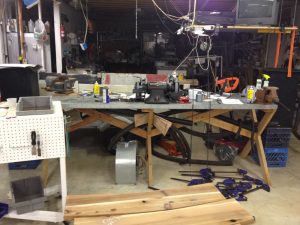
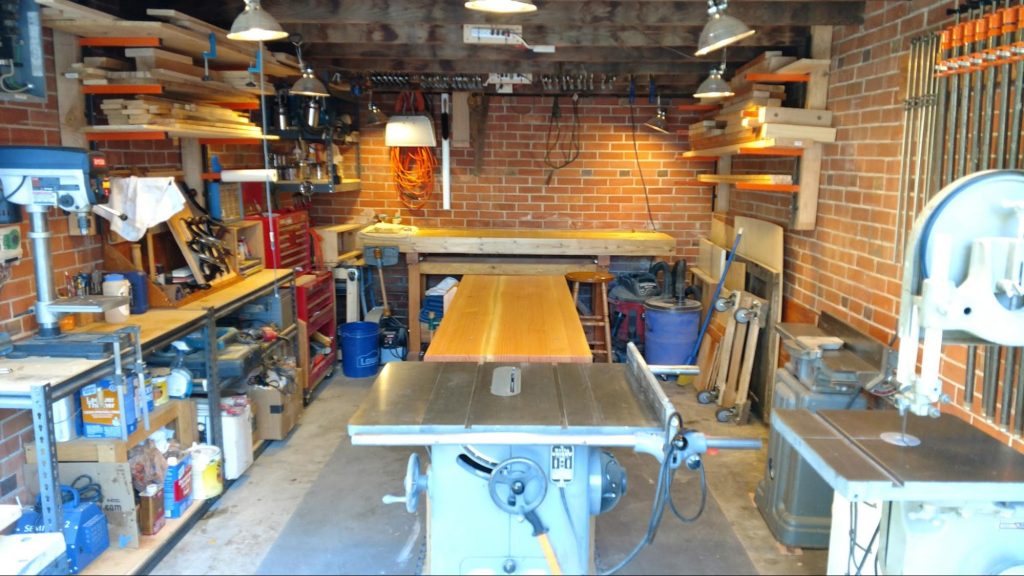
When putting my shop together I had a pretty small canvas to paint on. It is an old, brick, one car garage that came with the house that my wife and I purchased a few years ago. In terms of real estate, it lays out to around 250 sqft. Not a lot of space for a 6ft 3in, 260 pound man to move around in without some contortions and bruised thighs.
The silver lining though, is that it forced me to be realistic about the scale and type of work that I would be able to produce from this shop. There will be no large entertainment centers or banquet tables fashioned here. At least not with the ability to dry fit them and assemble them in their totality. I suppose if push were to come to shove I could build a larger scale item in sections, and trust that my measurements were accurate enough for the thing to be assembled successfully in the field. Thankfully, I have not had to test this theory as I have limited myself to working on free standing chests of drawers, small tables and boxes and other pieces that are of appropriate size for the limitations of The Tiny Shop.
I have found that this coming to terms with my shop’s limitations has proved profoundly important to my level of comfort in, and enjoyment of, my shop.
One of my main goals in putting The Tiny Shop together was to do so with aesthetics and comfort in mind. I wanted to be able to call the shop “my happy place.” I wanted to be sure that the time I spent in it was as enjoyable as possible and I wanted to eliminate as many discomforting distractions as I possibly could. It makes my experience much more enjoyable and rewarding to be able to shut out everything else but the task at hand.
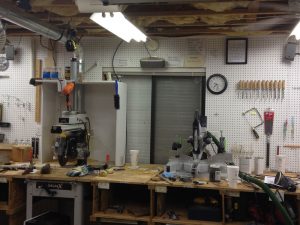
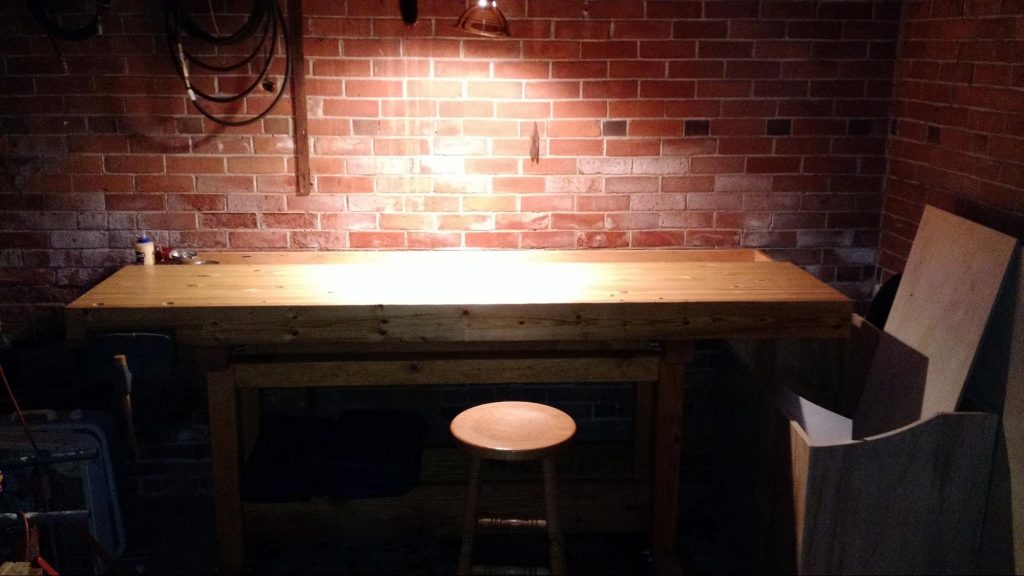
To that end, I chose to leave the walls mostly bare. With so little space in a shop like this, the natural go-to is to mount plywood or OSB to the walls so that shelves or hooks or other means of storing tools is made more easy.
I like the brick. It stays cool in the summer…for the most part…and helps keep a modicum of heat inside during the winter. Plus, it looks cool. Having the brick naked gives me something of a “loft-like” feeling in my shop. It feels a little more soulful, and provides me with a little less sterile feeling than that of OSB or drywall clad walls.
My shop’s limited footprint also dictated the need to be thoughtful about my choice of tooling. With more square footage, I am quite sure I would have found a way to stuff a full sized planer, an 8″ ‘Pot belly’ vintage Delta jointer, a lathe, a shaper and far more powerful dust collection with collection drops at each dust making machine.
In the case of The Tiny Shop though, I only had a couple of things I was unwilling to compromise on. I wanted a full sized cabinet saw. Providence smiled on me and dropped a 1946 Delta Unisaw in my lap at a price that…well…was a downright steal. So a Unisaw was adopted as the first tool in my machine arsenal.
Next, a good jointer, planer, band saw, sliding mitre saw, and some sort of dust collection. All of which were selected for their quality of build, and their compact size. Knowing I would be building a rather large workbench (later adding a second of nearly equal proportions) I needed to buy machines that would provide a high level of accuracy as well as allow for ease of movement in the shop and the ability to stow them when not in use.
Lighting was another priority. Since my woodworking tends to be something of a hybrid of machine and hand tool, I wanted there to be good, bright yet warm lighting in the shop. I know fluorescent lights are normally the standard in a shop setting, both for their lumens per square foot as well as their economy, but I absolutely detest the quality of the light produced by traditional shop lights.
So I compromised a little bit. I picked up 9 or 10 “dish lights” cheap and clipped them to the exposed rafters in my shop. In them, I use those twisty fluorescent light bulbs. For my needs in such a small shop, it seems to fit the bill for the time being, the quality of the light being nearly as friendly as incandescent bulbs.
Since I spend so much time on my feet in the shop, I soon decided that some sort of matting needed to be used to ease the strain of standing on cement all day. I found some inexpensive foam mats, like the kind you can link together in a child’s play area, at one of the local hardware store on sale. Perfect. Now my tired tootsies would get a break, and I could pad about in style and comfort. The added benefit being that the padding provides a bit of protection to wayward Sheffield steel blades rolling off my bench.
For the most part the shop is fully outfitted. Truth be told, there really is no where to add any further freestanding machines even if I wanted to. So all that was left was to develop my flow of work and to begin the ever evolving methods of working wood in my shop. The flow has evolved as a natural outgrowth of my incessant need for a well thought out plan of procedure. (Insert heartfelt nod to my former shop teacher Don Rauh here). Because I plan out each step of my build process for a given piece, I can also manipulate the order of the procedures to be accomplished to best fit the layout of the shop.
By and large, there is very little that I am finding to be all that difficult to build in this space so long as I adhere to my stated limitations. This is especially so when I have good weather and can open the two main doors and also include the great outdoors as part of my square footage.
In taking the time to develop an image of how I wanted my shop to look and feel, in taking the time to imagine how work would flow through it, I feel as though I have been able to build an efficient and comfortable place that allows me to freely explore woodworking as well as to efficiently work through paying projects that come in.
It is adequately powered, has very high quality tooling, and has a personality that encourages as well as provides for fearless woodworking. Until such time as it makes fiscal sense to either add on or build a new shop, this space is comfortable and welcoming.
To other woodworkers out there I submit to you that your work space should be pleasing to the eye as well as to the bottom line. Make the place comfortable, easy to clean, and distinctly your own. Take the time to sit in it and just look around once in awhile. I suspect you will find yourself puttering here, and readjusting there, remembering that bit of maintenance that you wanted to do to the table saw, or that little pile of scrap bits that needed to be gone through and either discarded or squirreled away. All these little “putterings” are a way of making the space your own.
Also, in my case at least, this personalizing of the shop seems to continue beyond initial setup. Sometimes the originally imagined layout needs to be rearranged and tweaked in order to develop sound work flow and to maximise comfort. Never be discouraged from making large, wholesale changes. Just be sure that they add to the comfort and add to the shops personality. You will thank yourself later.
I love comments, feedback and any discussion. These are always welcome. I can be reached at:
madcapwoodwright@gmail.com
And, as always, remember to work wood fearlessly and with joyful abandon.