Curtis Turner and his son show off this great project to do in the workshop with your kids this summer. The da Vinci Wooden Model Catapult Kit is just one of the wooden model kits available at Highland that will get your kids working in the shop and perhaps launch them into the world of woodworking. Check it out below!
Summer is upon us, and one way we can get more time in our shop is to invite our kids in with us. Help the kids in your life build woodworking skills that will last a lifetime with Highland Woodworking’s Tool Kit for Kids! Michael Morton reviews the tool kit in the short video below.
We originally profiled Chris Vesper back in 2016. Not long after that, he started building out a new space for his tool making business. We thought it was time to check back in with Chris and find out what has changed about Vesper Tools since we last chatted with him.
Click to learn what has been going on lately at Vesper Tools
Whether your hand plane’s blade is used up, pitted with rust or just plain no good, a Hock Plane Iron from Highland Woodworking can be the quickest way to get your hand plane cutting its best. In the short video below, Jim Dillon takes a closer look at the Hock Plane Irons and explains what makes them work so well.
Do you have inertia when it’s time to start a new project? Fear? Anxiety? Procrastination?
The iPhone jingled, and the ringtone said it was one of our daughters-in-law, Nan. I answered eagerly. We have been blessed in the daughter-in-law department.
“Hi, Pater,” she said. We exchanged pleasantries, then she got to the reason for her call. “Do you think you could make Audrey a combination bookcase/storage unit?”
Could I make something for my granddaughter? Would I make something for my granddaughter? Luke 11:11 says, “Which of you fathers, if your son asks for a fish, will give him a snake instead?”
“Of course I can make Audrey a present. Get me a plan and I’ll start right away.”
Or will I?
I’m not a lethargic kind of guy. People who know me will tell you I’m always on the go.
However, when I’m starting a new project, or supposed to be starting a new project, I can get a slow start sometimes.
To some extent, it depends on the difficulty level. If I’m making a plywood box for the garage, a storage container appears before you can spin around.
Audrey’s project, however, was complicated, even if only a little. It had to be certain dimensions to accommodate wicker baskets that were already purchased. It had a curved shape on the top. And I wanted to make it from solid wood. Therefore, wood movement had to be considered.
Call it fear. Call it a desire to do the best I could. Call it inertia. I had a really hard time getting started.
I was a little bit intimidated.
Well, as you might imagine, it turned out fine. After all, look at the photo below. It’s not all that complicated!
I made my own beadboard for the back.
The curved shape came from a thin, ripped strip of wood that I bent and applied to the side panels after they were glued up. After the first was cut and shaped, I just traced the outline onto the other side.
The poplar took paint like, well, poplar takes paint, naturally.
And, as you can see, Audrey was happy with the result.
Sweet little Audrey loves her bookshelf/storage unit.
Mom was, too. That’s her standing next to me below, the very first time she saw the project.
After designing the unit, sketching it and sending it to me, this was Nan’s first opportunity to see the assembled, but unfinished, project. It took her breath away. I treasure this photograph.
Slow start. Good finish. I suppose that’s OK.
Jim Randolph is a veterinarian in Long Beach, Mississippi. His earlier careers as lawn mower, dairy farmer, automobile mechanic, microwave communications electronics instructor and journeyman carpenter all influence his approach to woodworking. His favorite projects are furniture built for his wife, Brenda, and for their children and grandchildren. His and Brenda’s home, nicknamed Sticks-In-The-Mud, is built on pilings (sticks) near the wetlands (mud) on a bayou off Jourdan River. His shop is in the lower level of their home.Questions and comments on woodworking may be written below in the comments section. Questions about pet care should be directed to his blog on pet care, www.MyPetsDoctor.com. We regret that, because of high volume, not all inquiries can be answered personally.
No Southern-fried Southern boy wants to be called a Yankee, but we share the characteristics of shrewdness and thrift. Thus, each month we include a money-saving tip from Sticks in the Mud woodworker, Jim Randolph. It’s OK if you call him “cheap.”
I was having a conversation with Steve Johnson one day, when he said, “YouTube is full of tips on how to make your own ‘Painter’s Pyramids’ knockoffs. As inexpensive as Painter’s Pyramids are, why would anyone ever try to make a substitute?”
Your resident cheapskate was happy to supply several reasons.
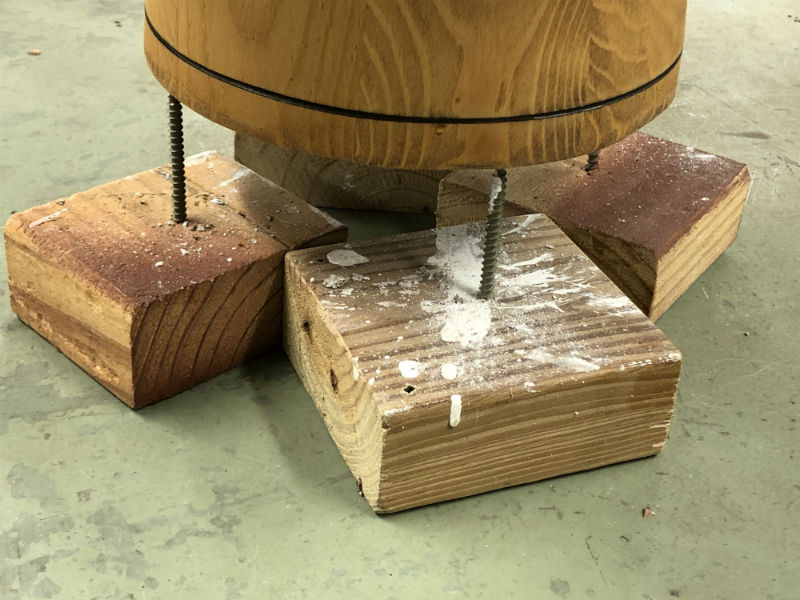
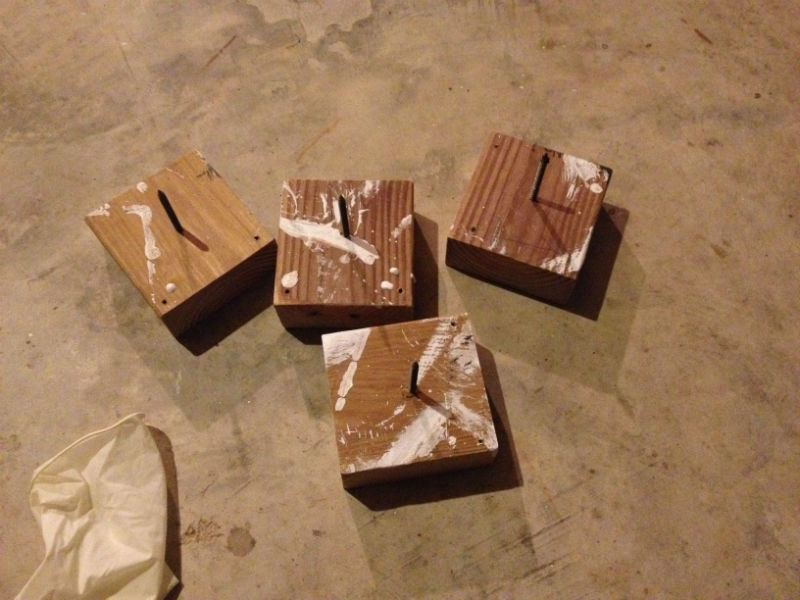
I have some that are homemade, and I made them in the middle of the night, when I had to have them right now, and there certainly wasn’t time to order them. I made four, and they worked perfectly.
One day, I needed eight. Having only four, I whipped up four more in less than ten minutes. And, frankly, at less cost than buying the real thing. Notice that I didn’t say far less cost, because how much less can one go than $5.99?
Another place a homemade work elevator is handy is in my friend Don’s cabinet shop. While I made mine with screws, his is a 10-foot-long board with nails driven through it, all along its length. While not as versatile as individual Painter’s Pyramids, it serves his very specific needs for finishing long moulding.
Homemade finishing supports in action. Read on to see how I made them.
Here’s how I made mine. Pay close attention. You might want to take notes, or print yourself a copy of this column. It’s highly technical.
First, find a scrap of 2 x 4. You can use a larger or smaller board, depending on your individual needs.
Set a stop block on your miter saw at 3½”. You can make it a little longer if you need additional stability, but it would be impractical to make it shorter. Me? I like the symmetry of 3½” by 3½”.
Now, find the approximate center of your base by scribing a line from each corner to its opposite. Drive a 3″ to 3½” drywall or deck screw through the intersection. Be sure your screw is perpendicular to the block, lest your support possibly throws your work to the floor. If the wood of your 2 x 4 seems brittle, you can drill a pilot hole. Just be sure the hole is tight. You don’t want your screw falling out.
If the item you’re supporting is light in weight, you can use the screws just like you bought them. However, if you’re finishing a heavy project, a sharp point can be driven into the end grain of a leg. In that case, try blunting the screw point by placing your support on an anvil and tapping the pointy end with a hammer. Wear safety glasses when performing this step, as drywall screws are extremely brittle and the point may snap off. Alternatively, you can just put the tip to a grinder wheel and take off 1/64″.
Jim Randolph is a veterinarian in Long Beach, Mississippi. His earlier careers as lawn mower, dairy farmer, automobile mechanic, microwave communications electronics instructor and journeyman carpenter all influence his approach to woodworking. His favorite projects are furniture built for his wife, Brenda, and for their children and grandchildren. His and Brenda’s home, nicknamed Sticks-In-The-Mud, is built on pilings (sticks) near the wetlands (mud) on a bayou off Jourdan River. His shop is in the lower level of their home.Questions and comments on woodworking may be written below in the comments section. Questions about pet care should be directed to his blog on pet care, www.MyPetsDoctor.com. We regret that, because of high volume, not all inquiries can be answered personally.
Welcome to “Tips From Sticks-In-The-Mud Woodshop.” I am a hobbyist who loves woodworking and writing for those who also love the craft. I have found some ways to accomplish tasks in the workshop that might be helpful to you, and I enjoy hearing your own problem-solving ideas. Please share them in the COMMENTS section of each tip. If, in the process, I can also make you laugh, I have achieved 100% of my goals.
Theoretically, one could make a panel simply by using a substrate, such as particle board or plywood, and nailing the boards’ tongues into grooves, just as you would cover a floor. However, I’ve never seen used boards that were sufficiently straight for that. Warping is a common problem. Also, your panel would be quite heavy, which wouldn’t matter if it were the top of a piece of furniture, never to be moved.
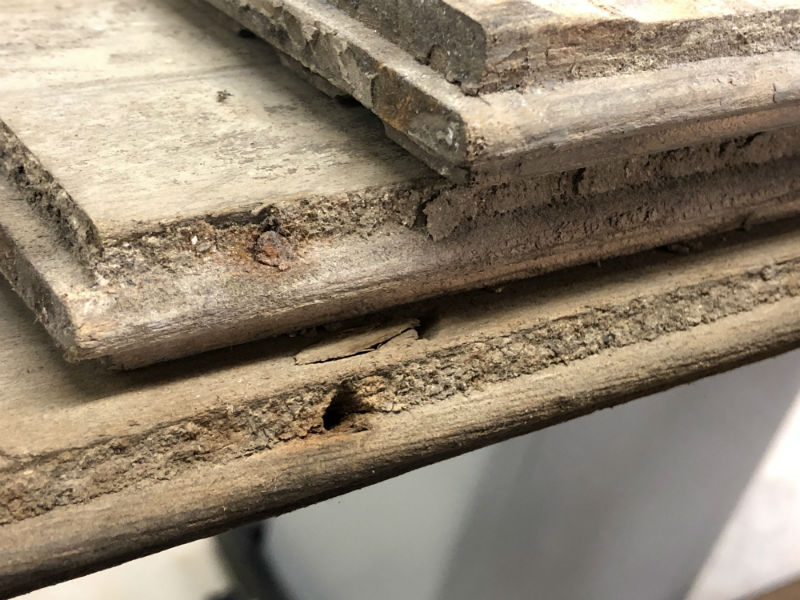
Our project calls for light weight, so we’re going to start by cleaning off the dirt, especially from the grooves and tongues, before we saw them off.
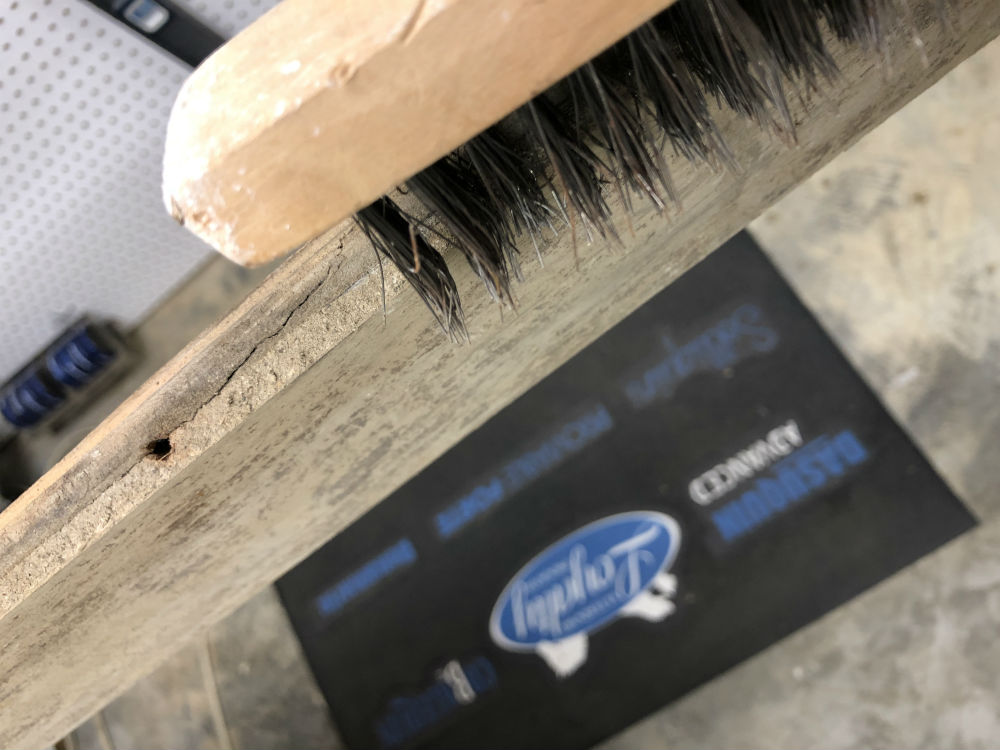
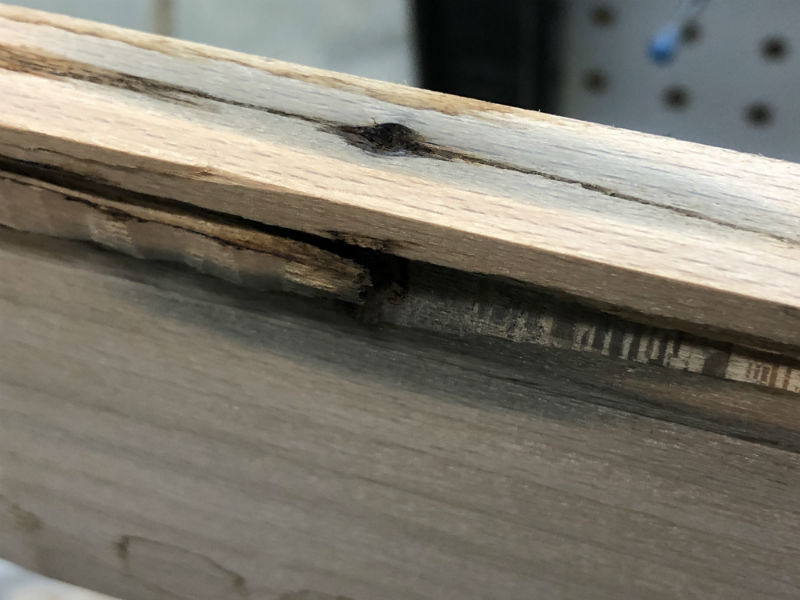
See the dirt on these tongues? It’s on the top edge, and represents decades of dirt and allergens pounded into the space between boards. The importance of a dust mask can’t be overemphasized. Notice that the first pass of nail removal didn’t catch this little broken fragment to the left. We will scan with the metal detector again before sawing.After scraping as much dirt off as you can, a wire brush will take off even more. Be sure to use eye protection along with your dust mask. I had a tiny piece of wire in my right eye once. It was no fun. Neither was removal.
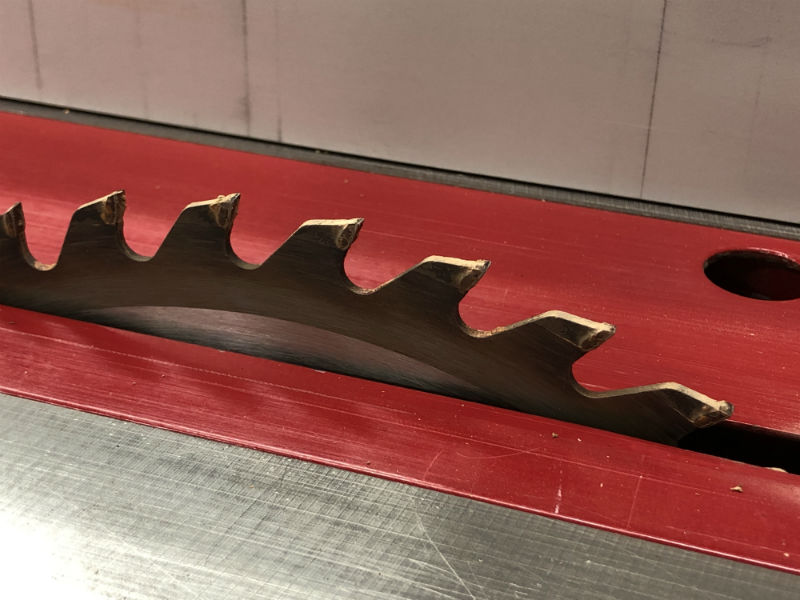
I have a coarse rip blade to take off the grooves and tongues. No matter how much you scrape and brush, it’s still going to be dirty, so there is no point in exposing your Forrest Woodworker II to that. I usually find the groove side to be straightest, which means you’ll remove the tongues first.
This old Craftsman blade does a good job of rough cutting, and it’s so coarse there’s no bogging it down. Every once in a while you’ll find a board so wonky it won’t feed through your table saw. Don’t risk it! Use the band saw, or, better yet, just put it in the burn pile. You probably won’t get it to lie flat for your panel anyway. In fact, while you don’t want to be wasteful with your “free” wood, it’s worthwhile preparing extra boards at this stage because bow, twist and warp will cause you to reject one-third or more of your boards.
Cut deep enough to create a smooth edge for gluing. If needed, you can cut most of the tongue on one coarse pass, then cut that edge again with a good blade, or make a light pass on your jointer. If your boards are really bent, you can straighten them with a straight-edge jig on your table saw.
If your project calls for uniform board width, pay attention as you go. Most boards start at 2-1/4″ wide; you don’t have a lot to play with.
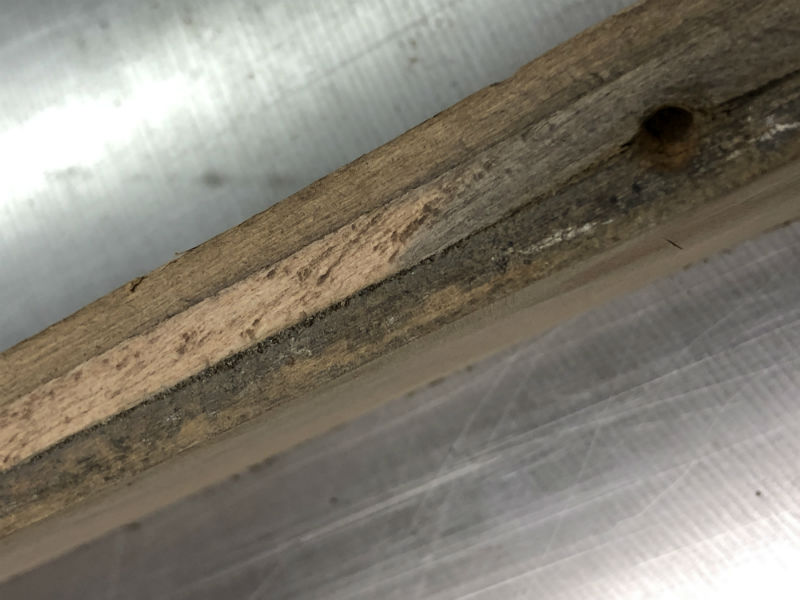
See how the blade has barely cut into the board? Fine-tune your rip to maximize board width, unless your design calls for narrow strips.After ripping tongues from four boards, I cut this one the same width, which didn’t take all of the tongue off. Because I’m going for a uniform-width look, I moved the fence 1/32″, re-cut this board and re-cut those first four on the tongue side, too.
You have the option to plane off the ridges on the bottom of the boards, which are called “absorption strips” and are intended to reduce cupping. If you are installing an edge on your panel you can leave those; otherwise, the irregularity will show from the side.
In making this panel, I doubled the boards to give the impression of a thicker top. For better stability you could stagger the joints, make the panel a little bigger than you need, then trim to size.
You will want to be efficient with this process, especially if your panel is any size, or if you are making multiple panels. To minimize excessive fence adjustments, cut all of the tongues off, then evaluate all of the boards to see which is likely to need the most cut off the groove side. If you’re lucky, you won’t need to change the fence a third time and you can zip through the remaining boards, simultaneously leaving them all the same width. Be watchful that you are not having so much fun running board after board through the table saw that you fail to attend to safety.
Here are some additional considerations.
The bottom matters only if your project shows the bottom. If you don’t have to machine the underside, your panel will have more thickness. However, that works only if the panel is fixed to a spot. If there are defects on the bottom, and there is any chance the panel can be picked up, the underneath may be seen, in which case you should plane out those defects. Or, cut the edge back to remove the fault.
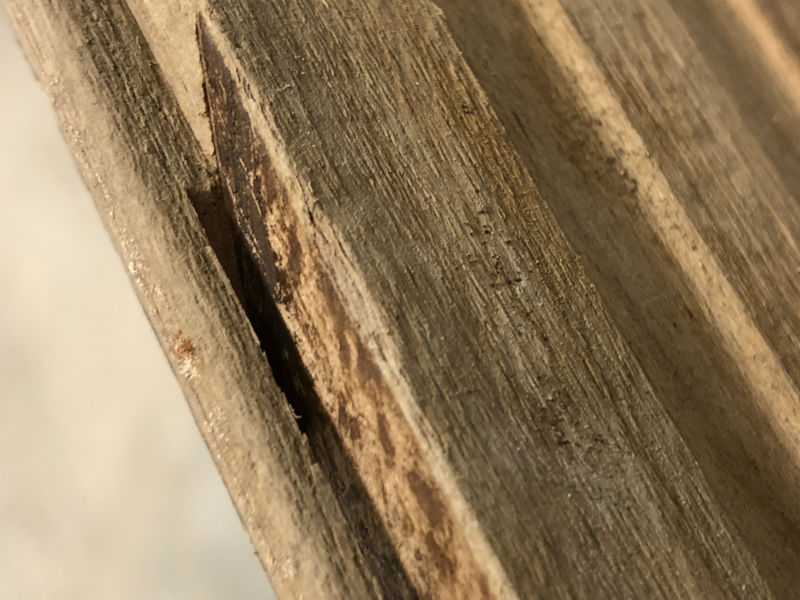
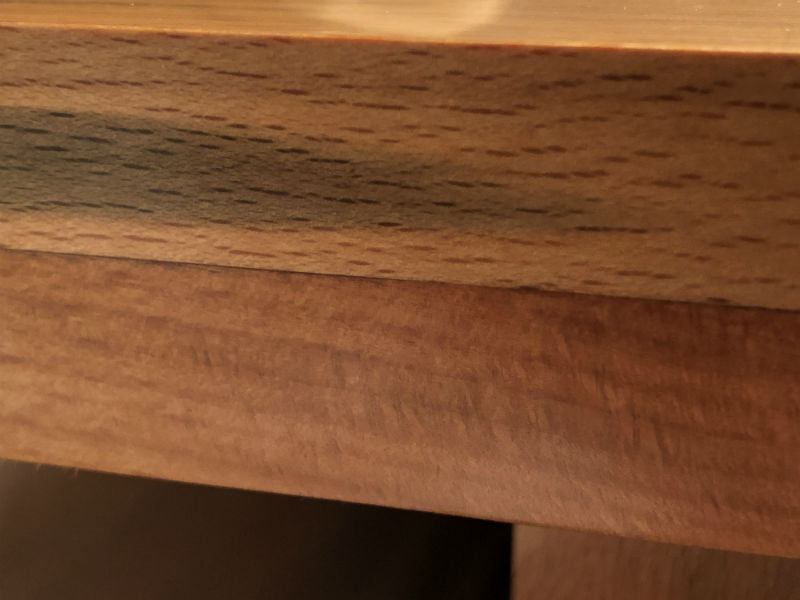
In a panel with a hidden bottom, this board is perfectly acceptable, as this defect will never be seen.
The only edges that matter are the ones that show. This edge defect makes a minor flaw in the bottom, which might not even matter. It certainly doesn’t affect the integrity of the edge joint.
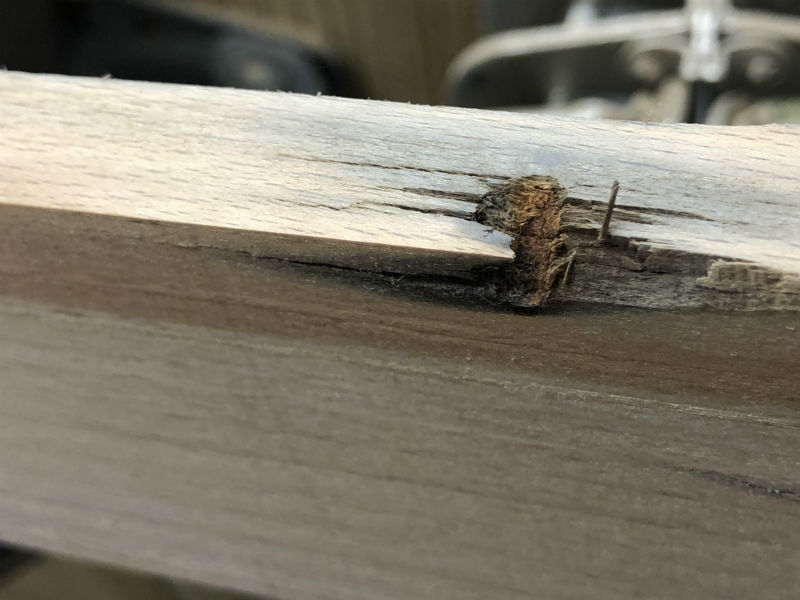
Sand out the little snag on the bottom of this board into a crescent and it’s as good as any.
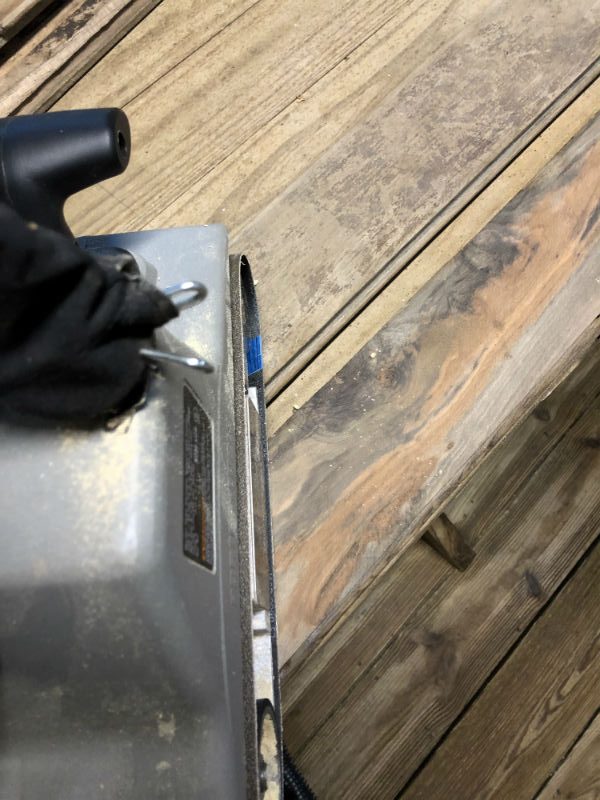
If there is dirt on the top or bottom surfaces, it’s going to wreak havoc on your planer blades. A paint scraper is good for removing that. A putty knife can help, too. You could even wash it, or pressure-wash it, and start the drying process all over again. But, there’s a cheaper, easier way. Belt sanding. It’s quick and it’s efficient.
Sand on a bias. First one 45-degree angle, then the other. It’s much faster than going with the grain. Use 80-120 grit sandpaper. You’re not trying to remove wood, and any scratches you make will be resolved in the planing process.
Here you see sanding on a bias, before and after. You can see how much dirt is on the surface of the board on the left, waiting to ruin your planer blades. The board on the right cleaned up nicely, revealing severe water damage and staining. One more reason to prepare extra boards.
Next month we will cover layout, joinery and glue-up.
Jim Randolph is a veterinarian in Long Beach, Mississippi. His earlier careers as lawn mower, dairy farmer, automobile mechanic, microwave communications electronics instructor and journeyman carpenter all influence his approach to woodworking. His favorite projects are furniture built for his wife, Brenda, and for their children and grandchildren. His and Brenda’s home, nicknamed Sticks-In-The-Mud, is built on pilings (sticks) near the wetlands (mud) on a bayou off Jourdan River. His shop is in the lower level of their home.Questions and comments on woodworking may be written below in the comments section. Questions about pet care should be directed to his blog on pet care, www.MyPetsDoctor.com. We regret that, because of high volume, not all inquiries can be answered personally.