Highland Staff

Nov 092012
 

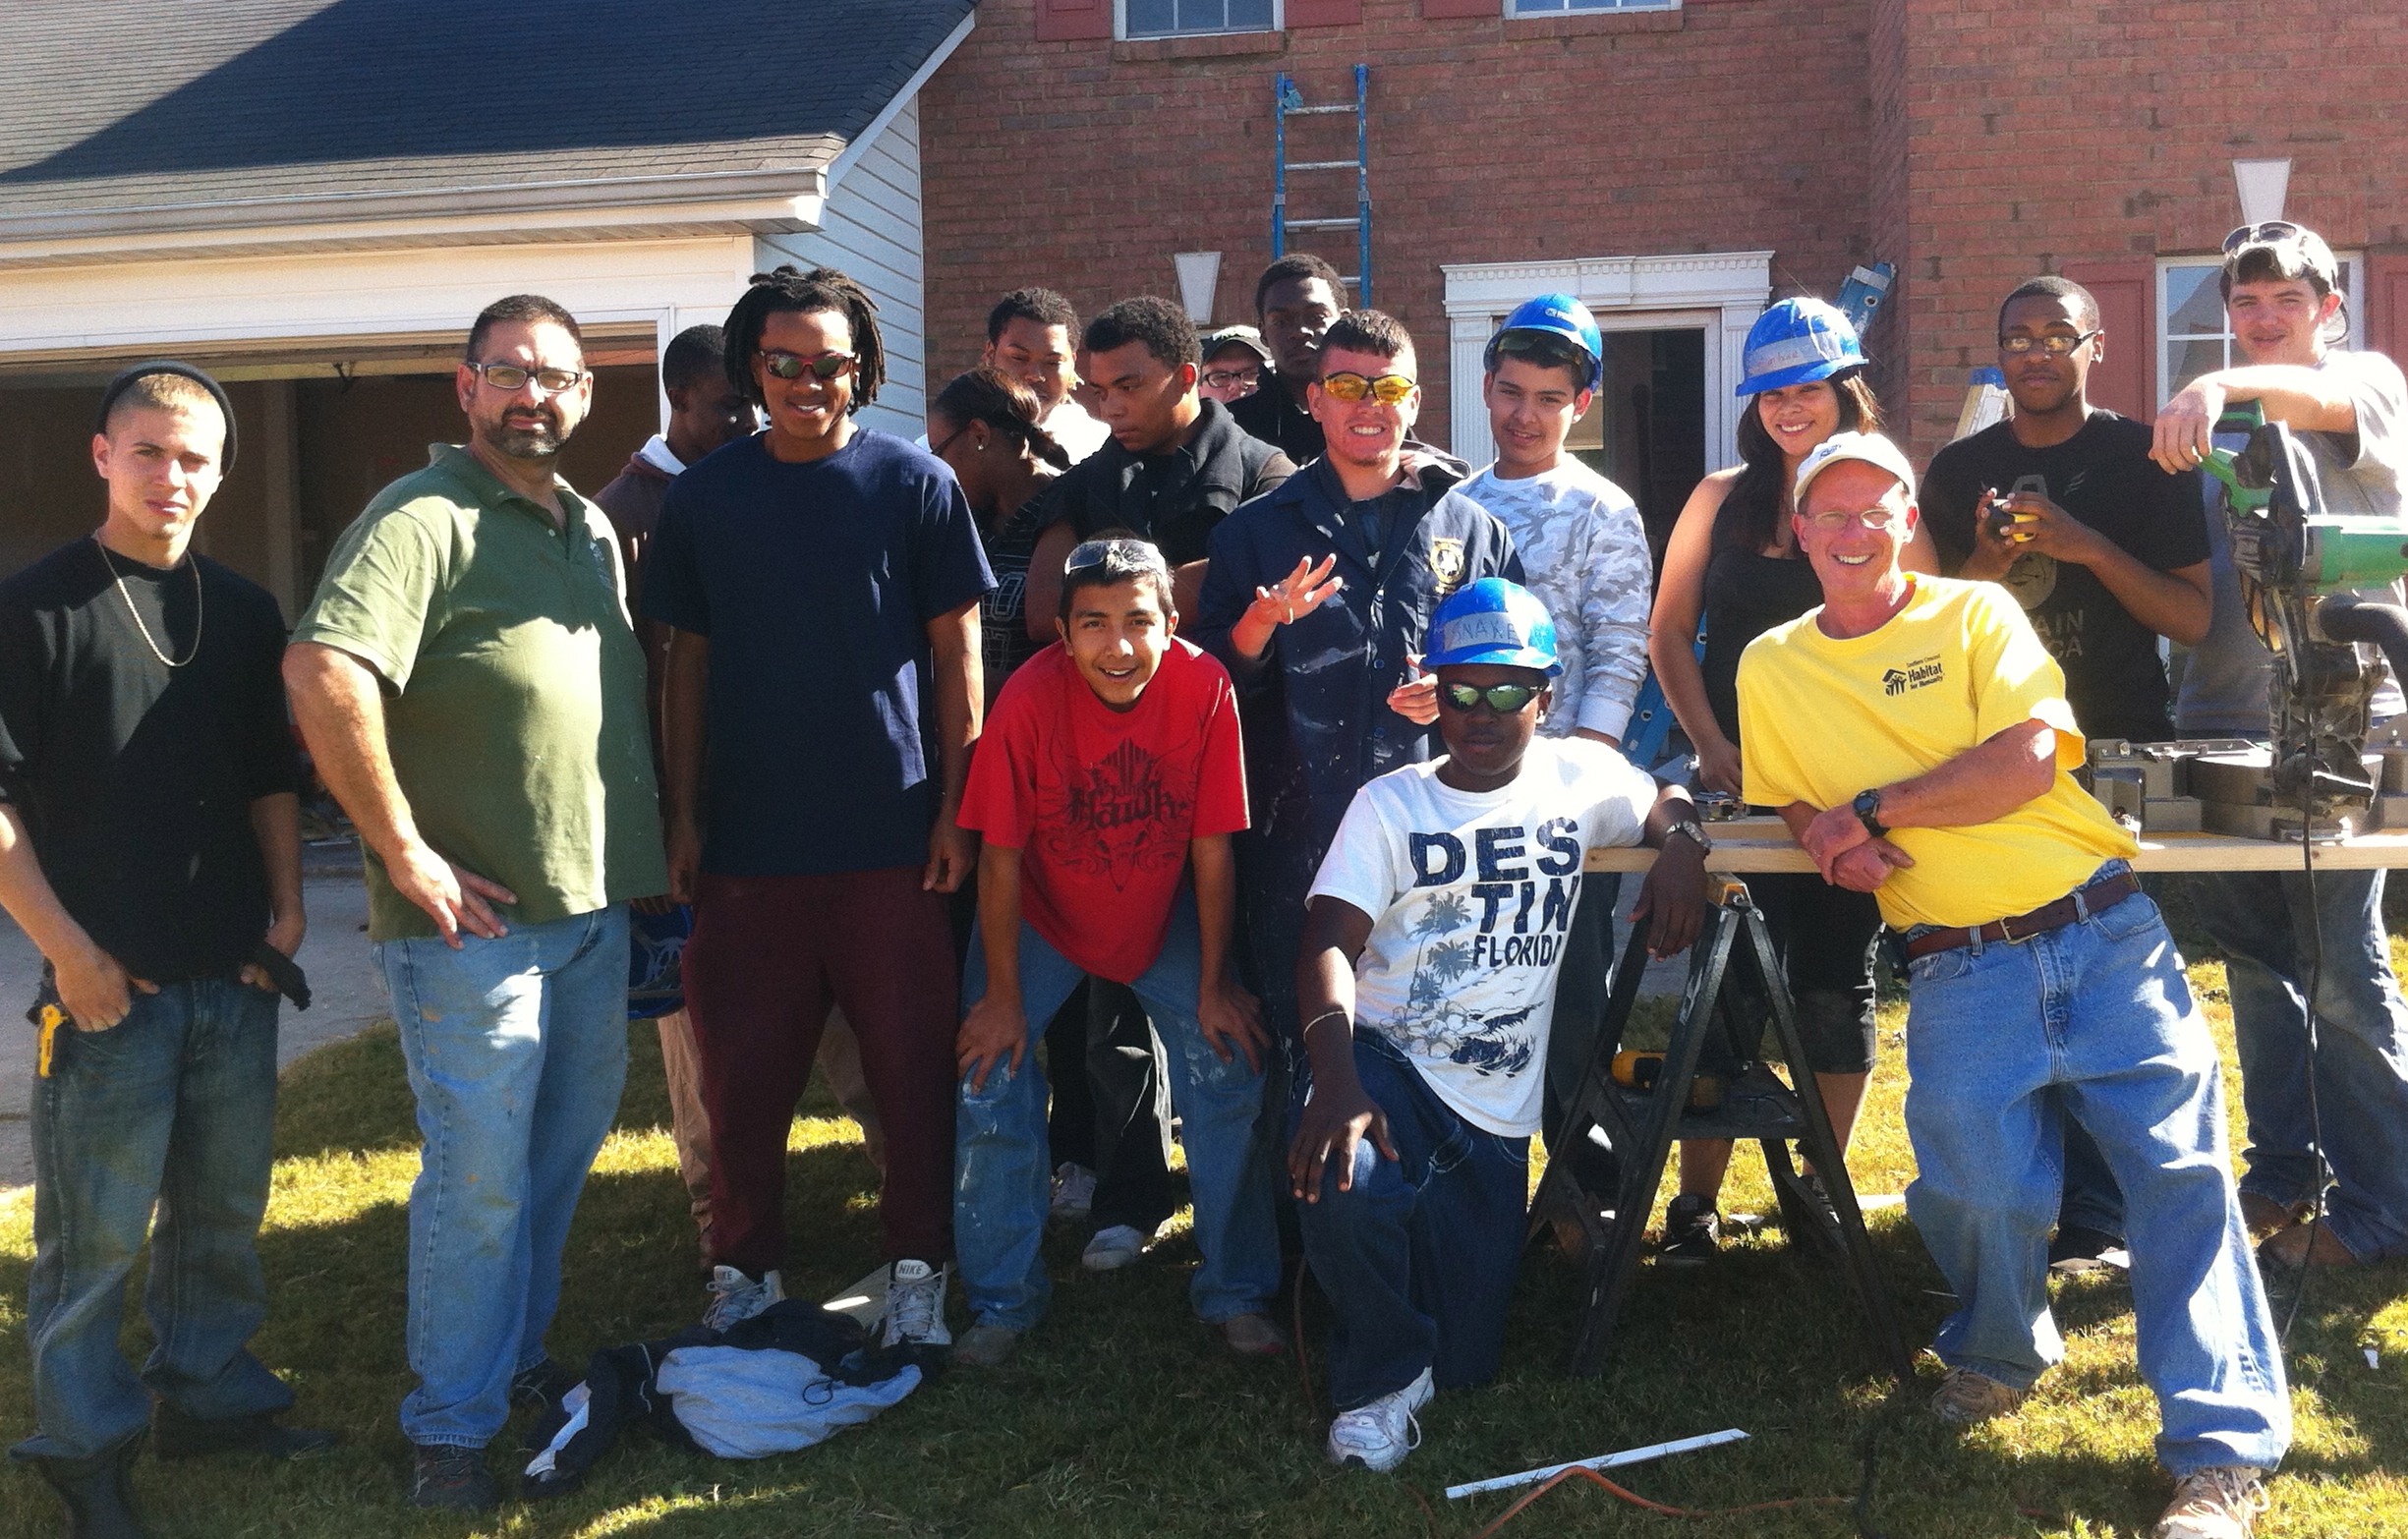
Carpentry Classes from Jonesboro and Lovejoy, GA High Schools


I was working on a house rehab last week with my Habitat Chapter and a group of 20 High School students from two of the local high schools.  The kids were great and the instructors were outstanding.  These kids are really into this carpentry stuff and they are well trained.  I am so happy to see this happening and it is a joy to work with them each year.

When I am on a job site in a supervisory role and not doing a lot of actual work, I carry a  tape and a small trim hammer.  I use the tape as a pointer so I don’t have to climb a ladder all the time.  The little hammer makes me the butt of many jokes as some people call it a girlie hammer (no offense people) or think it is just a toy.  I can assure you it is not a toy and it will flat move a nail.  Something about the size of the fight in the dog.  Last week the kids named my hammer “El Nino” or “Little Boy”.  I’m going to take that as a sign of respect for its skills cause they saw I can sink a nail with it better and faster than most of them.

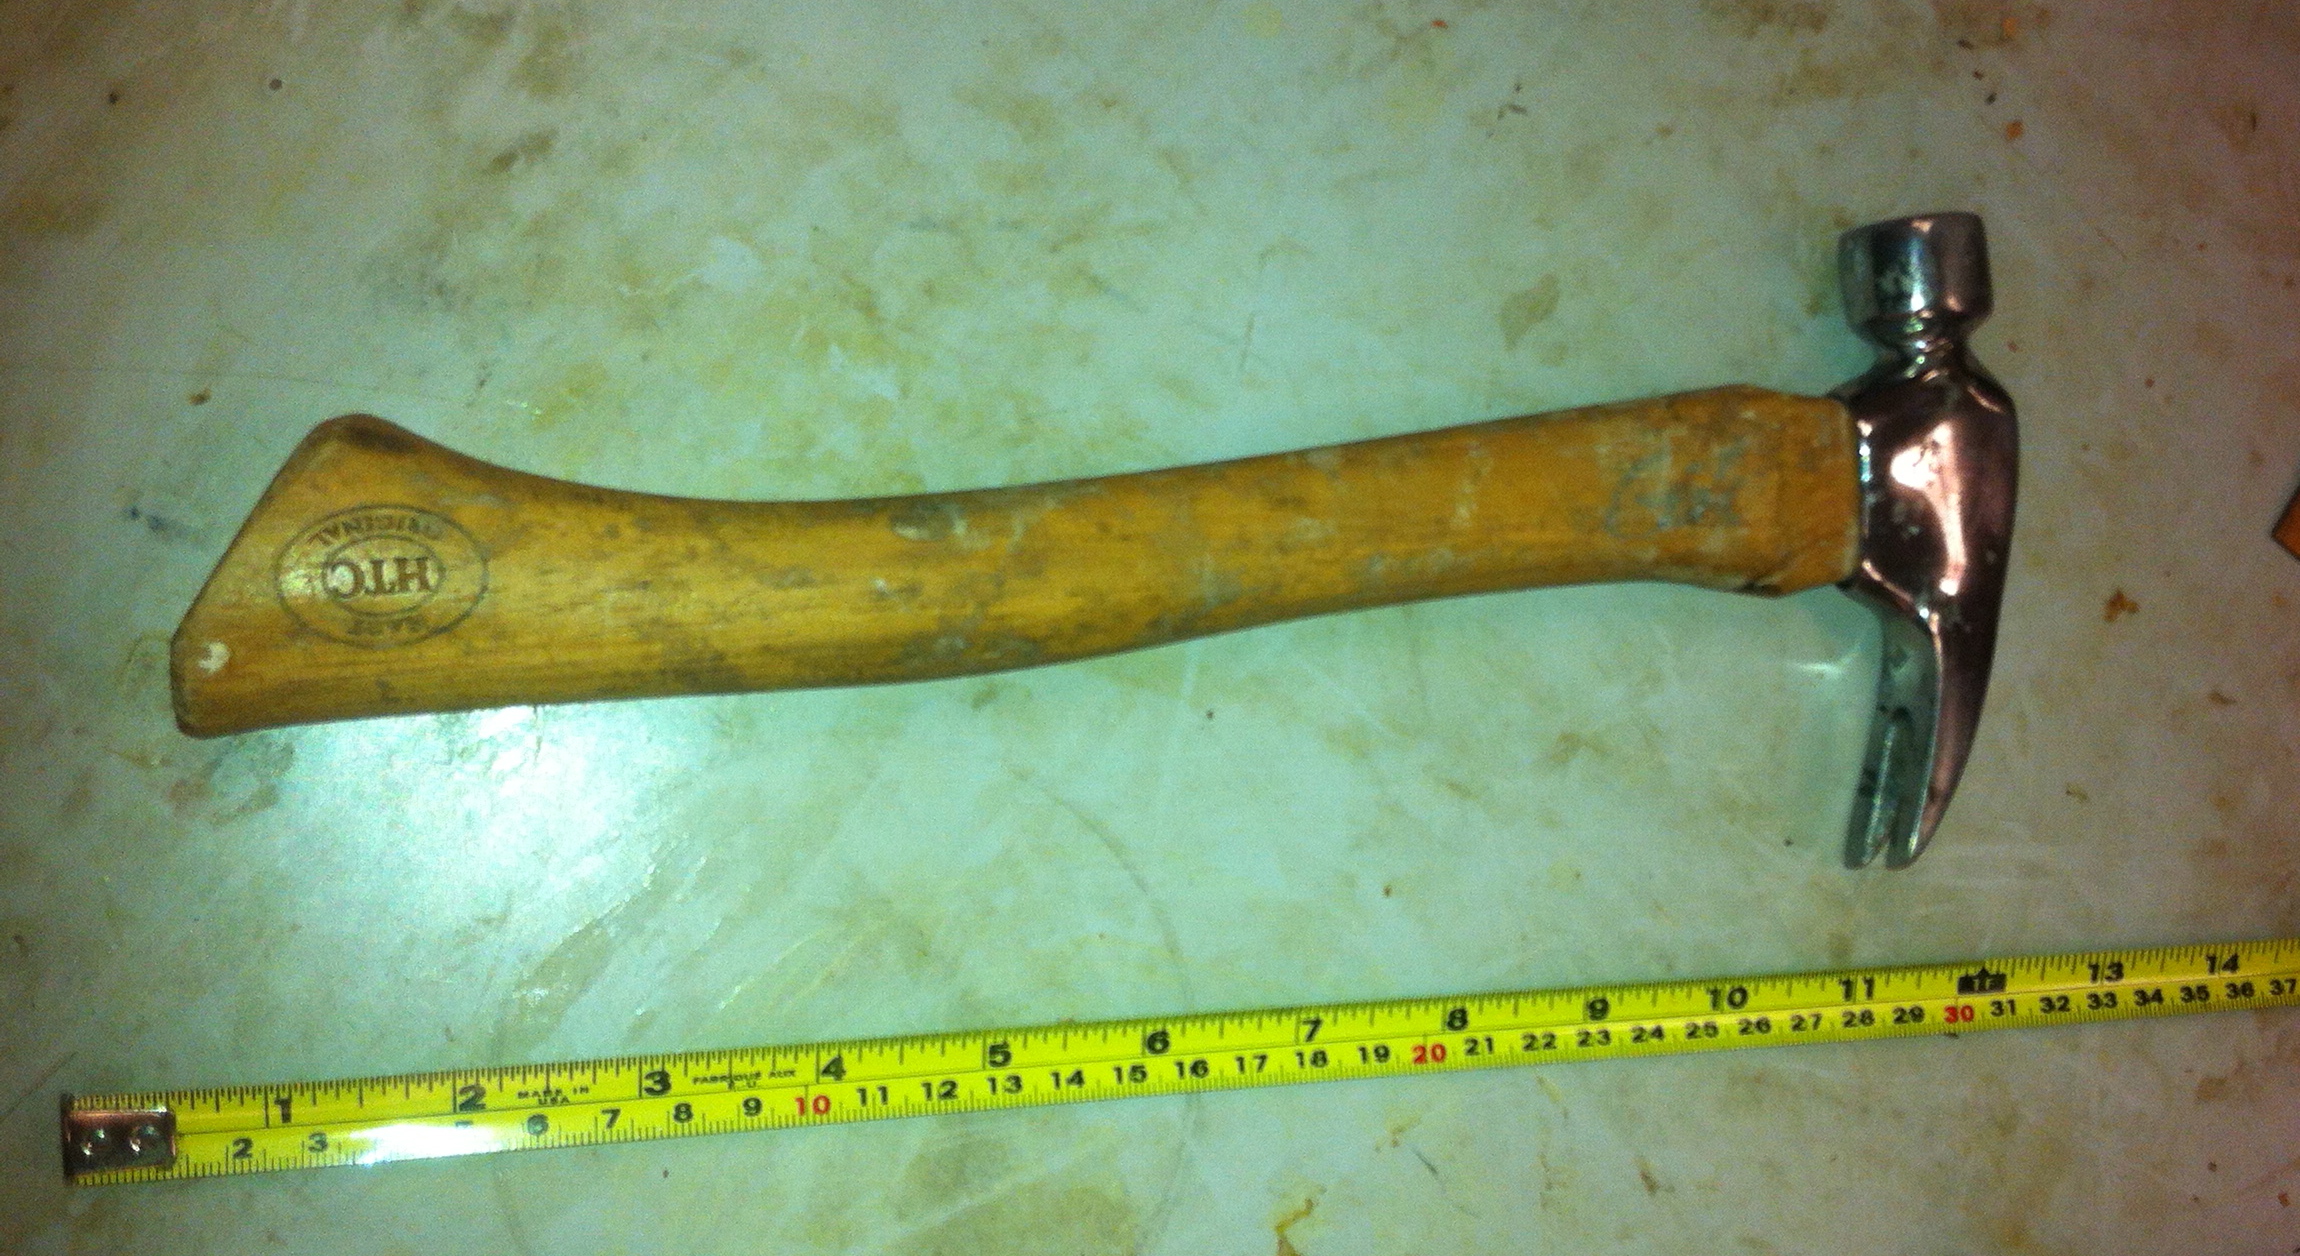
El Nino — The Hammer of Hammers

Besides El Nino, I think I may have fifteen hammers in the shop.  I cannot throw one away and they tend to accumulate on me.  Of course, there are some special favorites.  My favorite big one is a large framer with a replaceable wooden handle and a waffle pattern on the business end.  Talk about moving a nail, that one will do it.  The joke on the job site for an old guy like me is that this is the only hammer with an age limit molded into the head.  Look right there under the claw and it says “21”, and if you are older than that, you will not still be swinging that hammer at the end of the day.  The straight claws are a real joy in framing, since you can set them under a board and hit the head with another hammer to really put on some pressure.  And to double the pressure, pull the handle sideways instead of back, a trick which I am surprised that most people do not know.

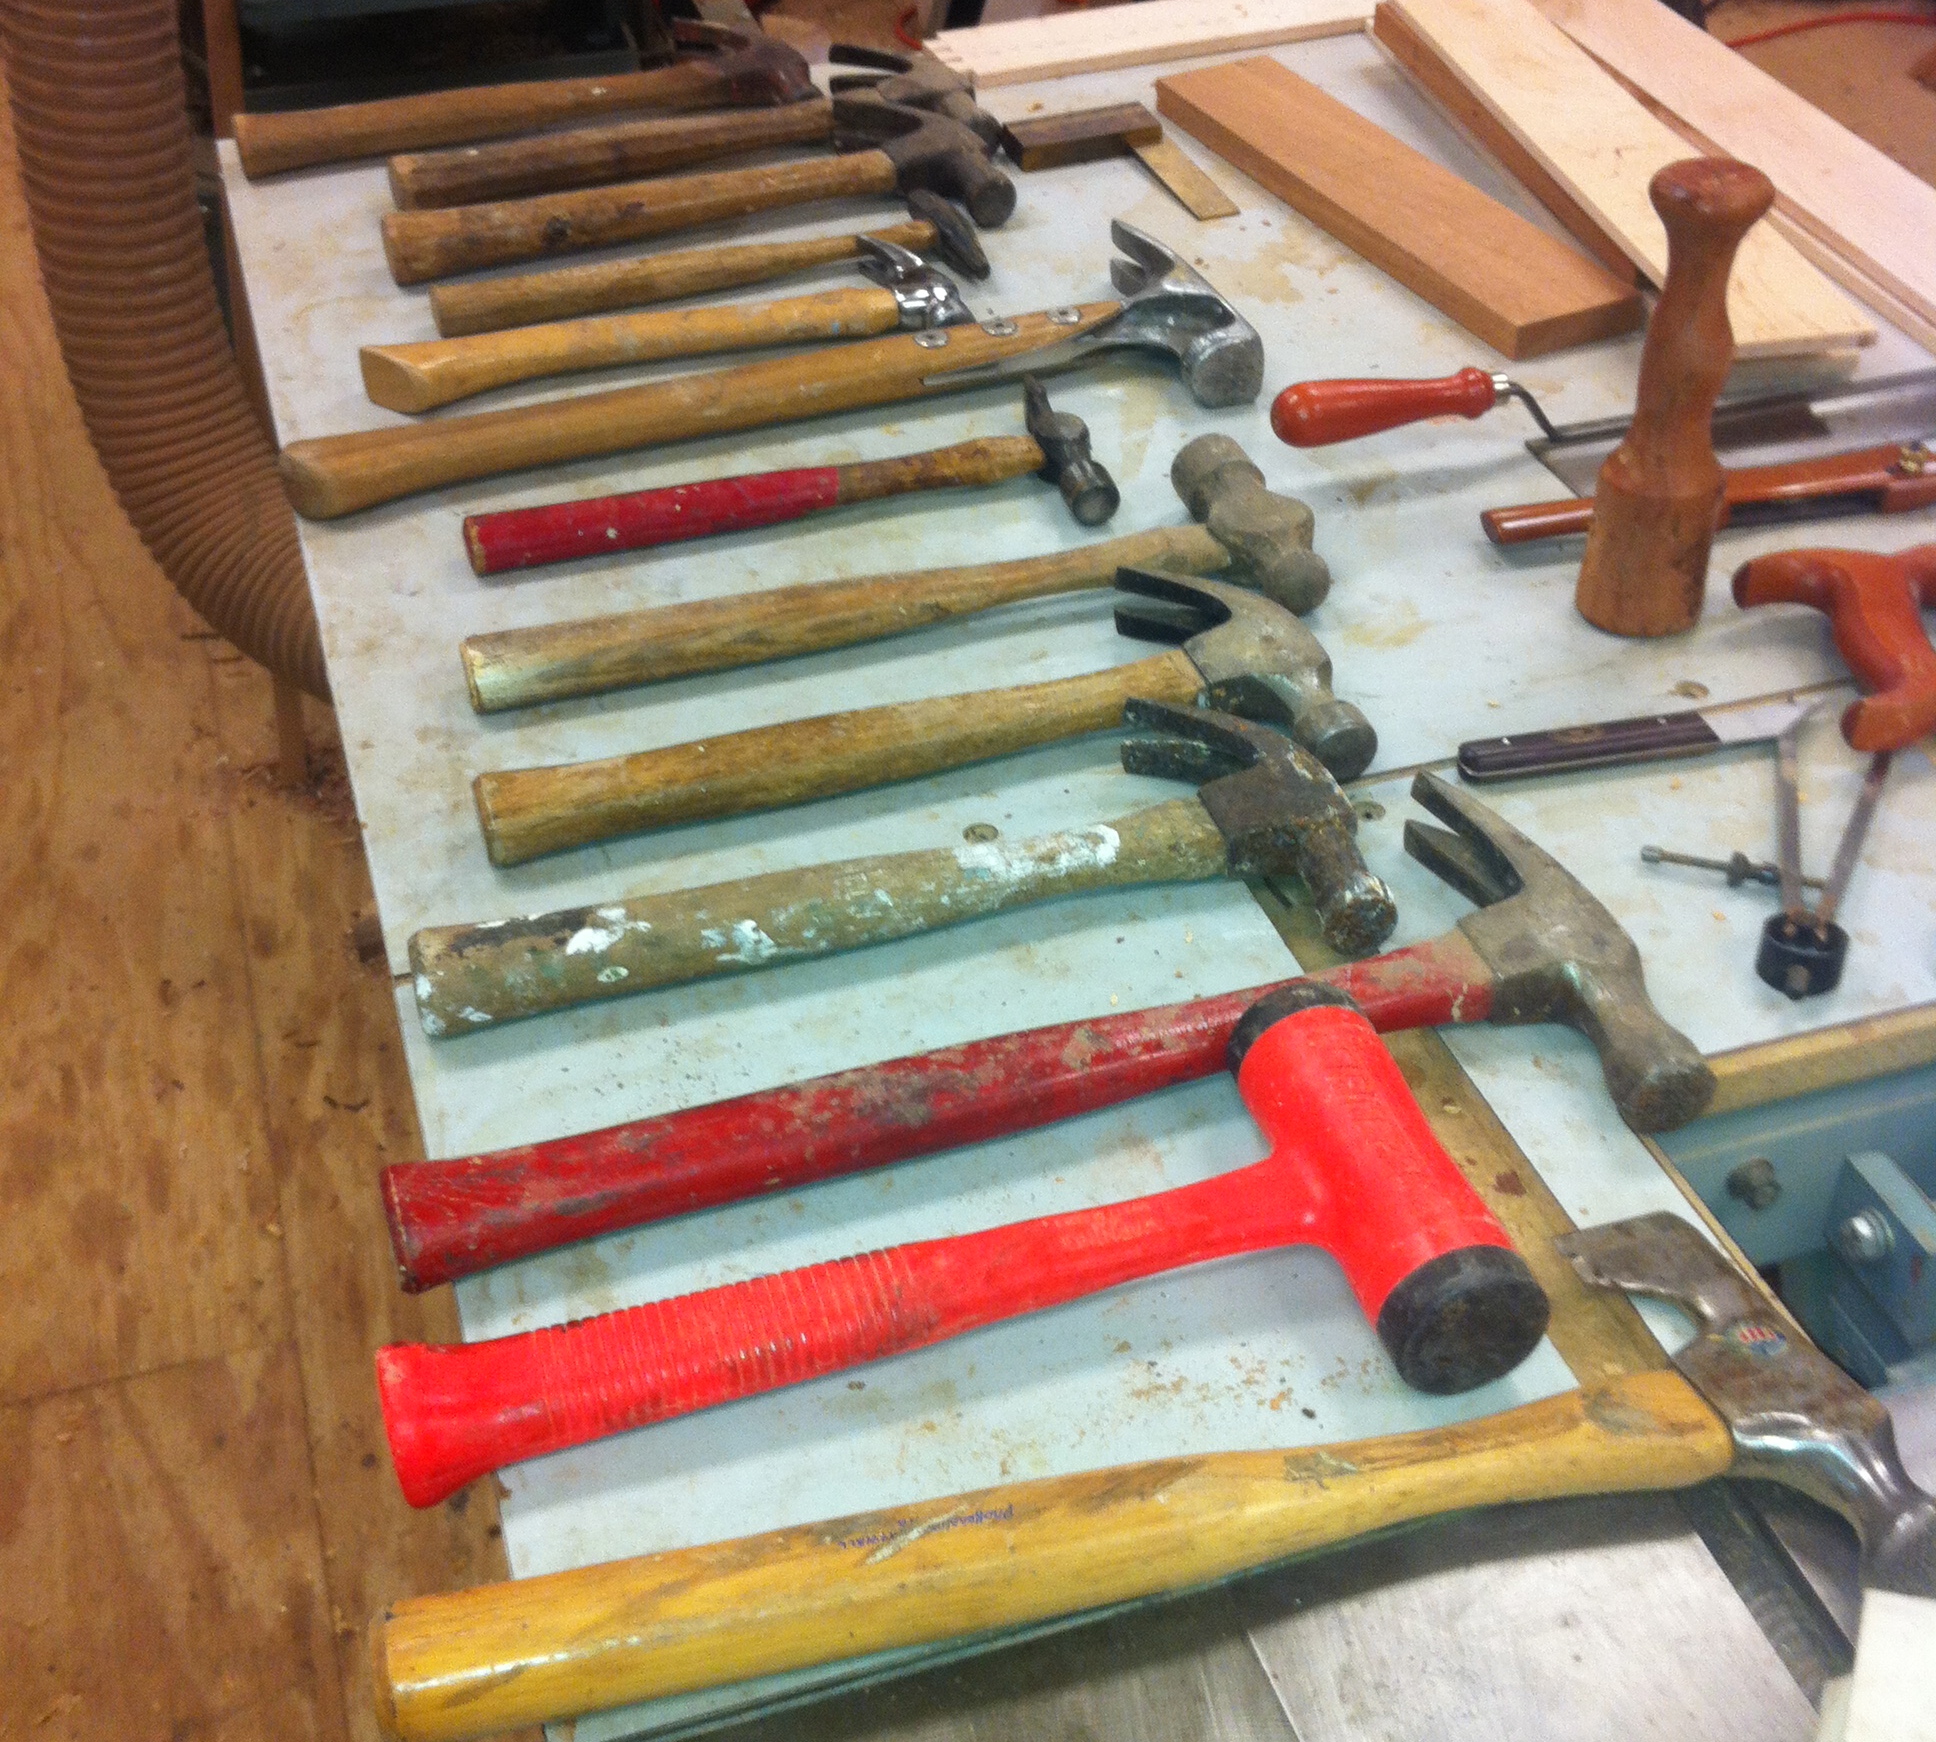
El Nino next to the Framer and then the Warrington with the red handle.

In the furniture making trade there is the Warrington pattern hammer.  I like this hammer a lot since it is so well balanced, light and easy to use.  It is made without claws since it is designed to drive brads that you could probably pull out with your teeth if you had to. If you are using it, you are so close to the end of your project you are not going to want to pull anything out of the wood and mess up your project.  The cross peen on the end is made so you can hold a brad with your fingers and then strike the hammer between your fingers to hit the brad.  It works like a champ.

Highland has a wonderfully large selection of hammers of all descriptions.  I’m not sure if anybody still makes a hammer like El Nino anymore, but if you can find one, you will really love it.  Have you got a favorite hammer?

Nov 072012
 

Now that the tenons are done, time for matching mortises.  Now, I could just scribe and chop them out by hand, there are only two.  However, I want them to be pretty tight and being risk-adverse at this stage in the project (I can’t get two more crotch walnut legs if I really screw up!) – I went with a template.

My mortise template - two attempts at the correct size and location

My mortise template - two attempts at the correct size and location

The other reason for making this template was to make test mortises and check the squareness of my stretcher + tenons.

Testing the stretcher in the mortise and square to the "floor"

Testing the stretcher in the mortise and square to the "floor"

It turns out that my stretcher is still slightly twisted (or the tenons are) and so check out the first picture again and note a piece of veneer taped to the template.  This rotates the mortise very slightly from 90 and running a second test (note two sets of mortises in the second picture) confirmed that the test legs sat firmly on the ground (my dead-flat assembly table).

Finally – I ran a layer of blue tape on the inside of the template to make it just that tiny bit tighter for the tenon to fit.  Time to do the real thing.

Blue tape on the inside edge snugs up the mortise that tiny amount.

Blue tape on the inside edge snugs up the mortise that tiny amount.

Nov 062012
 

There’s been some buzz around the internet of a video showing the effect of moving a hand-plane’s chipbreaker all the way to the front (within thousands of an inch of the iron’s tip).  Even Chris Schwarz had a post on it.  Pretty interesting stuff, and I decided to try it out myself.

I won’t go into details that you can read in the above posts – because my results were very similar.  I tried three different settings which resulted in three different shavings, although the wood surface left behind was pretty similar in all cases.

Three shavings from different hand plane setups.

Three shavings from different hand plane setups.

I first set my standard chipbreaker to within a couple thousands of the front of the iron.  This made the plane hard to push and left behind very crinkled shavings.  However, the surface left behind looked nice.

Crinkled shavings from a chipbreaker set extremely close

Crinkled shavings from a chipbreaker set extremely close

I then honed a 50 degree microbevel on my chipbreaker.  This made the plane a little easier to push and the shavings had minimal crinkle.

Slight crinkle to these shavings from a high-angle chipbreaker set very close

Slight crinkle to these shavings from a high-angle chipbreaker set very close

Finally I went back to my standard setup with the chipbreaker about 1/32″ of an inch from the iron’s tip.  This made the hand-plane a lot easier to push and spit out the usual smooth shavings.  Since I was planing fairly tame wood, the same surface was left behind.

Smooth shavings from a standard 45 degree angle-of-attack

Smooth shavings from a standard 45 degree angle-of-attack

So, the upshot to me is that this technique gives exactly the same results as approaching the wood with a higher angle-of-attack than the typical 45 degrees (via a high-angle frog, back-bevel blade, bevel-up, whatever).  It makes the hand-plane harder to push, but tears-out grain much less – leaving a great surface especially on hard-to-plane woods.  Give it a shot, it’s pretty fun and easy to try.

Nov 022012
 

The Violin Maker’s Plane (A.K.A. the #101) is one of Lie-Nielsen’s newest planes, and the smallest to use a captive nut adjuster, which is such a bonus when dialing up the perfect shaving. This plane is based loosely on Stanley’s #101, but Lie-Nielsen has made a number of improvements to the original design. The body and cap are made from Manganese Bronze, which add some mass to the plane, bringing it in at a hefty 1/2 pound. Another added benefit of Manganese Bronze is it doesn’t rust. This plane is just less than 3 1/2″ long, and has a 7/8″ wide A2 iron that is a full 1/8″ thick, and really holds an edge a long time. The iron is bedded at 20 degrees and operates in the bevel up configuration, and as usual, the iron comes honed to 600-grit on both the bevel and the back. I recommend honing both sides up through 8000 grit, as this provides a razor-like sharpness that is ready to take on any wood you decide to try. Take a look at this sharpening video for more details on the process.

The size of the Violin Maker’s plane is small enough that you can work in very tight areas, and with such a short length, it can easily handle sections that aren’t totally flat, as long as the “waves” aren’t too close together. That being said, I want to make sure you all know this plane isn’t only for violinmakers. While the somewhat diminutive size does make it handy for instrument makers, it can be used across the board (pun intended). The depth of cut for many planes of this stature is adjusted by reducing pressure on the iron, and then tapping lightly on the back of the iron. When using this style of adjustment, you’re basically just trying your best not to end up shooting past the intended depth. While there are a large number of planes that operate on the “Tap” principle, the fine movements of a captive nut adjuster makes it so much easier for all skill levels to obtain repeatable results.

An aspect of this plane that should be emphasized is the thickness of the iron. An 1/8″ thick iron may seem like a fairly thick iron for this small of a plane, but it radically reduces the chance of any blade flexing or chatter during a cut. Definitely a great reason to go thick.

The iron comes from the factory with a 25-degree bevel, but as always, a honing to a minimum of a 30-degree micro-bevel speeds honing and strengthens the iron. Since this plane’s iron is used bevel up, honing angles above 30 degrees are usable and up to the end user’s discretion. For example, if I were using this plane on some of the extreme curly maple on one of my guitar tops, I’d consider raising the honing angle to 45 degrees or possibly even slightly higher to reduce tear-out. With the 7/8″ iron width, this plane is extremely useful at very focused operations, reducing the chances of accidental contact with unintended areas of a work piece.

This super-small plane can easily fit into the pocket of your apron, or even in a pants pocket. You would almost forget it was there, if it wasn’t so functional. Just remember to take it out of your pocket at home before flying, so you don’t have to leave it with the nice TSA agents.

I hope this helps answer any questions about this plane. Please let me know if you have any specific questions I may have missed.

Click to take a closer look at the Lie-Nielsen #101 Bronze Violin Maker’s Plane.

Click to see Highland Woodworking’s entire selection of Lie-Nielsen hand tools.


Lee Laird has enjoyed woodworking for over 20 years. He is retired from the U.S.P.S. and works for Lie-Nielsen Toolworks as a show staff member, demonstrating tools and training customers. You can email him at lee@lie-nielsen.com or follow him on Twitter at twitter.com/is9582

Nov 012012
 

I’m ready to final-size the legs which means using the template I created awhile ago.  I first traced the curve onto both sides of the workpiece.  Then over to the bandsaw to remove the waste.

I use the bandsaw to cut within 1/16" of the curve line.

I use the bandsaw to cut within 1/16" of the curve line.

I try to cut about 1/16″ outside the lines so that there’s not too much material to remove with the router.

The template is just shy of the workpiece below.

The template is just shy of the workpiece below.

I clamped the template on top of the workpiece (and my bench).  I used a 1″ pattern router bit (similar to this one) to ride against the template.

A pattern router bit rides on the template to flush up the workpiece.

A pattern router bit rides on the template to flush up the workpiece.

Since my leg is almost 2″ thick, the 1″ bit didn’t reach all the way across.  Unfortunately I didn’t take a photo, but I flipped the workpiece over and finished it off with a flush trim bit that rode against the already-routed section.

Some sanding and scraping quickly blends across the two routed sections.

Oct 302012
 

I need to add a tenon to each end of the curved stretcher. I use my full-scale drawing to find the tenon locations.

The tenon is defined from the full-scale drawing.

The tenon is defined from the full-scale drawing.

After marking with a knife, I use a chisel to define a small v-groove to help guide the saw.

After scribing, I use a chisel to make a V-groove

After scribing, I use a chisel to make a V-groove

I used my Bad Axe Toolworks Tenon Saw to define the tenon shoulder.

I define the tenon shoulders with a Bad Axe Tenon Saw.

I define the tenon shoulders with a Bad Axe Tenon Saw.

Since this is a 6′ long piece, I brought a tool to the wood in order to quickly remove the cheek waste. The Festool TS55 was fast.

The Festool TS55 quickly remove tenon cheek material.

The Festool TS55 quickly remove tenon cheek material.

Finally, used my router plane to clean up the cheeks.

Veritas Router Plane cleans up tenon cheeks beautifully.

Router plane cleans up tenon cheeks beautifully.

Oct 252012
 

Now that the stretcher is flat, I decided upon the final curve using the grain.  I found that bending a thin piece of wood around four nails did the trick.

A flexible piece of wood bent around four nails defines the curve.

A flexible piece of wood bent around four nails defines the curve.

Here you can see the curve following the grain.

The curve follows the grain

The curve follows the grain

Back to the bandsaw to remove the waste.

The bandsaw quickly removes the waste beyond the traced curves.

The bandsaw quickly removes the waste beyond the traced curves.

The convex section I could clean up with a hand plane, providing a really nice smooth edge.

A Lie-Nielsen #7 cleans up the convex surface.

A Lie-Nielsen #7 cleans up the convex surface.

Unfortunately I don’t have a compass plane for the concave side.  I went with a flexible sanding strip.  I’ve used rasps and spokeshaves in the past as well.

A flexible sanding strip cleans up the concave surface.

A flexible sanding strip cleans up the concave surface.