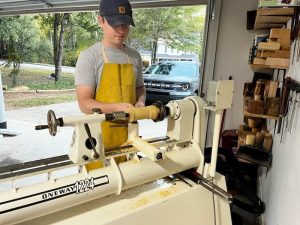
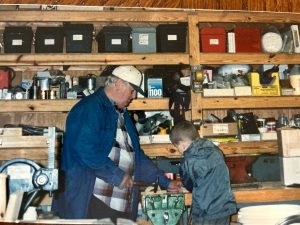
Doug Gordy was introduced to woodturning by his father, Vernon, a master woodturner. Doug recalls going with his father to Highland Hardware (now Highland Woodworking) for the first time in 1985, when he was a teenager. It was a much anticipated and frequent destination as he grew up. When Doug moved away from Savannah, whenever they were visiting family in the Atlanta area, a trip to Highland Woodworking was mandatory. Vernon introduced his grandson, Parker, to woodworking when he was about 5 years old. Parker, a recent GA Tech graduate, has recently started woodturning. His dad, Doug, said Parker has to go to Highland and buy his own Oneway lathe now.
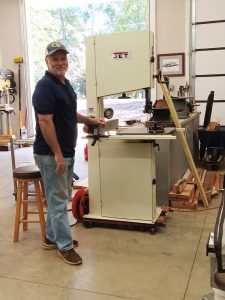
Doug & his wife, Sherri, raised their family in Savannah GA, where Doug had a successful career working for Gulfstream Aerospace. He loved the beautiful woodworking details in the planes and the exacting perfection of what they built. His way of unwinding after a day at work was to work on his lathe for 2 or 3 hours. He says you have to be completely focused to do woodturning, it made him put aside any stress from work & relax. Doug learned from his father & further developed his skills by taking classes and watching master turners. If he saw something new, he took it as a personal challenge to learn to how to do it. Next on his list is turning a lampshade. A bit of a renaissance man, his interests also extend to carpentry, welding, building cars (and planes, of course), and making his own tools.
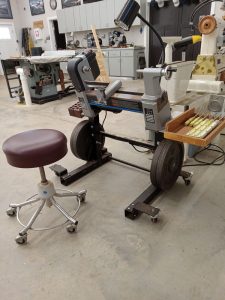
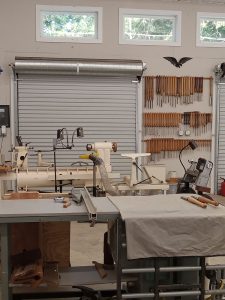
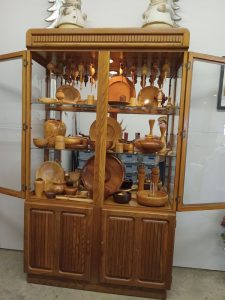
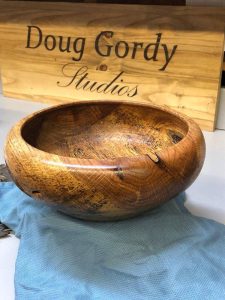
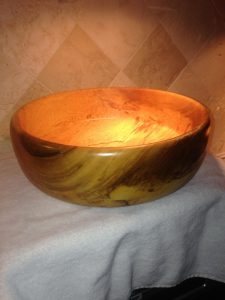
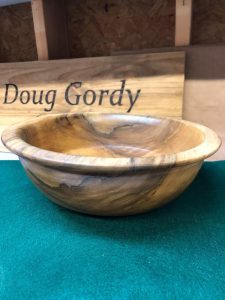
Doug turns pieces on commission, & now that he has retired & relocated to Milledgeville GA, he looks forward to having more time to devote to his art. Now 86, his father customized a lathe so he can continue to turn in their newly completed shop. Doug enjoys turning large pieces, letting the wood dictate the design. He is happy to work with domestic wood, and will go out with his chainsaw after a storm & help clear a fallen or damaged tree in exchange for some wood. He feels he is giving the tree a second life when he creates something with the wood he harvests. Sherri handles all the finishing, with Danish Oil or Teak Oil and various stains.
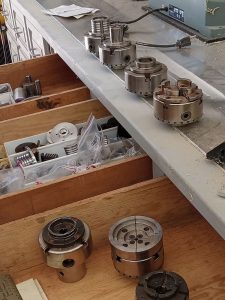
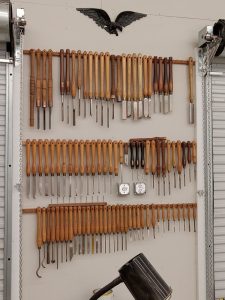
Doug is partial to Sorby Tools. He jokes he now has more tools than Highland Woodworking, and with the exception of the tools he has made, almost all of them came from Highland. Doug says the knowledgeable people at Highland, who have helped his father, then him & now his son over the years are an incredible resource. If there was something he wanted & on the rare occurrence that Highland didn’t have it, they would help him search for it & facilitate the acquisition. They love what they do & their customer service reflects that passion for woodworking.
I recommended trying to build a desk for your first piece of furniture. The standard rectangle with four legs is simple enough for beginners to get stuck in, and will teach you valuable skills that you can use on more difficult projects.
I love using single sheets of ply to create a whole piece of furniture with little to no waste and there are many plans available online that can guide you through the process from initial measurements to putting the finishing touches on your new desk.
Here’s a basic (and free) step by step guide that can take you from sheet to desk with some basic power tools. The basic outline is as follows:
1. Gather supplies. Get your plywood, power tools, pocket hole jig, sandpaper and finish, clamps, wood glue, and fasteners.
2. Layout your pieces on the ply. This will help ensure you get the best use out of your material.
3. Cut out your pieces using your circular saw or track saw.
4. Trim them to size with the miter saw.
5. Dry fit your pieces, and drill your pocket holes for assembling the desk frame.
6. Now it’s time to do everyone’s favorite thing – sanding the surface and edges.
7. Once everything is sanded, you can do the final assembly.
8. When you have glued and screwed everything together, It’s time to put the finish on.
9. All that is left to do now is enjoy your new one sheet plywood desk.
I recommend using a track saw to cut the pieces, but you can achieve the same result with a circular saw, a straight edge, and a couple of clamps. You will also want a miter saw to cut the small angles on the legs.
That’s All Folks
I hope I’ve convinced you that plywood is worth your time – whether you’re a seasoned journeyman carpenter, or a beginner who wants to build something that lasts for years and looks beautiful in your home. Please join us over at Sheet Good to get some inspiration for your plywood furniture creations. You can also find many more posts that delve into all the different aspects of this fascinating material.
A professional cabinet maker and furniture designer – Joel was raised on a cattle farm in Mississippi and has spent the majority of his professional life in Atlanta, Georgia. After obtaining a degree in Industrial Design from the Savannah College of Art and Design, he pursued further qualifications in cabinet making. For over ten years, Joel has specialized in working with plywood, and now operates as a freelance designer for various furniture manufacturers. Find more of Joel’s writing about plywood design and project ideas at Sheet Good.
Working with plywood throughout my career has shown me how versatile of a material it is, how sturdy it is, and how stunning it looks in any space. I think plywood is an incredibly efficient use of natural material that has been engineered to reduce some of the limitations of solid wood, and is now used in almost every facet of our living environments including buildings, cabinetry, furniture – the list goes on. I’m Joel, a plywood geek, and I’m going to take you on a journey and show you why you should be using plywood for your projects too. So pull up a stool (made from plywood, of course) and let’s delve into this world.
Why Listen to Me?
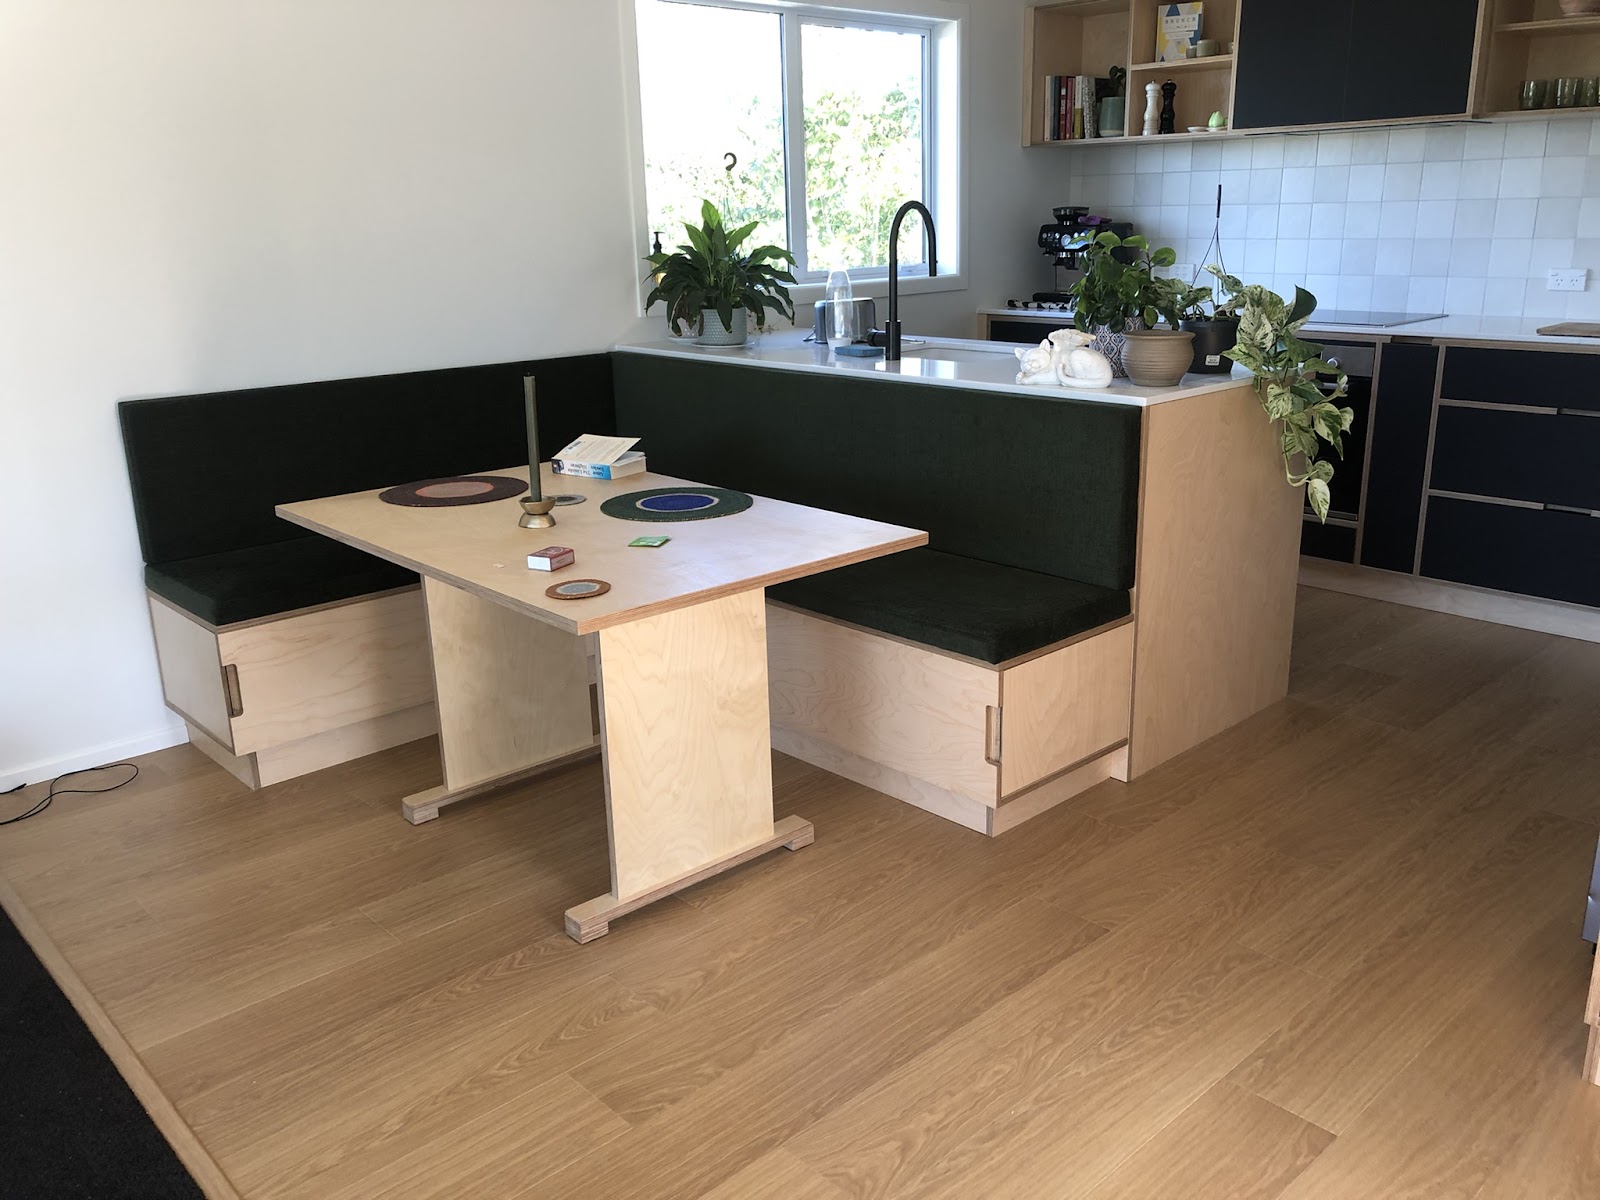
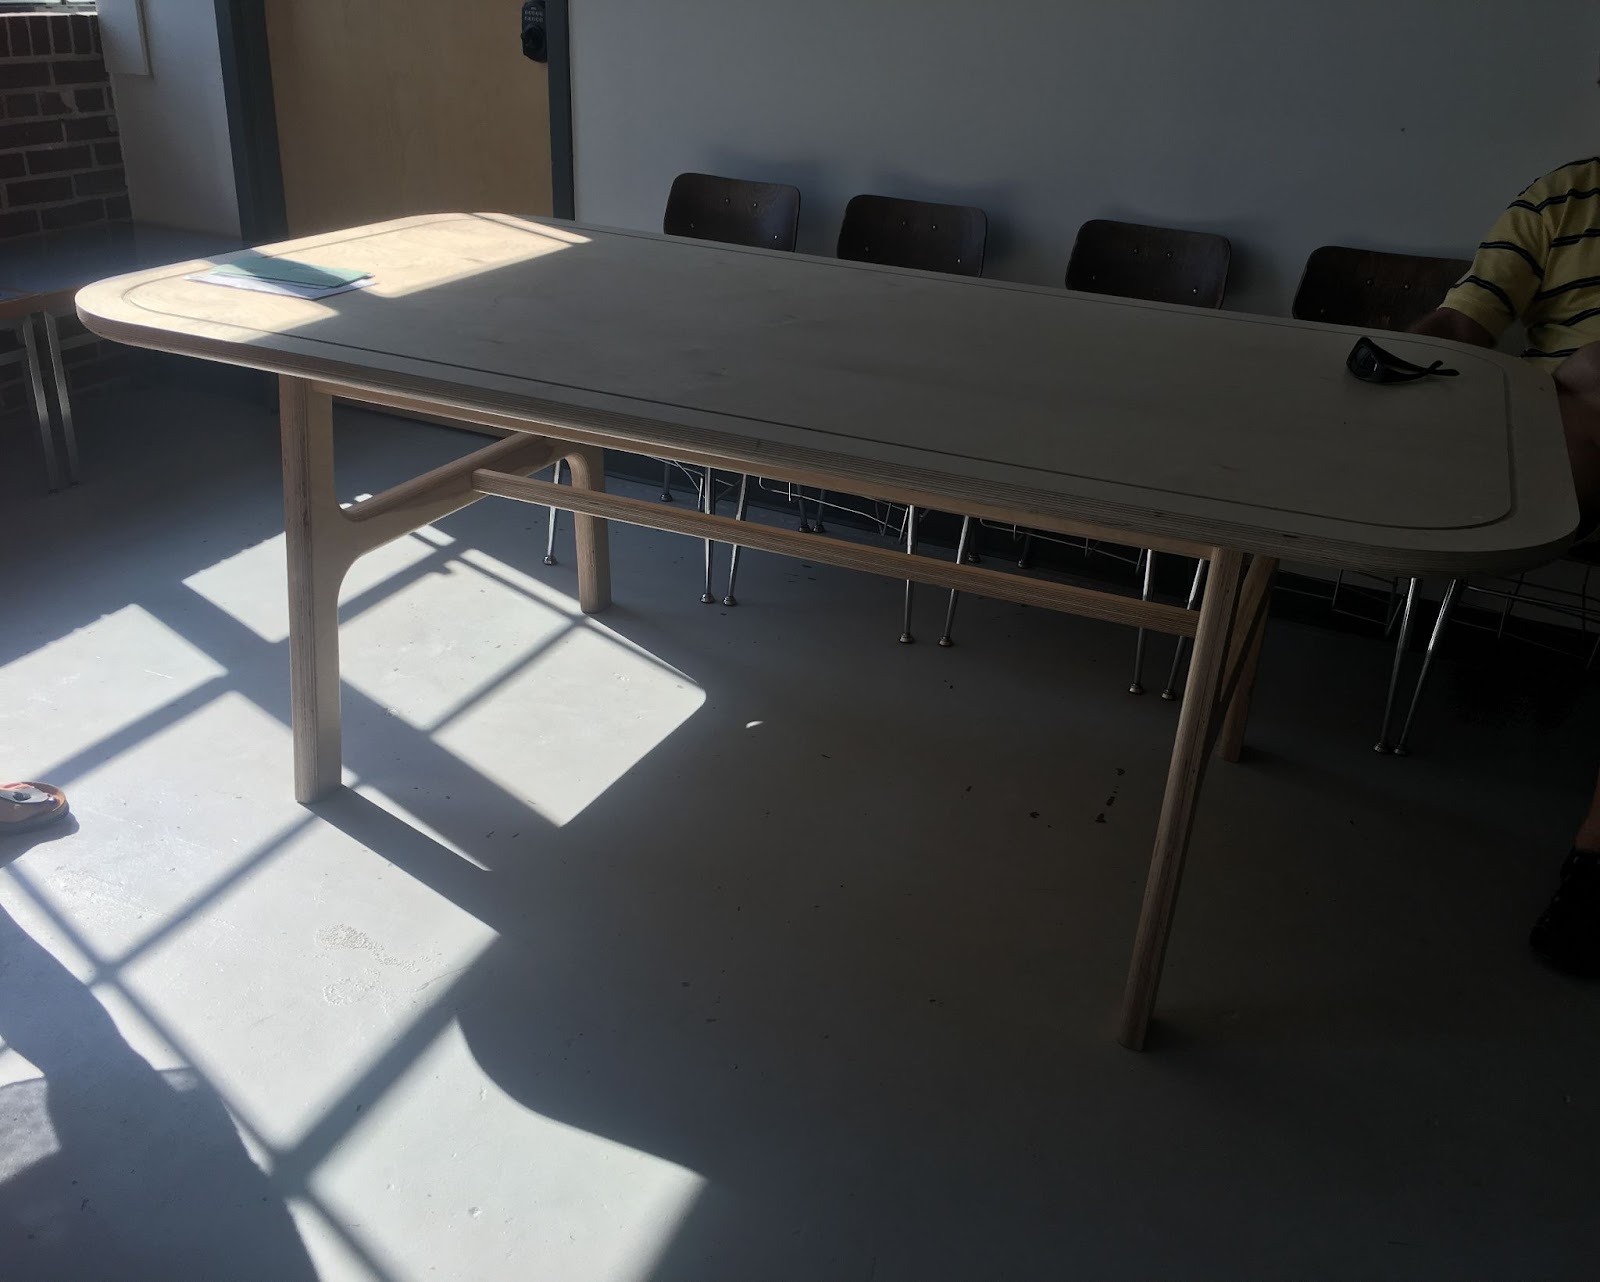
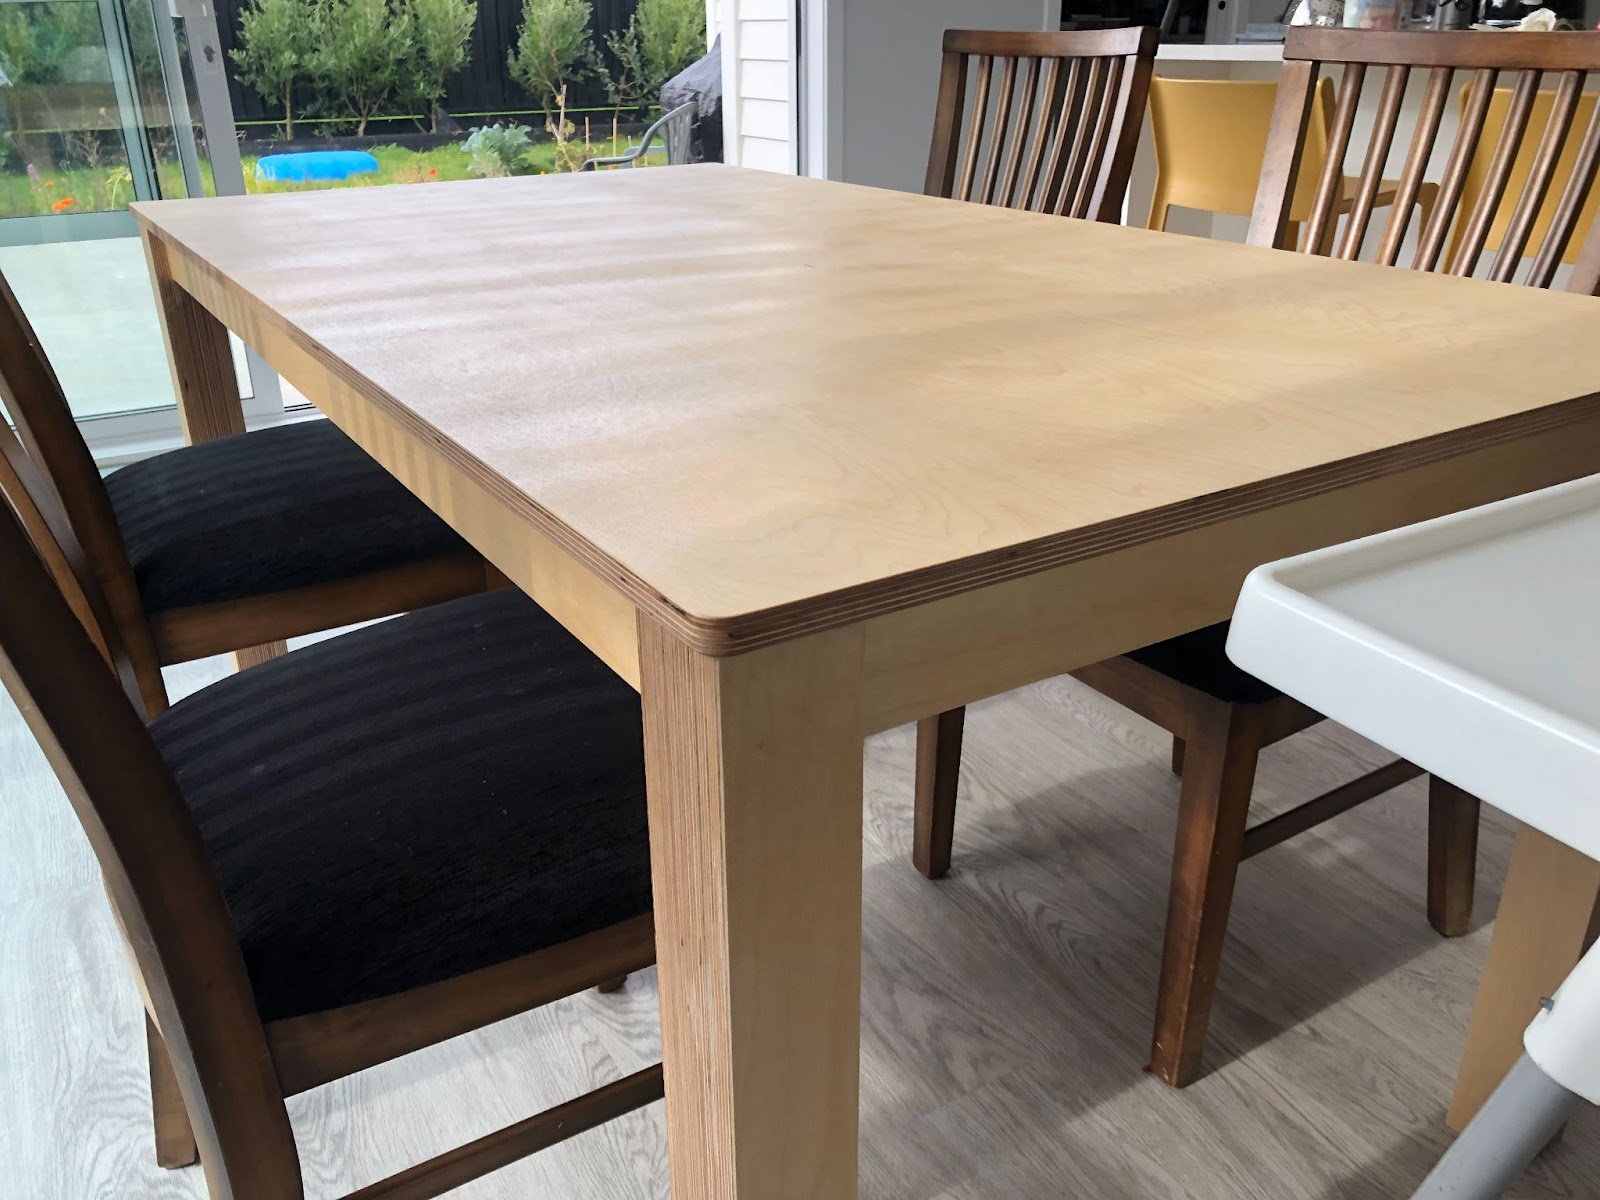
I’ve been working professionally as a cabinet maker and furniture designer for most of my life. I was born and raised on a Mississippi cattle farm but spent most of my professional life in Atlanta, Georgia. After earning my degree in Industrial Design from the Savannah College of Art and Design, I went on to earn my qualification as a cabinet maker. I spent over ten years honing my craft using plywood, and nowadays I work on a freelance basis for various furniture manufacturers. Here’s some examples of my work.
Photo Credit: Joel AndersonPhoto Credit: Joel AndersonPhoto Credit: Joel Anderson
Why Use Plywood?
Let’s get into the nitty gritty – why should you bother with plywood compared to solid woods, fiberboard, particleboard, or any non-wood materials? Let’s start with plywood’s unique composition – Plywood is made up of cross-laminated layers of wood veneer, and because each layer is in tension with the next it creates a dimensional stability not found in solid wood, while still being a lightweight material. Another unique feature comes from plywood veneers being shaved off the raw timber – a bit like an old-fashioned apple peeling contraption. This makes it possible to have large lengths and widths relative to the thickness of material and still be strong across both dimensions. If you’re building something with a large surface area, plywood is a great choice for uninterrupted wood grain.
Plywood is also very versatile, and this makes it useful for a variety of projects that require curved shapes. Thinner sheets can be formed around a frame, or using another technique called kerf bending, that allows thicker sheets of plywood to be bent. Even compound curves are possible by forming your own plywood in a mold.
Perhaps most important when thinking about furniture – plywood is beautiful. A sanded down sheet of ply used to build a table, chair, or kitchen cabinet creates a look that is both subtle yet striking. Depending on the species of tree used, the natural grains can create a light and airy appearance, or a darker and more contrasted look, which will give your space a natural vibe.
Types of Plywood
There are more types of plywood than I can list here, but these will get you started:
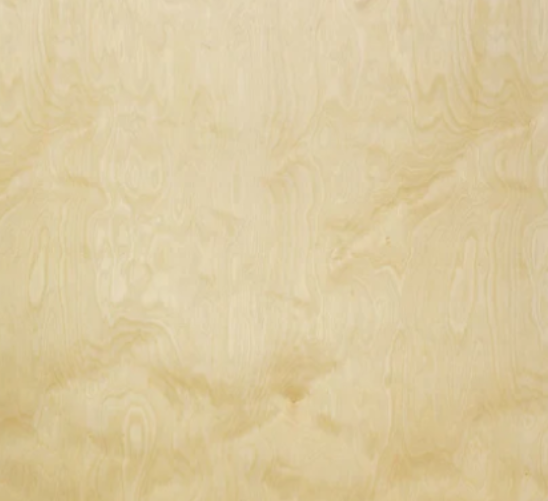
Birch Plywood A hardwood plywood that has good strength, beautiful visible grain texture, and is easy to finish. It is also known for having nearly no voids, so when you cut into it, no nasty surprises are waiting to be found. This is why birch is the most common plywood used in furniture making.
Photo Credit: Joel Anderson
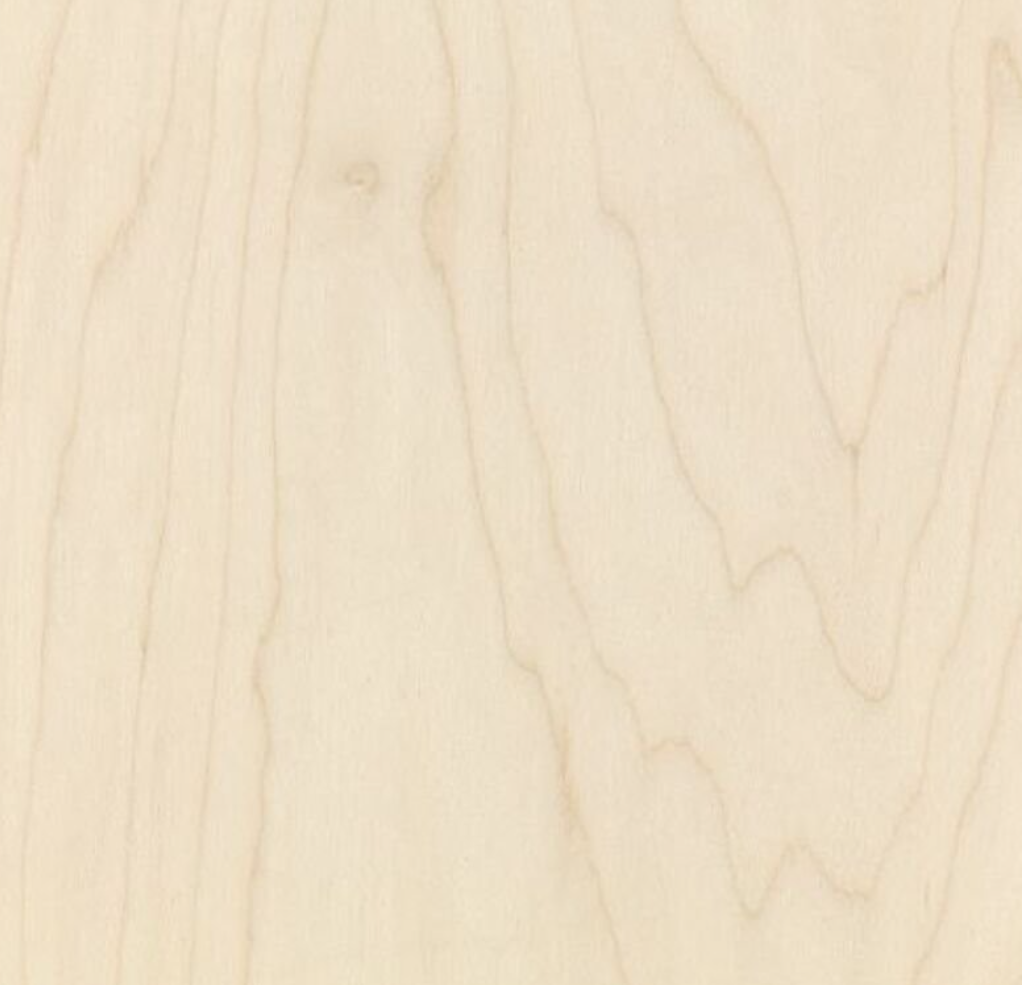
Maple Plywood Another great furniture-grade plywood found in North America is maple plywood. It has superior strength to birch but comes at a higher price. For the majority of projects, birch will get the job done but maple is always an option if you want to check it out.
Photo Credit: Joel Anderson
Veneers Many other species are not great for making plywood or would be prohibitively expensive. This is where veneers come in. Plywood veneers are a common way to apply different species to birch or maple cores so you can get the best of both worlds. This keeps the cost within reason while maintaining the durability and aesthetic strengths of birch and maple. Here are some of my favorites:
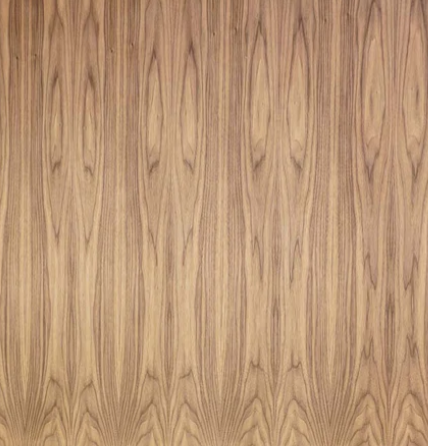
Walnut – The dark rich tones make this an excellent choice for anyone who wants to create a cozy atmosphere with their furniture.
Photo Credit: Joel Anderson
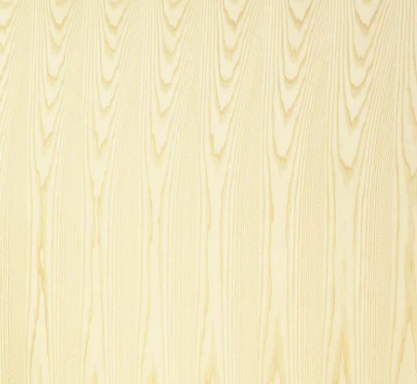
Ash – A cooler and more neutral grain pattern means that this veneer is able to fit into whatever space you want, and adds a refreshing natural vibe whether in your kitchen, living room, or bedroom.
Photo Credit: Joel Anderson
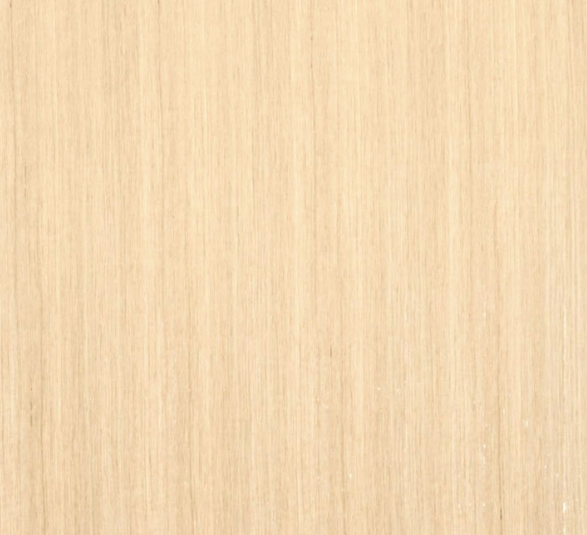
White Oak – I’m sure you’ve heard of white oak, as it’s a popular choice among furniture makers. Beautiful warm tones, but is still fairly light in color.
Photo Credit: Joel Anderson
Grades
It can be a daunting experience to go to a lumber store for the first time and be confronted with the different grades of plywood. What do they mean and how do they apply to the project you’re working on? Let’s break it down:
The rule of thumb is – use Grades ‘A’ and ‘B’ for furniture and features that are outward facing, and ‘BB’, ‘C’ and ‘D’ for anything that isn’t going to be seen by many people such as subflooring or interior walls. • Grade ‘A’ is the highest quality, with very few to no imperfections, and often comes pre-sanded or pre-finished. • Grade ‘B’ is still good, but may have some small knots and may not come pre-sanded. • Grade ‘BB’ is often nearly as good as ‘B’ but may have a handful of patched knots. • Grade ‘C’ will have some noticeable knots and other issues in the wood. • Grade ‘D’ will have larger knots and voids and won’t look presentable. It’s not pretty.
Sheathing, ACX, and CDX – What Are These?
If you see a plywood with multiple grades, that means it will have one side of each – so ACX will have a clean looking side but also a back with more knots and voids. The ‘X’ stands for the exterior grade adhesive which has glued the A and C sides together. These types of plywood are construction plys and can be a great choice for lining a garage, but aren’t really suitable for furniture making.
Plywood Cores
Veneer Cores
These are typically made using 3 or 5 layers for a 3⁄4” sheet of plywood. The layers are made up of thin strips of wood, or really thick veneers. They are made from a combination of a center and crossband veneers that are alternatively layered. This core has great strength and flexibility, but depending on the board the edge is not always the best looking, and can be prone to warping.
Multiply Cores
Multiply cores are usually made using 13 thin veneer layers for a 3⁄4” sheet of plywood. These thin layers create a beautiful edge pattern. The higher number of layers helps reduce warping of the material which makes it a great choice for furniture making.
Plywood Alternatives
Here are some of the other sheet materials you might come across when looking for material for your project.
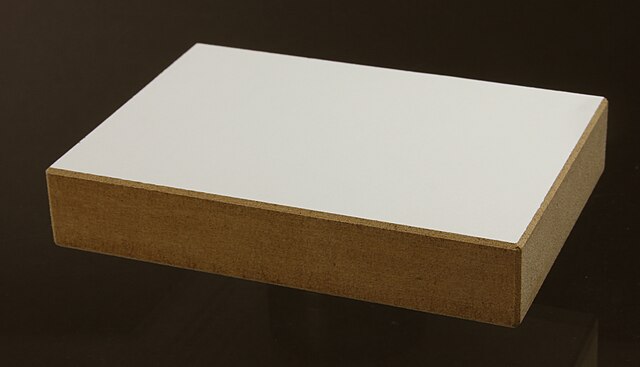
Medium-Density Fibreboard (MDF)
This material is known for being consistently thick and smooth, and this makes it a great choice for projects where you’ll be painting and doing detailed work. However, it is heavier than plywood while being less rigid and more brittle. This makes it perfectly fine for panel projects like cabinets, but not great for furniture.
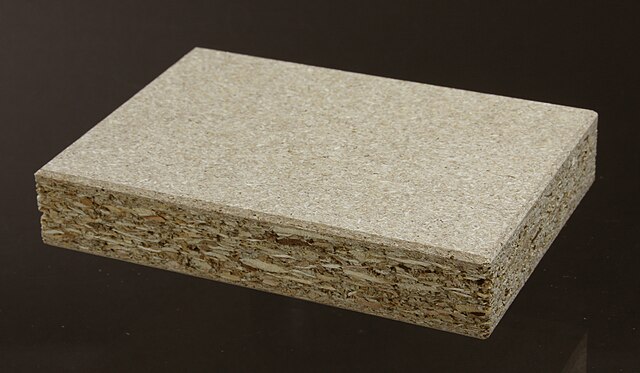
Similar to MDF, this material is made up of small bits of wood that have been glued together and is often covered with a veneer or a laminate on its face. This material is commonly used in flat pack furniture (think IKEA). While it is light and generally quite cheap, it’s not good at taking heavy weight – we’ve all had that one IKEA shelf that finally cracked under the pressure, right?
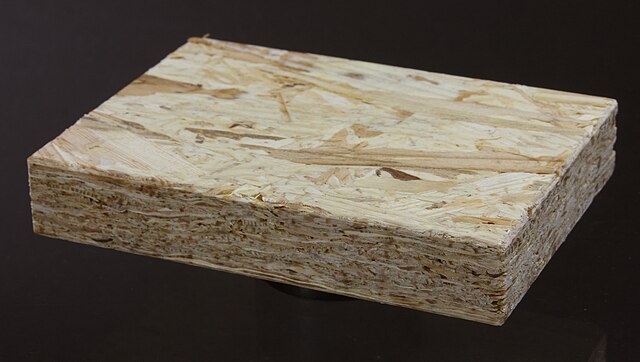
OSB is commonly used as an alternative to plywood, particularly in structural applications like subflooring or sheathing, as it is durable while also being cheaper. The main drawback is that it is more susceptible to moisture damage. It can also look good as a wall covering for a more industrial look. You can definitely use it for shop projects but the fit and finish leave something to be desired.
While these alternatives definitely provide their own advantages, and are oftentimes cheaper than plywood, I think it’s clear that plywood is stronger, more durable, and has a better appearance. When you’re building furniture or redoing your home interior, consider whether you’d rather spend a bit more now to have something long lasting and beautiful, or need to spend more money in a couple of years when the material starts to wear down.
What to Consider When Buying Plywood
As well as checking the grade, also take the time to think about what species of wood you want your plywood to come from – this can affect the aesthetics of your furniture. Something important to take note of is your budget. How much are you willing to spend overall? Don’t forget, mistakes happen, and material can be wasted. If you spend all of your budget on the finest ‘A’ grade plywood but then lose half of it to a poorly placed saw cut, will you have enough to start over? You can always contact Highland Woodworking to see if they have a board stretcher in stock.
Where to Buy
The classics of home improvement in the USA are stores such as Home Depot and Lowes, but they tend to focus on construction grade plywood and the alternatives mentioned above. This can be good for prototyping, but is generally not suited for furniture projects. I recommend asking your local woodworking store or a local cabinet maker where they source furniture-grade plywood. If the big box store is your only option I recommend going with Purebond Plywood – found at Home Depot.
The Non-Plywood Stuff
Highland Woodworking has got you covered for all of your other needs, whether you want to cut, sand, or stain your plywood furniture you can find it all here.
A professional cabinet maker and furniture designer – Joel was raised on a cattle farm in Mississippi and has spent the majority of his professional life in Atlanta, Georgia. After obtaining a degree in Industrial Design from the Savannah College of Art and Design, he pursued further qualifications in cabinet making. For over ten years, Joel has specialized in working with plywood, and now operates as a freelance designer for various furniture manufacturers. Find more of Joel’s writing about plywood design and project ideas at Sheet Good.
Highland Woodworking and Gary Rogowski’s Northwest Woodworking Studio have partnered together to help make woodworking education more available for everyone.
Gary is offering a FREE 2-hour online seminar on Saturday, Sept. 28 at noon ET that will discuss his Online Mastery Program, give a quick tour of the curriculum, show images of design work from graduate students and he will answer any and all questions about the program.
Email Gary at studio@Northwestwoodworking.com to receive the Zoom link for the seminar.
You can read Gary’s latest newsletter at: https://northwestwoodworking.com/newsletter/i-get-it/
Buying a new tool is a lovely day. If you’re like me, you’ve spent hours researching and making sure you’re making the right choice. I spend hours reading forums, watching videos, and trying out demonstration examples when possible. I consummate the relationship with a handful of numbers on a piece of plastic.
Once home, I take every precaution that my new tool suffers no damage while unpacking. I cut the box open with the care used by surgeons upon making an initial incision. With the guts of the box exposed, I gingerly pull out the pieces, one by one, and lay them before me. With a scene reminiscent of an airplane crash investigation sprawled across an unused hangar, I take the manual and begin going over all of the parts. Do I have enough? How do they fit together? Do I need help with this?
Over the next several hours, I start by cleansing every part of what can best be described as Cosmoline (shipping goop). Sometimes it’s really easy (likely it isn’t Cosmoline) and other times it’s an absolute pain in the ass. However, I’ve traded a portion of my life to purchase this tool, so I am not skipping steps now. Once all parts are clean, I play a game of slow-motion Tetris. Part A goes into Part B. Part B connects to Part C… Once everything is assembled, I then spend several more hours applying coats of rust prevention product and making sure angles are what they should be.
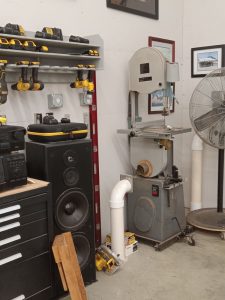
Six months later, I start to notice something. That tool I purchased and spent so much time getting set up is starting to rust. I regularly strip and replace the rust prevention coating, so what’s going on? Unfortunately, my shop isn’t climate controlled. It’s a 2-car garage attached to my house. Temperatures jump up in the summer and sink down in the winter. In the summers, humidity is my enemy. In the winters, condensation is my enemy. In between those extremes, my own stupidity is the enemy.
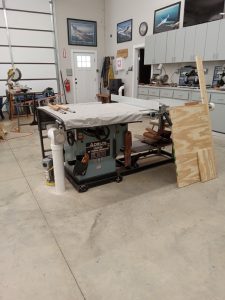
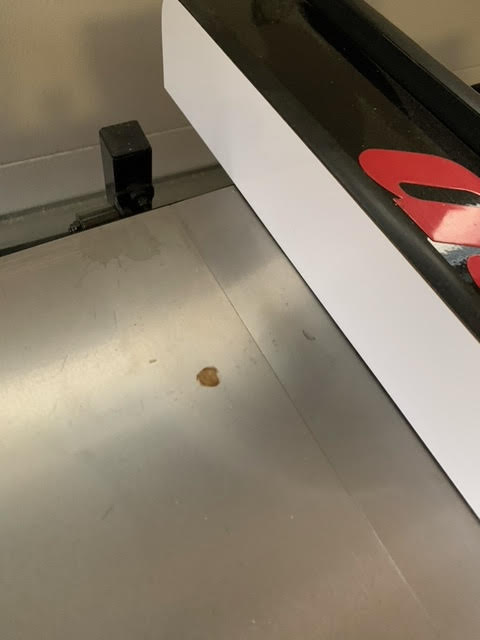
For instance, it was recently raining outside, and I needed to open the garage door to move something from my car into my house. It never crossed my mind that the weather stripping on the base of the garage door would drip water on to my table saw. To my surprise, when I went to start woodworking that weekend, my table saw was covered in polka dots of rust. Even though I religiously rust protect the surface, I discovered it doesn’t matter what prevention I’ve done when it’s just too much water to evaporate before that barrier is broken.
Since my garage is not climate controlled, and I imagine a lot of us don’t have climate controlled shops, the one thing I have found really works well is a dehumidifier. If you can run a hose from it to drip outside of your shop, even better. Manually dumping the bucket becomes an every third day task for me during the summer. However, it has substantially cut down on idle rust in my shop. Idle rust is what happens when temperatures fluctuate throughout the seasons, and aren’t from a specific cause like leaving a dripping wet cold Coke can on your cast iron table.
For direct rust accidents, like that Coke can or a sweaty glove, the one thing I have learned is that it’s perfectly okay to resurface my cast iron. It won’t look as great as it did on day one when I spent so many hours setting it up, but it will function. The key here is to re-surface the entire surface as evenly as possible. Simply scrubbing out the rust with a Scotchbrite pad will only leave a divot where that Coke can sat. If it’s on the periphery of your table, and unlikely ever need to be square, fine. If it’s somewhere wood will regularly come in contact with, you’re likely better off making sure that entire surface matches what you are taking off to get rid of that rust.
Here’s where things may get frustrating, and you may ask yourself if you are helping or damaging your cast iron top. Removing rust will make your cast iron top look different. The grit of the Scotchbrite pad you used will make the top look different than when you first set it up. Most often, the clean lines will turn into what can best be described as cloudy swirls. If this really bothers you, by all means go for higher grits to bring the sexy back. However, functionally, so long as the rust is gone, and the treatment/re-finishing was consistent, it will be fine.
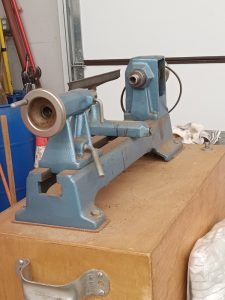
Finally, outside of goofy stuff like opening my garage door on a rainy day, the best way I’ve found to prevent rust build up is to clean my tools after using them. It won’t help as much as the seasons change, thus the dehumidifier recommendation, but it generally keeps the shop rust free. If you spent all night turning a bowl, wipe down your lathe with a dry cloth. If you cut some pickets out of 2×4’s from your local big box, wipe down all surfaces on your table saw when you’re done. While rust prevention options like Boeshield, Renaissance Wax, blah, blah, blah can help, ultimately, keeping your woodworking space clean will serve you much better when trying to prevent rust. That and a dehumidifier.
With an historic preservation grant and vision for a return to the past elegance, the new owners of the Pentagöet Inn in Castine, Maine asked me to create and turn the four new newel posts they needed for the renovated main entrance from the street. Their contractors did an impressive job, and the newel posts […]
Fresh from New York City, the new, young owners of the Pentagöet Inn in Castine, Maine arrived two summers ago to embrace the long history of the Town and especially their beautiful building in a way that is both impressive and sustainable. Their vision and energy as owner/operators/hosts of this magnificent old-time, 130 year old […]