blair

Jul 202015
 

Who says you can’t read a good woodworking book on the beach? We asked our bloggers which books they are looking forward to reading this summer, and they provided us with some great answers. See below for Anne Briggs Bohnett’s summer reading list:

The Anarchist’s Tool Chest By Christopher Schwarz

Anarchist's Tool ChestIf you are a woodworker, or a human, and have not yet read the Anarchist’s Tool Chest, go buy it or borrow from a friend or the library right now. Never before has one book so strongly challenged, inspired or resonated with me the way the ATC has. In The Anarchist’s Tool Chest Chris encourages his readers to disobey our consumerist culture and to invest in a lifestyle and possessions that will last beyond our own years on this earth. He teaches that one simply cannot afford to buy cheap, disposable tools or furniture. His tool list is well rounded and expertly explained, and the tool chest project is one that will challenge you both as a woodworker and a human in ways you would never expect. Buy the book, get started with a few quality tools in your kit, and then buy and cross things off your ATC checklist slowly over time as you practice handtool woodwork and discover your own personal tool needs.

The Chairmaker’s Notebook by Peter Galbert

Chairmaker's Notebook
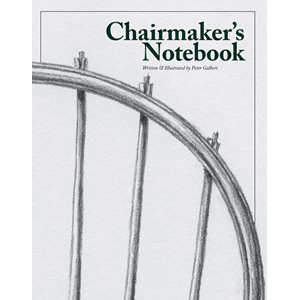
I know I am not the first, and will certainly not be the last to say that Peter Galbert’s Chairmaker’s Notebook might just be the best woodworking how-to book published in this decade. It is said that true experts make even the most difficult of tasks look easy, and Pete is no exception. Simply flipping through the book, looking only at the beautifully drawn illustrations is enough to give anyone confidence to build a chair of their own. This book is extremely informative, is an incredible work of art and should definitely make it on your summer reading list.

The Joiner And Cabinet Maker – LAP Anonymous, Chris Schwarz & Joel Moskowitz

The joiner and cabinet maker
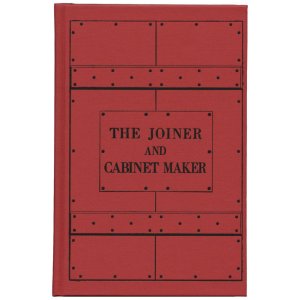
I have often wished there were more books that could continue to fuel my passion for woodwork and yet also possess the ability to retain my attention for more than a few pages at a time. The first part of The Joiner and Cabinet Maker tells the fictional story of young Thomas’ apprenticeship in a cabinet shop in the 1800’s. The second part of the book was created as an addendum to the antiquated fictional text to teach the reader how to build each of the projects Thomas builds in the story. The genius of this book is that it allows woodworker’s the opportunity to envision themselves as Thomas the apprentice, to practice the skills he practiced, and to gain confidence as a woodworker all the while. This is a fantastic book for youngsters, people just getting into handtool woodwork, or seasoned woodworkers looking for a very interesting piece of fiction and a few more projects to add to their lists.

Woodworker’s Guide to Handplanes – Scott Wynn

Woodworker's Guide to Handplanes
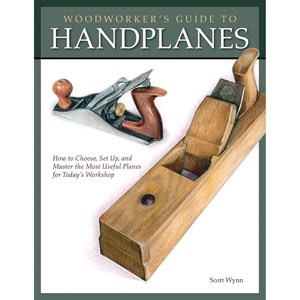
Beginners and experts alike will find all kinds of helpful information about both wood and steel planes in Woodworker’s Guide to Handplanes. Scott Wynn expertly explains the setup process, the intended purpose of different planes and their use. The photos and illustrations within the book make complex concepts very easy to understand. From choosing and buying the right planes to sharpening blades and using your tools properly, this is a must-have reference book for all handtool woodworkers.


Anne Briggs Bohnett is a 26 year old woodworker out of Seattle, Washington. She and her husband Adam own and operate a small farm aimed at teaching youngsters about animal husbandry, traditional woodwork, and it’s also where their food comes from! Anne has been seriously pursuing woodwork with a focus on handtool use for three years and is passionate about the preservation of traditional methods and skills and building community.

Anne can be reached directly via email at briggs.anne@gmail.com and you can check out her website at www.anneofalltrades.com.

Apr 302015
 

Editor’s Note: A few years ago, a couple of well known woodworkers (The Wood WhispererTom’s Workbench, Modern Woodworker’s Association, just to name a few) started woodworking safety week, which later turned into Woodworking Safety Day. This day is tomorrow, May 1st and we thought we would have some of our bloggers share their own woodworking safety stories and tips.

messy-shop

Over the last 20 years, I have worked in several different shops, from welding to woodworking. In each shop, I witnessed quite a few accidents, and in most cases, at least one of three things caused all. The number one cause of accidents that I witnessed was a messy shop. The worst accident I saw was my coworker got his feet tangled up in a rat’s nest of an extension cord while working at the table saw. Instead of paying attention to his hand placement he was paying attention to stepping around the extension cord and ran his hand right into the blade. Three surgeries later, he has partial use of his hand. Too bad SawStop wasn’t around back then.

It doesn’t stop with tripping over cords on the floor. The tangled extension cord can catch you off guard at the workbench as well. I have had the cord of a router tangled up on a pile of stuff on the workbench. While trying to hold the router with one hand and get the cord untangled with the other, I ruined my work piece. Luckily that is all I ruined.

Having a messy shop goes hand in hand with the second stooge of a dangerous shop, and that is being in a hurry. I don’t know how many times I have seen coworkers and I as well use the wrong tool for the job because we were in too much of a hurry to stop and go find the right tool. We run around the shop looking for that clamp to clamp down the work piece to the drill press only not to find it. We are in such a hurry to get back to work on the project we say, “Screw it” and decided just to hold the piece down, only to have it spin out of control when the drill bit catches. A flying work piece often results in smashed fingers, loss of fingernails, or worse yet, stitches. There are far worse examples of being in a hurry that can result in far worse injuries. Using the wrong tool for the job can be devastating. If we hadn’t been in such a hurry we would have cleaned the shop as we went, making it easier to find the right tool for the job.

The third stooge for a dangerous shop I have witnessed is complacency. I may not have seen this one as often as the messy shop or the hurried worker, but it often results in some of the most horrific injuries. It most commonly happens when doing product work, or a repetitive process. When I worked in a welding shop, we had a huge metal shear that would shear sheet metal up to 3/4” thick. My coworker had several hundred of the same pieces to cut out. As the day went on his mind started to wander and he became very comfortable with the operation. Not paying attention (being complacent), he got his finger in between the guard and the work piece. When the shear came down the work piece flipped up and smashed his finger between it and the guard. The pressure was so great it split his finger open and shattered the bone. I changed jobs shortly after that incident so I am not sure how his finger healed, but it reminded us all to pay attention, and stay focused on the task at hand.

These three stooges of danger are not the only dangers in the shop but when an effort is made to prevent them, we can avoid many injuries, save many work pieces from the scrap bin, and have bigger paychecks from not missing work.


Brian Benham has made his lifelong passion for woodworking his profession. He enjoys taking his clients ideas and combining them with traditional woodworking techniques to create a unique piece of furniture.

You can find more about his furniture at http://www.benhamdesignconcepts.com/

You can Follow Brian on Google Plus

Apr 062015
 

When cutting out the parts for a project, I usually start by planning my cut list to cut around the defect, or have the ugliest side of the board face towards the back. I have also filled many knotholes with epoxy, which creates a nice affect. However, before modern day epoxies it was standard practice to inlay a Dutchman over the defect to cover it up. By using a similar piece of wood, one would hope it would blend in, and not be noticeable. But what to do if the defect is too big to use a Dutchman to cover it up?

Rotted_stump_5.7


Well a large defect was what I was up against in a recent project when a customer brought me a cross section of a stump he wanted made into a table. The cross section had an unusual and beautiful shape; it was well worth saving. The only problem was that the center of the stump was rotted out. He left it to me to figure out how to fill it in and make it look good.

My first thought was to try to figure out how do a bow tie inlay across the rotted area, but I just couldn’t make it look right. So I started playing around with cutting a circle to inlay over the section. The circle looked too forced. I finally settled on inlaying an accent wood so it would follow the shape of the growth rings of the stump.

To create the inlay I used a piece of tracing paper and picked a growth ring to trace. I dug through my scrap bin and found a walnut cut off that had a small knot in it, with growth rings radiating out from the knot. I used some spray adhesive to attach the tracing paper to the walnut, taking special care to align the knot in the center. I went to the scroll saw and carefully cut out the shape.

Stump-inlay


Once the shape was cut out, I used an inlay router bit kit, to cut out the inverse shape of my plug to use as a template to cut out the recessed shape on the stump. I fine-tuned the template with sandpaper, used double stick tape, taping it to the stump taking care to align the shape of the template to the growth ring, and then routed out the shape.

The router bit kit did a perfect job of copying the accent plug I made; it fit in place with a little tap from my mallet and was snug all the way around. I glued it in and sanded it flush. The rotted area may have been too big for a Dutchman but it was perfect for a custom accent inlay.

Live_edge_stump_table


Brian Benham has made his lifelong passion for woodworking his profession. He enjoys taking his clients ideas and combining them with traditional woodworking techniques to create a unique piece of furniture.

You can find more about his furniture at http://www.benhamdesignconcepts.com/

You can Follow Brian on Google Plus

Feb 192015
 

brynns-desk-accent-woodMy 7-year-old daughter has an art supply collection to rival most craft stores.  She decided to use these supplies to make me something for my birthday.  That morning she came into my office and asked if she could borrow one of my furniture books to get some ideas.  I gave her Great Designs from Fine Woodworking and off she went.

A few hours later, she brought back my book and her creation.  It was a desk/table thing, and most importantly, a sweet thought my little girl was proud of.  It of course didn’t look anything like one of the pieces of furniture in the book, but it did have many elements.  There where curved rails on the sides, and she even took the time to color in what I think are dovetails.

When it comes to my own designs, I go through a similar process to help me get to my end result and make it as original as I can.  I look through tons of Google images and design books, looking for elements to incorporate into my design.

When I find a piece of furniture that really speaks to me and I want to use for inspiration, I study the design.  I try to determine what parts I like and are drawn to and what parts I am not drawn to.  I keep those in mind as I work towards my final design.

Next, I go to the drawing phase. After I have studied the inspiration piece or pieces for a while, I cover up the photo and redraw it without looking at.  Several things happen as I do this.

First, I have no idea what size the piece is in the photo so I have to decide for myself what size it needs to be.  To come up with the right size for the piece, I think about where I would put it.  If it is for a client, I ask them where they plan to put it.  Often times their needs will dictate the overall size it needs to be.  Just changing the size can change the look and feel of a piece of furniture because all the proportions will end up different from the original.  Defining the overall size is the first step into making it my own style.

Second, is to change the details of the piece.  I can’t remember every aspect of the piece as it appeared in the photo.  This is when the piece really starts to take on a life of its own.  I have to fill in the blanks in my memory using my own experience of how I think things should look.  For example, if it‘s a table I am working on I most likely won’t remember what the original apron looked like.  I will have to decide how far to set the apron back from the edge.  I would have to remember if the apron was set back from the legs creating a reveal or if it was flush with the legs.  Then I have to decide how to join the legs to the apron.  Do I want to use standard mortise and tenons, or add some visual interest by using through mortise and tenon joints?

Then I would have to try to remember the shape of the legs, where they curved at the end, did they start out thick at the top and get thinner as they went to the bottom?  If the legs are one of the elements that  I didn’t like in the original photo because they were too thick, then this is the time to change them by thinning them down or by making it a more gradual curve.

This list of things to remember from the original will continue as I redraw the piece.  There are several things you can change from the original that will change the overall look and feel of a piece of furniture.  Even as simple as using different wood spices or throwing in an accent wood to add visual interest.

By deciding on how to handle all those subtle differences, and by using my own preferences and not referencing back to the original, I come up with something that is inspired by but different from the original.  All those design and construction details, as small as they are individually, add up to big changes.  I had to decide on each of them as I redrew the piece, bringing in my own design tastes and personality.

Many times, I am not 100 percent satisfied with my first redraw.  From that point, I will repeat the process and redraw it several times, tweaking this, that, and the other thing.  Each time asking myself what it is that is not speaking to me, and then changing that until I have come up with a design I am excited to build.

However, it doesn’t stop there.  Once I am in the shop, I may redraw elements of the design full size to get a feel for how the finished product is going to look.  Alternatively, if I can’t decide for sure whether or not the leg should be 2-1/2” or 3” wide, I will mill an extra leg at 2-1/2″ to get a feel for what it is going to look like.  If I like it, I will adjust the design on the fly.  When I am finished, I am always satisfied with my design that is inspired by, but not a direct copy of the original piece.

————

Brian Benham has made his lifelong passion for woodworking his profession. He enjoys taking his clients ideas and combining them with traditional woodworking techniques to create a unique piece of furniture.

You can find more about his furniture at http://www.benhamdesignconcepts.com/

You can Follow Brian on Google Plus


Jan 052015
 

Welcome to our 2015 Woodworking Resolutions blogger series. Every year we invite our bloggers to share their resolutions specific to their woodworking goals for the new year. Click each link below to read our bloggers resolutions!

Curtis Turner

My turning goals for 2015 are mostly about learning new techniques. I hope you will set a few turning goals for yourself in 2015. Have a happy and safe new year.

1.      Improve my metal spinning skills.  I have recently began experimenting with spinning metal on a wood lathe.  While the lathe is the same, the tools and techniques are completely different.  It’s more challenging than I expected.

2.      A sand blasted lidded box is high on my priority list.  I hope to create several boxes for the purpose of experimenting with paint and patinas.

3.      I want to try a few different projects just for fun.  For example, I would like to make a tall pepper mill.  Also a yo-yo or perhaps a few more gavels.

4.      I want to test turning a sphere using a vacuum chuck.  I think I can make the seal work in a way that makes the final turning (reverse turning) process simple.  The vacuum chuck has become my favorite new tool.  So, I’ll be thinking up new ways to utilize this function.

5.      Donating several turned pieces to a charity auction for my state’s arboricultural conference.  You might consider establishing a relationship with your local forestry or parks and recreation departments.  They may be able to assist you with securing some interesting material.  You could in turn offer to give back a few items to display in their offices or to use as a fund raisers.  This could make for a community service project for a turning club.

6.      Finally, my never ending goal of cleaning the shop!  I have chips, dust and logs everywhere.  It always seems that when the logs are mostly processed another batch shows up.  I know, a nice problem to have.


Curtis was the 2012 President of Central Texas Woodturners, a member of the American Association of Woodturners, and a member of Fine Woodworkers of Austin. Curtis teaches and demonstrates nationally for Lie-Nielsen Toolworks. He also owns a studio where he teaches and works. Curtis lives and works in Central Texas with his wife and four young children. Take a look at his website at www.curtisturnerstudio.com

Click below for more bloggers 2015 Woodworking Resolutions:

Dec 192014
 

When designing furniture one of the things that makes a piece go from the mundane, to “WOW that’s a nice piece”, is choosing an awesome looking piece of wood to feature in the project. It could be anything from that great figure in the wood, to the spalting streaks, and even the cracks and imperfections that make it stand out.

Oftentimes when I go to the lumberyard with a design in mind, I am looking for one of those WOW pieces of wood to feature. However, most times I just can’t find exactly what I am looking for. The stack has either been picked through by others before I got there, sorted out before that particular shipment arrived at the dealer, or mother nature just didn’t provide what I wanted that day.

Not all is lost; there are other resources such as veneering, as well as other woodworking techniques that can be employed to mimic the desired piece. Much like in the case of my recent project. I was building a bench and wanted to add a decorative feature by putting butterfly inlays over a crack in the wood. I scoured all of my local lumberyards within a two-hour drive of my shop to no avail. It seemed that the perfect piece of cherry that I could visualize in my imagination just didn’t exist in real life.

Once I was out of lumberyards to visit, I started thinking of other options I could use to incorporate the use of butterfly inlays. I didn’t like any of the options I came up with so I decided to make my own crack.

I started out by jointing the two boards I picked out for the top to be sure I like how they looked together. I then sketched the shape of the crack I wanted on the top and on the ends of the boards. I used a carving wheel on my grinder, various rasps, and sandpaper to create the shape. I worked slowly taking only a few passes at a time and then sliding the boards together to be sure I was on the right track in making a shape I liked.

When I was finished, I had carved a convex shape on one board and a matching concaved shape on the other. The resulting shape made it look like they had been one piece that had split apart. I thought it looked great with the crack in the wood meandering back a few inches from the end.

Before gluing the two boards together, I stained the area I had carved on making it look like the split in the wood had been there for a long time. I think the result was a nice solution when I was not able to find that choice piece of wood in the wild.

Bench Leg View

DSCF4495

Brian Benham has made his lifelong passion for woodworking his profession. He enjoys taking his clients ideas and combining them with traditional woodworking techniques to create a unique piece of furniture.

You can find more about his furniture at http://www.benhamdesignconcepts.com/

You can Follow Brian on Google Plus

Dec 182014
 

Some of our bloggers are still working on their 2014 Holiday Woodworking Tool Wish Lists. Just in case you are still working on yours (or haven’t even started yet!), here are some ideas to get you going. And don’t forget to create your own woodworking wish list on our website by CLICKING HERE.

Today we’ve got Highland Woodturner contributor, Curtis Turner’s wish list:

Why We Make Things and Why It Matters by Peter Korn

A woodworking friend suggested that I should read this book.  It’s not a typical woodworking book it is more inspirational than instructional.

Festool Systainer-1 Box with 1300 Spax Screws

I already use Spax screws.  So, I guess I don’t need 1,300 screws but this is a great selection of sizes and lengths packaged in a useful way. I really “want” this!

Highland Hardware Black Flexible CA Glue – 1 oz.

This looks like it would be helpful in some situations. I have always wanted to try this out.  It will make a great stocking suffer!

Hirsch #7 Straight Gouge – 35mm

I have a similar sized Hirsch bent gouge that is fantastic.  So, I know the straight gouge would also be helpful.  This is similar to the one Paul Seller used for spoon carving in this video.

Japanese Silky Bigboy X-Coarse Folding Saw

I have the smaller version of this saw and it is just awesome.  I had a chance to check out this “Bigboy” saw the last time I was in the store, and it went straight on my wish list.


Curtis was the 2012 President of Central Texas Woodturners, a member of the American Association of Woodturners, and a member of Fine Woodworkers of Austin. Curtis teaches and demonstrates nationally for Lie-Nielsen Toolworks. He also owns a studio where he teaches and works. Curtis lives and works in Central Texas with his wife and four young children. Take a look at his website at www.curtisturnerstudio.com