blair

Dec 262016
 
As another new year is upon us, I have so much to look back on and be thankful for. This past year I was able to travel the country visiting woodworking shops and was even able to squeeze in a few classes. I unexpectedly acquired some HUGE woodworking tools (and when I say huge, I mean a 3,000 lb 36″ antique bandsaw, and a full turn of the century blacksmithing shop). Our farm saw lots of growth and many finished projects. It also brought lots of unexpected interruptions and heartbreak, but we have learned SO much and the hard moments make the happier moments that much better.  The biggest thing I’ve learned this year is to live in the present and stay focused on future goals. As humans, the way we live today creates the world we will live in tomorrow. As woodworkers this is certainly true.
In 2016 I chose two words I wanted my actions within the year to reflect: Gratitude and Grace. Emphasizing those areas helped me grow in some huge ways as a person. It gave me new eyes for our farm, woodwork, and the many opportunities I have been given.
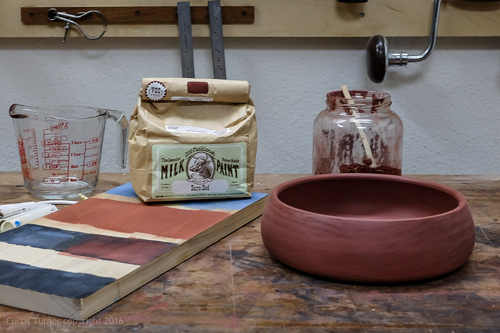
For 2017, I have chosen the word Focus. I want to work on being more focused in every area of my life. I’ve set short and longterm goals (some pretty big ones, about which I can’t WAIT to share), and I want to be working each day towards reaching those goals. I am extremely easily distracted. I love starting projects, and I really struggle finishing them. Between the farm, travel, my job managing the woodworking program at Pratt, the classes I’m taking, and my writing gigs, I cannot afford to continue to allow myself to juggle multiple projects at once in the shop too. So I’ve disallowed myself from starting any new projects, and have been making a concerted effort to cross off every project by the end of December 2016 so I can start January 2017 with an empty bench and a clear head.
I know I’m not the only woodworker who struggles with focus. With thousands of blogs, podcasts, books, videos, and Instagram posts crowding our inboxes and newsfeeds every day, it’s hard to know where to best place our energy. The constant inspiration, the constant exposure to new project ideas and new techniques make it very difficult to even know where to start. If you, like me, start projects based on instant inspiration, move on to other things when you’re stuck, and then struggle to know where or how to pick things back up, here are a few helpful hints on how to stay focused during your shop time in 2017:
1. Thoughtfully create reasonable, attainable short and longterm goals. Write them down somewhere you will see them every day.
2. Make a specific list of projects you’d like to tackle in 2017. Write them down somewhere you will see them every day.
3. Create a shopping list for tools you’d like to add to your kit in 2017, write it down, and don’t stray from it. This will not only help you keep your focus, but will also help your pocketbook.
4. Read those blogs, look at those Instagram posts, watch those videos, and be inspired, but channel that inspiration into the projects you’ve already got going
5. Ask for help- whether it’s needing accountability in how you spend your time in the shop or whether you’re stuck on a project and literally just need help on a specific problem in the shop- there are tons of resources available: online forums, Facebook groups, local classes, other woodworkers in your area.
6. Get a kitchen timer for your shop. Time certain tasks and activities and look for areas to improve timeliness and efficiency. If you have a goal to spend ten minutes sharpening tools, set the timer, and do not allow yourself distractions until it rings.
7. Leave your phone in the other room.
8. Turn off the music/TV in the shop and give your full attention to the task at hand.
9. Before you walk through the door of your shop, have in mind one thing- one small thing you KNOW you can accomplish. Walk through the door and accomplish it. Accomplishing that first thing will give you the confidence to tackle the next thing, and the next after that.
Best of luck and plenty of focus to you in 2017!!

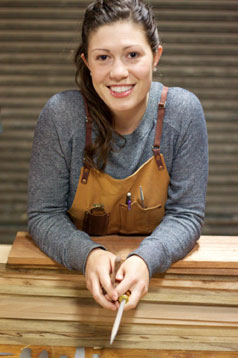
Anne Briggs Bohnett is a 27 year old woodworker out of Seattle, Washington. She and her husband Adam own and operate a small farm aimed at teaching youngsters about animal husbandry, traditional woodwork, and it’s also where their food comes from! Anne has been seriously pursuing woodwork with a focus on handtool use for three years and is passionate about the preservation of traditional methods and skills and building community.

Anne can be reached directly via email at briggs.anne@gmail.com and you can check out her website at www.anneofalltrades.com.

Nov 212016
 

My partner and I live in a large, sloppy rental whose chief merits are an excess of space and the low-stakes-no-stakes upkeep. One room has been entirely devoted to a collection of decommissioned fake Christmas trees (the Forest Room). A taxidermied bobcat lurks on the periphery. I am slowly assembling a hand tool workshop there amongst the branches and twinkling lights. Part of the joy of working here at Highland is the opportunity to try out a wide variety of high-end tools to which I might otherwise not have access (the rest of the joy lies in the constant barrage of terrible jokes). Here are a few I would love to see beneath the tree(s) this holiday season:

The deed to a robust stand of (real) mixed hardwoods to call my own, ideally 10-15 acres in Northern Georgia with a stream. While I’m dreaming, I prefer something at or around $6000/acre. Let me know if you come across anything.

Gränsfors Bruk 420 Small Forest Axe 

The most versatile small axe for casual limbing, barking, light splitting and felling. With a traditional Scandinavian-style head.

Gränsfors Bruk Right Bevel Swedish Carving Axe

Well-balanced and suited for roughing utensils and bowls to final shape. The single-bevel style prevents the axe from turning into the material.

Hirsch Bevel Edge Chisel (Set of 4)

A step up in quality from the Narex, but at a more modest price point than the Lie-Nielsen, I wouldn’t feel bad banging on these with a mallet. They share a common root with my last name (the stag). They’re also available in a wide array of shapes and sizes for carving.

Lie-Nielson No. 102 Low-Angle Bronze Block Plane

Is there anything more lovely? More of a pleasure to use? Probably not. For fine cuts and endgrain work there’s nothing more stable, or that fits better in the [read: my] hand. A perennial favorite of the awards committees.

Japanese Dovetail Saw

Designed by Toshio Odate for cutting hardwood dovetails with a 19” replaceable blade and wrapped bamboo handle. It is smaller and lighter than the Gyokucho Rip Dozuki Saw (made popular by David Barron) and thus less unwieldy for me. The narrow kerf makes it ideal for precise cuts.

Festool ETS EC 125/3 EQ Random Orbit Sander

My favorite lightweight, low vibration, all-purpose sander. With Festool’s exceptional dust-collection system and superb craftsmanship, it’s the ideal sanding solution for a hand tool aficionado who abhors the sound and sensation of hand sanding.

Oct 212016
 

highland-gift-blog-dscf2328-web2

I actually got a jump on the holidays this year! I recently completed this 9″ bowl. I wanted this gift to be somewhat unique. I considered various embellishments but ultimately decided to use milk paint. I tested various samples before settling on Barn Red over Black. I applied 3 coats of red with a sponge brush. I then used medium and fine Scotch Brite pads to smooth the surface. Then, I applied two coats of spray shellac followed by coat of wax. I am very pleased with the deep red color. I actually hate to give this one up.

highland-gift-blog-dscf2252-web1

I enjoy working with different materials and embellishments. I would offer a word of advice on milk paint, or any new technique; practice first. I make an effort to test samples when I am trying something new. I have used milk paint on several turnings and a Dutch Tool Chest. Milk paint is not like other types of paint you may have used. The initial applications are typically splotchy, rough and chalky. It takes several coats of the paint and sanding between coats before the beauty of milk paint becomes apparent. Also, I would encourage new users to mix the paint close to the recommended mix. The paint spreads much further than one expects. The concept of thinning the mix to stretch the paint is a false economy. It quickly becomes apparent many more coats will be required to end up with the same appearance as 2-3 coats of properly mixed paint.

In addition, I recommend a finish be applied. The topcoat can be an oil, shellac, lacquer or wax. The topcoat will slightly change the appearance so a sample board of finishes is also recommend.

I would encourage you to give milk paint a try. It is available in small packages and has almost an indefinite shelf life if stored as directed.


Curtis was the 2012 President of Central Texas Woodturners, a member of the American Association of Woodturners, and a member of Fine Woodworkers of Austin. Curtis teaches and demonstrates nationally for Lie-Nielsen Toolworks. He also owns a studio where he teaches and works. Curtis lives and works in Central Texas with his wife and four young children. Take a look at his website at www.curtisturnerstudio.com

May 132016
 

After 70+ years of joyful working with wood, I thought I had seen most everything, but several weeks ago, something new happened. I had just moved my entire shop to a new location. The move took over a month, and when I arranged everything again, I naturally was very excited to be back into making sawdust. During the move, I had placed a big metal chest with a nice maple top on the outfeed side of my 15 inch planer. It was just the right height to catch boards coming out of the planer, about 1/2 inch lower than the planer outfeed table. As a test, I selected several rough sawn ¾ inch boards and planed them. What a good feeling it was to see them feed perfectly onto my new outfeed table arrangement. No more scrambling to catch the long boards.

dickrank1

The next day I needed an eight foot long by one and one half inch thick piece of pine, so I ran a slightly thicker piece through the planer, a piece I had saved from another project. I watched with pride as the chips flew. But suddenly the planer started rolling backward on its roller base toward the open back door to my outside loading dock. Panic immediately set in. I was on the wrong side of the planer to reach the shut off button, and the machine was heading outside. Fortunately, as it headed for the door, the power cord was pulled to its full length, and the power plug separated from the wall outlet.

dickrank2

Too late. I realized that when I cranked down the planer table to the new thickness setting, the thicker wood being pushed off the planer was lower and would catch the edge of my new off feed table, which weighed about 100 pounds. It wasn’t about to move, and the planer is on a rolling base.

dickrank3

After telling the story a half dozen times, I decided it was time to solve the problem. I noticed a used motorcycle lift on Craig’s List, and drove over to see it. It just might give me a start on building an adjustable off feed table that would avoid my problem. The motorcycle lift platform stayed level as it went up and down, so it was a perfect base for the new adjustable off feed table I needed. A piece of 2×10 pine, a couple of 2×4’s and a five foot long used maple butcher block section from my lumber stash were all I needed to built an adjustable base to raise and lower the off feed table height to match the various wood thicknesses I need to plane. A valve on the lift controls lowering, and a foot pedal nicely pumps the table up when needed. The table top is hinged and swings up from the back, providing nice storage space. A new vertically adjustable work table costs from $400 to $1000. Mine cost under a hundred dollars. Not much money to prevent a planer from escaping from the shop.

May 092016
 

tormekRepetition and practice are often all that are needed to bring about an improved outcome with just about any task. This includes pushing a lawnmower (my kids get better at it with each passing summer), swinging a golf club or tennis racquet, or paring & sawing right to your marked line. Practice and experience, along with a little sheer will power thrown in, propel our species to get better at doing the things we do.

Yet try as we may, oftentimes we can find ourselves at a place where we just get “stuck.” The road to improvement may be right in front of us, but we cannot see the path. Fortunately during these “stuck moments,” sometimes all it takes is a person with a more skillful and practiced eye to share just the simplest of feedback, which then enables us to move forward. Duffers experience this when a golf pro points out the tiniest of adjustment to one’s golf club grip and voilà, the dam holding you back from hitting a nice straight drive suddenly bursts.

The other day I had one of these moments using a Tormek Sharpener and it involved the task of stropping the backs of chisels on the leather wheel. Though stropping a chisel’s bevel on the Tormek can be done using the tool guide bar & the Square Edge Jig for perfect positioning, stropping the back of the chisel is a “freehand” operation, which for me personally meant “the liberty and freedom to screw it up.” The 8­-1/2” diameter stropping wheel gives a good amount of open access to the wheel’s circumference (face). So much so that I was presenting the back of the chisel to the stropping wheel in haphazard random places along the wheel (but hey, I was consistent in my randomness) and thus getting predictable, lackluster honing results because I was slightly “rounding” the edge on the back side of the chisel. Because of this, I had resorted to using a manual flat strop in order to avoid my “rounding errors” when stropping on the wheel.

Of course an easy solution to allow me to hone the chisel back correctly on the wheel was right in front of me, but I was not seeing it. However, once it was pointed out to me, my personal log jam keeping me from stropping successfully on the wheel was joyfully breached.

Turns out the carrying handle on top of the Large Tormek Sharpeners, models T-7 & T-8, is a perfect visual reference for highlighting a center line point at the top of the wheel. At that intersecting point on the wheel, when you draw the chisel back so the end is at that tangent point on the wheel and with the chisel being held level, the back will be flat on top of the wheel, and the honing will happen on the back, right at the cutting edge, and in the “flattest” manner possible. And it just so happens the T­4 model sharpener has a line in the casting that serves as the same visual reference.

I don’t know why I couldn’t see what now seems obvious, or couldn’t figure it out without having to be shown, even after sharpening a good number of chisels. (My hat goes off to “Stig,” the Swedish “Tormek” race car driver, for showing me the glaringly obvious among the merely obvious). I do know this won’t be the last time something appears to be staring me in the face which I cannot see.

Yet in the big scheme of things there could be worst things to overlook. I could miss seeing a MARTA bus speeding by as I step off the curb to cross the road or overlook the fact that I am in fact being stubborn when my spouse calls me so. But for now, I remain “unstuck,” in good health, happily married, and now able to put finely honed edges onto my chisels.

Find out more about the Tormek Sharpening Systems

Feb 182016
 

Working at Highland Woodworking, I’m often asked to assist customers with their band sawing questions, of which resawing is a frequent topic. Fortunately for woodworkers, there are plenty of articles, books and videos for use as reference guides to help one navigate the tricky waters of resawing. Suffice it to say most standard two-wheeled shop bandsaws, with well-adjusted guides set to a blade suited for the task at hand, and with an operator at the helm having a wee bit of experience, will typically offer up satisfactory resawing results. Of course this doesn’t mean that sometimes the waters won’t be choppy on the journey and your results may vary some as you work to find your resawing sea legs. My experience has been that there are always common elements to keep in mind, but as with most journeys, the path to arrive at a destination is not always a singular one or one rigidly set in stone. You may like to reference fully against a long fence, or use a point fence or just scribe a line and free hand the cut. You may be on a small saw with just a fraction of a horsepower motor and so your progress on the journey will happen much more slowly than using a saw that dims the lights in the neighborhood when turned on. There are many elements that come into play as you resaw in your own shop on your own bandsaw.

A recent article in the March/April 2016 issue of Fine Woodworking solidly covers resawing basics and you should find it quite helpful. One thing that resonated with me was the mention of how a consistent material feed rate improves results. This is true of most machining work you do in the shop. I found this out years ago while working in a stair building shop where we would mill up long lengths of custom handrail. The machine we used was a monstrous 5 HP, 3 ph Oliver shaper (it did dim the lights on the block when turned on!) Regardless of how evenly we tried to feed the stock through the shaper, afterwards we’d always need to spend a good deal of time removing the blips you could feel along the rail at each place on the rail’s profile where our hand grip had changed at the time when feeding the long stock through the shaper. When the owner of the business purchased a 3HP – 3 wheeled stock feeder and hitched it up to the shaper, the blips in the milling results completely vanished. The feed rate was so perfectly consistent along the rail’s entire length that the need for follow up hand work to remove milling hiccups was no longer necessary. So yes, an even feed rate can make a big difference in your cutting results.

I don’t mean to suggest you need a power feeder to resaw successfully any more than I would suggest you use your 2-wheeled consumer grade bandsaw to process all the trees on your back 40 lot into prized veneer, with the hopes of creating a retirement nest egg. Some things are just not practical.  The consumer grade shop bandsaws we all use typically can resaw when called to do so, but they are not resawing machines. Bandsaws built just for resawing run blades as wide as your fist. Because we are running a 1/2” or 3/4” wide blade which can twist, and are cutting wood that can & will move as it’s liberated of its thickness, we need to pay a bit closer attention to the set-up and the process to achieve satisfactory results. An even feed rate on our saws comes about from listening, feeling, anticipating (where is my push stick?) and yes, practice.

The other thing in the FWW article that perked me up was that the author, Timothy Rousseau, highlighted how much he liked using a no-frills Sterling brand 3 TPI hook tooth blade made by Diamond Saw. I am very happy to report the blade he spoke of is one we have sold at Highland Woodworking for going on 15 years. In fact, it was the same blade that was a top pick in a Fine Woodworking blade evaluation article back in 2004. It has been a solid performing blade for our customers for a very long time and I recommended the blade as a good choice for ripping and resawing thick stock. The blade is listed on our website as our general purpose 1/2” blade and we keep more than 30 lengths in stock, so we probably have one for your saw. Check it out here:

http://www.highlandwoodworking.com/123tpibandsawblades.aspx

Feb 032016
 

ICWSIn 1947 a small group of wood enthusiasts from around the United States started a society dedicated to collecting wood, naming it the International Wood Collectors Society (IWCS), opening membership to people from around the world. Today there are over 500 members from 32 countries in the society. The founders started the IWCS with an emphasis on the academic collection of wood species, distributing information on collecting wood, correctly identifying and naming wood specimens and coordinating the availability of a standard sized wood sample (3”x6”x.5”) of wood species from members from all over the world. With the availability of so many beautiful woods from IWCS members from across the globe and from a multitude of commercial sources the IWCS expanded its charter to include the crafting of wood.

I became a member because, as a wood turner I was interested in learning more about the different types of wood I was buying. I wanted to know where the wood was from and the woods properties for turning, gluing and finishing before working with the wood. I was also interested to know if the wood was endangered because of over logging versus a species that was regularly harvested from renewable sources.

My membership in the IWCS over the years has provided a lot of benefits. First and foremost I have been meeting people from all over the world who share my love and interest in the diverse variety of beautiful woods. The IWCS has regional, national and international meetings where members get together and trade wood for sample collections and crafting, learn about accurate naming and classification of wood specimens, share information about trees and forests, and promote good ecology and forest management. The annual society meeting is held in the USA every other year and in another country like Australia or South Africa in alternate years. In addition there is a great bimonthly journal titled the World of Wood (WoW) that contains information about IWCS meetings, articles about wood collecting in different regions of the world and detailed articles about different wood species.

To learn more take a look at the IWCS web site at: http://woodcollectors.org. Whether you make round or flat items from wood you will find the International Wood Collectors Society a useful resource.