George T. (Terry) Chapman

Terry Chapman is a Professional Engineer (Civil) and Land Surveyor who lives south of Atlanta. He has done woodworking for many years and particularly enjoys bowl turning and making Windsor Chairs. He currently works as Site Development Manager for a local affiliate of Habitat for Humanity and has one son who pastors a Church in Connecticut. You can email him at cdeinc@mindspring.com.

Jul 012014
 

Father’s Day is just past and I have thoroughly enjoyed my gift from Highland.  I was cruising around on the web site and I came across a set of DVDs called “Hands”.

Hands have always been a topic of interest to me.  My family had a dairy farm when I was growing up and we did a lot of stuff outside and subjected our hands to a lot of abuse.  When I think of my father, one thing I carry with me that reminds me of my father is that little bit of skin between the thumb and the first finger of my hands.  My Dad’s hands were always worn and cracked and that bit of skin (there’s probably a name for it) was characteristic of him.  When I work outside in cold weather, my hands crack and split as his hands did, and that little connection with him now gone for nearly fifty years, reappears on me.  I show it to people who may remember him as I do.

“Hands” is a series of documentary films made in Ireland during the 1980’s.  They document traditional Irish crafts and craftspeople, some of which have disappeared by now, I’m sure.  There are 37 videos on many different subjects ranging from patchwork and lace to hurl making to bookbinding and bespoke handmade shoes.

220910-1

I have a problem in wanting to do everything I see, and when I watch these films I am checking off the tools to see which ones I don’t already have.  Question is whether it is worth while buying the tools and spending the time it takes to get really good at some of these trades.  These people make it look so easy, probably because they have been doing it for generations.   I mean how long does it take to learn to be a cooper anyway?

One thing which I really enjoyed was how the craftspeople all took the filming so seriously.  I noticed that they all dressed for the occasion.  Even in the one where they are making clay pipe for sewers, which has to be an incredibly dirty process, they all wore a nice tweed jacket — almost as if the boss said, all right we are going to be in the movies tomorrow, be sure you look nice.

All in all, a great series of films.   My favorites so far, coopering, bookbinders, and the shoemaker.  I looked up the shoemaker on line and they are still in business.  You can order your own pair of bespoke handmade shoes for about 200 pounds for the first measurement and custom lasts, and then after that, it will cost you about 500 pounds for a pair of what they say are the best fitting shoes you will ever have.  I’m glad they are still out there.

Jan 012014
 

We try to do a Christmas Wish List every year along with a New Year’s Resolution List. A time for reflection on the old year and plans for the new, I always find it a bittersweet time. I have never been one for changes, but this year brought some big ones and the next will bring even more. I’m that guy who just wants to get it all fixed right and then freeze it in place and never have to worry about it again. But alas, that is not always a good thing as the wallpaper in the master bath at my house will attest.

From last year’s resolutions, I did learn to carve last year. I went to the class with Mary May at Roy Underhill’s School and enjoyed it thoroughly. The woman is good! I also went to the John Campbell Folk School and carved a Carousel Horse Head. I learned how to do it fairly well, but I think I have filled my quota for carving for the next few years.

I went back to New Hampshire in the spring and made another Windsor Chair with Mike Dunbar. One of my favorite “Chair”-rities benefited from that one and they were able to sell it at a silent auction for the benefit of some kids.

In August, I went on a two week construction trip (not on the resolution list) back to Vietnam after 45 years. About 40 Vietnam Vets and family went with Habitat for Humanity to build homes for families in the Mekong Delta of what used to be South Vietnam. I recommend it highly — it was a great trip.

Some of the old resolutions from a couple of years ago are still hanging fire. Do they ever expire or do I have to agonize over them from now on? How do you kill them off? So for this New Year, I will make a few new resolutions and try to finish up some of those old ones which are still valid. Here goes:

I will pick out at least two more classes this year. I really like the classes so I can spend a week out of town, learn something new, and be forced into completing a project. I don’t take vacations, I take classes. Highland has many classes scheduled this year and they are easy to get to, whether or not you live in Atlanta. For instance, Peter Galbert is coming back to Atlanta in March for another one of his wonderful classes on chair building. Check the web site for a complete list.

I will try to read all the woodworking books lying around the house. I have a beautiful handmade Windsor Chair (backdoor brag!) full of woodworking books and I need to get through them. Hate to buy books and not read them, but even worst is to buy a new magazine and then come home and realize I bought it before.

I want to continue to volunteer in the New Year and I would urge you to do so. Lots of the people reading this will have skills useful to many volunteer organizations. You know I build with my local Habitat affiliate, but there are over 1600 affiliates in the U.S. There is an affiliate close to you run by good people that you would enjoy being around. Call them up and offer your services.

My Habitat Affiliate We also build houses out of gingerbread.

My Habitat Affiliate
We also build houses out of gingerbread.

And one more left over from last year — Remember the newlywed wife on the flight home to Atlanta on Christmas night 2012? Her six month husband had left just two weeks before Christmas for deployment to Afghanistan. She was headed back to their house on a naval base in the Carolinas, by herself, late on Christmas night, to a dark, cold and very lonely place. He was due home this Christmas 2013. His name is Wade and he’s a Navy Corpsman. I’ve thought about him often this year and I hope and pray and wish I knew that he made it home safely to that lovely young woman. I resolve to honor and remember our military at every opportunity.

Happy New Year!!

Dec 042013
 

For the past few weeks, our bloggers have been hard at work in their woodworking shops. Not only are they working on their gifts for friends and family this holiday season, but they have also been working on their 2013 Holiday Woodworking Tool Wish Lists. In case you are still working on yours (or haven’t even started), here are a few of our own wish lists. And don’t forget to make your own woodworking wish list on our website by CLICKING HERE.

First up we’ve got Terry Chapman:

It’s that time again. I went by Highlan this week to look around at what is new and to see what might catch my eye for Christmas. My son lives way up north in Connecticut and is not the least bit interested in woodworking nor does he have a lot of money to spend on Christmas gifts for me. I feel an obligation to make a list of some of the things I would like to have which do not cost an arm and a leg. I pretty much have all the woodworking tools you can get which cost less than $300 and that narrows the choices down pretty good for a kid trying to survive the heating season way up north on a preacher’s salary.

Flex Arm Work Light

Flex Arm Work Light

Here you go, Jon. I like the Magnetic LED Work Light for my lathe. This light is excellent on many counts. It has a long flexible neck, a magnetic base which goes vertical and horizontal and actually has a switch which turns the magnet off and on (how does that work?). It uses an 8 watt LED bulb which puts out a lot of light and is rated at 50,000 hours. The thing I like best is it puts focused beams of white light about four feet away and will light up the bottom of a turning bowl when I set it on the lathe bed. The only one I have seen which is better is the one my dentist has on a track above the chair to light up your mouth. The dental light probably costs $3000 used. The one at Highland is my choice.

When I was in the store last week, there is a whole wall of what I would call Viking axes. These are beautiful pieces of work signed by the smith who forged it. The one I like best is the Gransfors Bruks Double Bit Axe. If I were a lot younger, I could bring down a redwood tree with this thing. You know those old pictures where the lumberjack is standing on a spring board about forty feet in the air notching out for a saw cut on a 1500 year old tree about 60 feet in diameter, that would be me.

Viking Axes

Viking Axes

Actually, this one is designed for throwing competitions. It even comes with competition axe-throwing rules and the address of the Swedish Axe Throwing Society. How cool is that!!?? They better ship a trauma wound kit with it if I am going to throw it. My first thought when I saw the axe wall — Road Rage!! How cool would it be when some guy cuts you off on the freeway and starts toward you with a baseball bat and you pull out a Viking Axe? Plus think about Show and Tell at your grandkid’s school. Good one.

Double Bit Throwing Axe

Double Bit Throwing Axe

I always like books and there are some wonderful woodworking books out there. Here are a some new ones available at Highland this Christmas:

To Make as Perfectly as Possible by Roubo. This is a new translation of a French classic on an 18th century cabinet shop. Now it sounds like it would be terrible stuff what with no power tools and modern conveniences. What is does have is the back to basics stuff we all need on sharpening tools, selecting wood, staining and finishing, and all the other things you need to dig up from time to time. Nothing but good reviews on this one.

The Practical Woodworker A Four Volume Set by Bernard E. Jones. Originally published in 1916 and recently reissued, this is another back to basics volume. I was flipping through one volume and there is a whole chapter on joinery in “Aeroplanes.” Been a long time since I saw an article about that, but you know it has a lot of good stuff if it has a section on aeroplanes in it. If you are in the middle of a WWI Sopwith Camel and are stuck on how to attach the wings to the body, this may do it for you. Highly recommended.

With the Grain – A Craftsman’s Guide to Understanding Wood by Christian Becksvoort. I am a big fan of Christian Becksvoort. He is so down to earth that he has a blog where he averages one blog entry every three months if he thinks about it. He makes the most beautiful Shaker furniture and I would buy all he makes if I could afford it. He donated a lovely Shaker Candle Stand to the Sabbathday Lake Shaker Village for a raffle. I bought tickets for the drawing on December 7th and I would really treasure that thing. Please do not buy tickets and decrease my chances to win: http://chbecksvoort.wordpress.com/2013/07/23/shaker-roundstand-raffle/. We would all be better woodworkers if we understood our material as well as this guy does. Read this book.

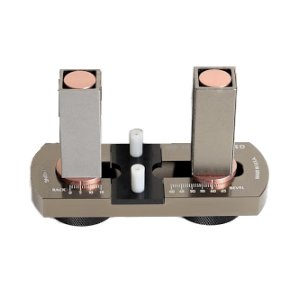
And one last tool is the Galbert Drawsharp by Benchcrafted. This one is high on my list. I struggle with sharpening and I am afraid to sharpen my drawknife for fear I will mess it up completely and make a chisel driven tool out of it. That would be sad because I like what it can do and I am getting better using it. Peter has designed a tool to sharpen the thing and it runs off the rear of the blade for reference.

Galbert Drawsharp

Galbert Drawsharp

Looks like it works like a champ and you can ask Pete about it in March when once again he comes to Highland to teach a chairmaking class.

There you go, Jono.

Nov 062013
 

Well, dern!! It is obvious I cannot live without one of these Galbert Drawsharps.

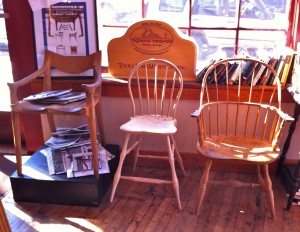
I am a big fan of Peter Galbert and the man is just amazing to me both with his Windsor Chair skills, and his mechanical inventiveness.  I took his chair making class at Highland a few years ago and he is coming back next March to do another one. By the way, if you want to see my chair built in Peter’s class, look in the front window of Highland and see it sitting next to an original Dunbar and an original Maloof. Turn it over and see my signature on the bottom. Not that my skills are worthy of such august company, but hey, there it is. I plan to mention having a chair in the front window of Highland in my obituary many years from now.

Maloof on the left, Dunbar on the right, and (dare I say it) Chapman/Galbert in the center.

Maloof on the left, Dunbar on the right, and (dare I say it) Chapman/Galbert in the center.

Peter started with the Caliper, a wonderful on-the-go diameter-measuring tool for turners. He has moved into Reamers and Travishers for chair makers and now comes the Galbert Drawsharp by Benchcrafted.Drawsharp by Benchcrafted

Sharpening is one of the great frustrations in my woodworking life. And when I take a class on chair making where I use a drawknife as a big part of the work, it is so disheartening  to see someone like Peter take a drawknife and hone it by cutting end grain on a white pine seat blank. Did you get that? He hones it not with a leather strop, but by cutting end grain on white pine. Well, now he has invented a mechanical device, which should allow me to do that too.

The Drawsharp sets the angle of the cutting edge by guiding off a couple of small pegs set in the middle of the device and running off the back edge of the knife. It is all done by hand, quiet and easy and smooth and it looks like it will work perfectly on my drawknife. Maybe now I won’t have to buy a new drawknife just because the one I have is dull.

Go watch the video on the Highland website and see how easily the Drawsharp works. If you have an old drawknife, tune it up and give it a try on a chunk of wood. Clamp the wood in the vise of your workbench and with the flat side of the blade down make a slicing angled cut. Don’t try to dig it in, just pull it towards you and take a thin shaving. Don’t jerk and snatch it along, that’s what happened to Roy Underhill’s half-brother. Just a smooth slicing cut and then come back for another. It’s like petting your cat, don’t go against the grain — always cut down hill. If you are breaking off big chunks or splitting out to the end of the wood, then you are doing it wrong. Turn the wood around. I do not consider myself a huge expert with a drawknife, but I do find myself picking it up much more often these days. It is quick and easy and will remove an amazing amount of material in a very short time. Just think what it might do when it is sharp!

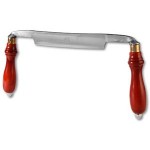
DrawknifeGet yourself a Drawknife, a Drawsharp, and go to work. Shoot, take the class and make a beautiful heirloom chair by hand and people will look at it and touch it and say “how pretty” and “can I sit in it?” And you will say, “yes, please sit in it. People have been sitting in chairs just like it for 300 years and there is not a nail in it and very little glue” and “yes it will hold you up, and there are three kinds of wood to suit the places where it is used and I certainly did make it all by hand, thank you very much!” Then when you walk by it at night on the way to bed and you will touch it once more and smile.

Oct 302013
 

Ever since I managed to cut a circle on a piece of thin plywood several months ago, I have been thinking I need to get the splitter back on my table saw.  I have a 10 inch Delta Unisaw in my shop and after watching Mr. Norm use the same saw for years and years (actually his show is why I bought the saw), in spite of that little message about “the saw guard was removed for photographic purposes”, I took the splitter and the saw guard off and set them in the corner of the shop.

When that piece of plywood kicked back on me, flew by my head and bounced off the wall ten feet behind me, that was a wake-up call sure enough.  I kept looking for alternatives since I really do not like the blade covered up for dadoes and grooves and those partial cuts we always want to make.  I saw the Micro Jig MJ Splitter at the High and since I am not ready to spring for a new table saw, anything that makes this one safer is a good thing.  Starting at $24.99 for the standard duty model, this Splitter is an excellent solution for updating an old saw.

MDF Template with Jig in place for Drilling

MDF Template with Jig in place for Drilling

The package comes with complete instructions of course, but you will need a blank table insert and a piece of 1/2 inch MDF.   The kit comes with four screws, a drill bit and a jig needed to locate the holes required for the splitter to work correctly.  Once you saw a slot in the MDF and attach the jig, drill the holes in the table insert and it is done.  The standard duty model comes with two hard plastic inserts with legs that fit into the holes located with the jig.

I am not a machinist so I don’t deal in thousandths of an inch.  In fact, I love rough framing a house because you can deal in eighths of an inch with no major problems (no cards and letters, please). What was surprising to me was the two inserts are made with different offsets to the drilled holes so you can adjust the splitter to the blade and to how your saw cuts.  Using either side of each insert, you have a choice of four offsets, each of which is 0.003 inches more than the other.  When I had my splitter installed, I popped one in and did a test cut.  I was thinking, “yeah, right, my blade has more wobble than that”.  Wrong–I could not push the board through with the maximum offset on the splitter.  Had to very carefully turn the saw off and pull the board out and try another insert.  The directions say that when you have the correct insert in place it has a “feather board” effect on the cut piece and develops a slight pressure towards the fence at the rear of the blade.  It works for me and I feel much safer with the splitter in place.

Micro Jig makes two versions, the standard with the solid plastic splitters which I bought, and the Pro version, which has four steel splitters with a plastic coating.  I will be interested to see how the standard version holds up in my shop.

The Finished Splitter in place

The Finished Splitter in place

Based on my impression of this kit, I am certainly going to look at the rest of the equipment offered by the Micro Jig people including the GRR-Ripper System and the MicroDial Tapering Jig.  I like what I see so far.

Aug 132013
 

OK, Luddites, how many blogs do you follow, besides this one of course? What’s a blog anyway? Blog is a contraction of “web log” and it is a way to post things on a regular basis on the internet so others can follow what you have to say or see what you are making. I just counted and I follow 19 mostly woodworking blogs. I really enjoy keeping up with other people on what kind of work they are doing and picking up suggestions on something I might want to make.

Screen Shot 2013-08-06 at 9.30.08 AM

You might well ask “BigT, with all the other work you do and the busy schedule you keep building buildings and making stuff and going to classes, how do you have time to check 19 blogs every day?” The answer is I don’t, so I use a Blog Aggregator to keep tabs on the blogs I enjoy. The particular aggregator I use is called “Shrook” and it is free and non-subscription. You can purchase a paid version which will work across all platforms and synchronize all your devices as to what you have read or not. Since I use a Mac, there may be others which are better for other machines, but I am no expert in those matters so you may have to search a little bit or ask your grandchildren. Just Google “Blog Aggregators” and a bunch will pop up.

Screen Shot 2013-08-06 at 9.35.45 AM

How do you find Blogs you like? Well, you might start with a really popular one like Lost Art Press. Then the key which you may not know is to go find the initials “RSS” usually hidden somewhere down in the bottom right corner of the page. RSS stands for “Rich Site Summary” or my preference “Really Simple Syndication”. On the Lost Art Press Blog, it is in the bottom right under “Subscribe via RSS”. Click that after you have Shrook or something like it loaded on your machine and you will get a window asking if you want to subscribe to this blog. Tell the window you do want to subscribe and it will set up your subscription for you. Add as many subscriptions as you want and then when you open Shrook, it will show you all the blog entries that are new and you haven’t read. If you aren’t subscribed to the High’s blog yet, scroll down and you can enter in your email or press this button:

Many bloggers have a blogroll over on the side of their entry to show the blogs that they follow and enjoy. If you go to Popular Woodworking’s Blog Network page you will find a list of around 40 blogs. You can pick and choose the ones you like. Click on some of those and dip in and get the flavor of a few and then subscribe if you like. Or not. Many of those will have their own blogroll and it just compounds and multiplies and pretty soon, you will not even have to time to cut the grass and your spouse will leave and your kids wil desert you and the house will start falling down around you, but as long as you have the computer running, that just means you have more time to read blogs. Enjoy!!

Jun 262013
 

I just got back from a week at John Campbell Folk School in North Carolina. I drove up about two and half hours from South Atlanta on Sunday and made it in time to register and attend the orientation. I met my classmates and the instructor and we went over to our classroom for our initial instruction before we came back to the dining hall for supper.

John C. Campbell Folk School is located in the lovely Great Smokey Mountains of western North Carolina near Murphy. It was founded in the1920’s and is still going strong with something like 800 classes taught each year. Instructors and students come from all over and live in dorms on the campus and have meals family style in the dining hall and then collect for a “Show and Tell” at the end of the week. Last week they had Marquetry, Woodturning, Woodcarving, Wool, Photography, Blacksmithing, Cooking, Native Flute, Collage, and Pottery as I recall.

Something to aspire to, but overwhelming on Day One.

Something to aspire to, but overwhelming on Day One.

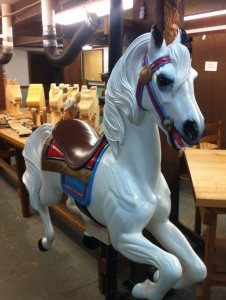
I went to Campbell this time to take a course in carving the head of a carousel horse. The instructor was Ira Chaffin, who runs a sculpture studio over in Birmingham and is a skilled instructor endowed with loads of patience for a bunch of beginners. I learned that since carousels in America turn counterclockwise, the decorations are mostly on the right side of the horse to be visible to folks waiting in line. Horses are different sizes depending on the row — inside, middle, or outside, where they will travel. Outside horses are bigger since the outside row is longer.

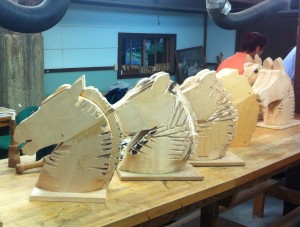
Carving Blanks

Carving Blanks

We started the week with whatever tools we had all brought with us, along with tools furnished by the school, and Ira’s personal tools, plus band-aids all around. I personally started the week with a purist attitude about the tools. If you don’t use classic carving gouges and a wooden mallet, then you are not paying proper homage to the profession. Grinling Gibbons would have been proud. By the end of the week, if I had brought my chain saw, I would have been there with it. Anything to get the wood off and get a horse head.

Ira furnished a carving blank glued up out of two by basswood planks on which he traced a pattern. He cut the horse head on the blank which gave us a good start. After some discussion about grain and how to handle it with a chisel, we were off. One of us had no experience at all, one had lots of woodworking but little carving, and the other was in the class for the second time since she wanted to do some extra on her head. With only three students, we each had lots of instructor time.

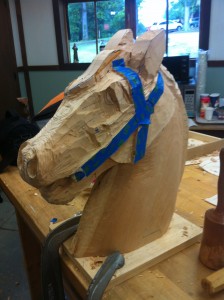
Wednesday Morning

Wednesday Morning

The first day, we carved and carved and carved and then after that we carved some more. And after we had carved a while longer, it was time for lunch. Want to hear the cliches? “Carving is easy, go down to the skin and stop.” “I just look at the block of stone and take away everything that doesn’t belong.” Basswood is soft at the beginning of the day when the tools are sharp. As the day wears on, the tools start to lose their edge, and you get tired, then the wood gets tougher. By the end of day three, it is like carving walnut burl.

When you are just beginning, the biggest fear is carving off too much wood and getting to a place where you can’t recover. The only thing to do is to keep carving down until it gets right again and then you may only have a colt head instead of a horse head. I came up with a new invention, which I am going to try to have the High stock from now on. It answers that fear of too much removal perfectly. I call it the “WoodPutterBackerOner”. I could sell a million of ‘em. Especially at the wood carving school.

I had a great time, I got a decent horse out of it, I met some nice people and I got out of town for a week. I recommend it highly. By the way, I named mine Dan Patch after the song lyric from “The Music Man’ about trouble right here in River City “… stuck-up jockey boy sitting on Dan Patch”. You can look it up.

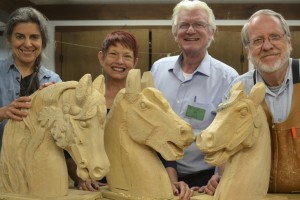
Class Photo Redenta, Marcie, Ira, Terry .

Class Photo
Redenta, Marcie, Ira, Terry
.