Lee Laird

Lee Laird has enjoyed woodworking for over30 years. He is retired from the U.S.P.S. and works for Lie-Nielsen Toolworks as a show staff member, demonstrating tools and training customers. You can email him at lee@lie-nielsen.com or follow him on Twitter at twitter.com/is9582

Sep 122011
 

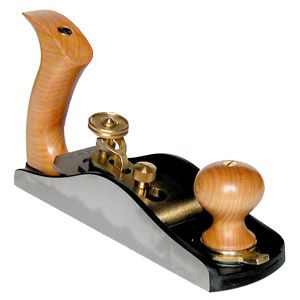
I was working on a future guitar body, and decided I wanted to remove about 3/8” of wood, taking the top wood down to about 1/2” thick. The top is highly figured and already glued up to the body, so I wasn’t sure what I was going to use to make this happen. First up, I decided I should mark the edge of the top, to set the final dimension. For this, I used a Titemark gauge, leaving the mark just a bit proud of the final dimension. After the mark up, I decided to examine a couple of new additions to my personal toolbox. I recently bought two Lie-Nielsen Boggs spoke shaves (one with the flat bottom and the other with the curved bottom) as well as a 3/16” bed float. I’d just put the initial sharpening on both the shaves and the float, so they were ready for action.  First thing that went through my mind was “I wonder how fast this float would remove this excess curly maple”.  I hadn’t tried the bed float on any wild figured wood, so it was yet to be seen. Just to be clear, the bed float was originally designed for plane makers, but I enjoy finding additional usages for my tools.

The first couple of strokes were a bit bouncy, but that was just the wood and tool giving me feedback, and telling me I was pressing too hard. I backed off of my pressure and found the float was just zooming through the wood. I decided I’d work a bevel on the edge, removing almost the full 3/8” of material, so I could test it for potential future usage. I worked the forward edge of the guitar top until it had a nice consistent bevel. This only took a couple of minutes. The wood didn’t blow out or splinter, which was one of my concerns. Certainly different than if I’d decided to use an aggressive toothed rasp.  After checking out the surface, I thought I’d follow it up with my flat bottom spoke shave. Again, it was like a dream, even across the end grain surface on which I was focusing. So even though I’m still going to excavate the whole surface down to the lowest level of this bevel, I used a current project and its excess dimensions to assess the new tools in my inventory.  I like testing them in a situation similar to what I’m expecting in real life. It’s just not the same picking up a 2” x 4”, or other wood completely different than what you’d normally use for projects, to try to get used to a new tool.
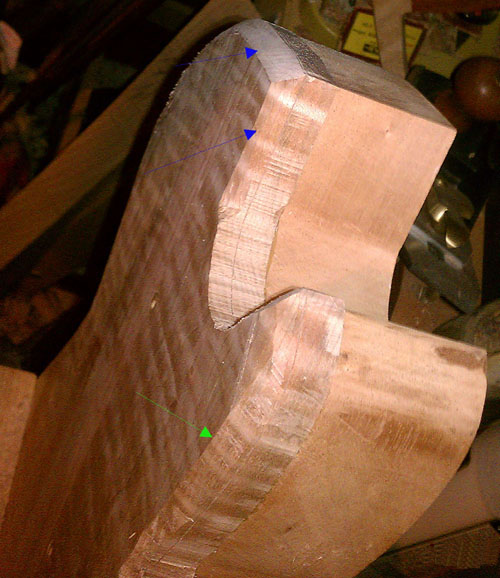
The arrows in the above picture point to the two focused surfaces, where I removed the gross volume of wood with the float, followed with a few passes with the shave.

I’d suggest this type of “live fire” practice for anyone who is adding a new tool to their repertoire. I know I won’t have any worries when it comes time to integrate these tools with future projects.

I hope to see some of you at our events this season, listed on the Lie-Nielsen website.


Lee Laird has enjoyed woodworking for over 20 years. He is retired from the U.S.P.S. and works for Lie-Nielsen Toolworks as a show staff member, demonstrating tools and training customers. Follow him on Twitter at twitter.com/is9582.

Sep 062011
 

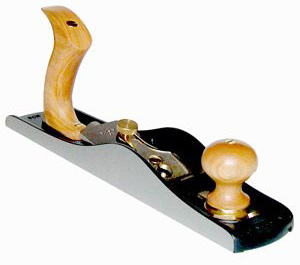
I regularly visit with the customers who attend our Lie-Nielsen events around the country. We have a wide range of attendees, from the well-seasoned woodworker checking if we’ve released a new tool (so they can keep their sets complete) to the new woodworker. We often hear the same question from this latter group: “What is the first plane I should buy?” I like to discuss a customer’s interests and current tools at length so I can provide the best answer. Some who ask this question truly are looking for their first plane, while others are looking to find the best bang for the buck. Many times, both groups will end up finding the #62 Low Angle Jack Plane as a good fit for their needs.

The #62 can be a chimera of sorts, in the plane world. The plane iron is bedded at 12 degrees with the bevel up, and the mouth is easily adjustable, all features recognizable in a Low Angle Block Plane. The length of the plane (14”) kicks it into the Jack Plane category. There are three types of irons available (one standard iron comes with the plane), the standard iron with a 25 degree bevel, the toothing iron and the scraping iron. The low bedding angle of the iron provides excellent end grain planing, with a standard iron honed with a 5 degree micro bevel, finalizing at 30 degrees. With this setup, and the addition of the Hot Dog handle, shooting the ends of boards to that final fit is extremely easy and comfortable. Using the same style standard iron, you can add in some camber and open up the mouth to handle a thicker shaving, and you’re ready to handle some quick stock removal. The toothing iron, with all of its little teeth, works wonderfully on highly figured or crazy grained wood. Since the iron has lots of small teeth, it can remove material without the tendency to dive down into the grain. The surface left by the toothing iron is not what most associate with planing, as it is rough, yet flat. If you follow up use of the toothing iron with a freshly sharpened standard iron, honed at an angle between 30 and 45 degrees, you can make that instrument grade curly maple look like it belongs on that exquisite table/chest of drawers or even high-end guitar. Some woods might not need the extra “toothing” attention, but could still use more than the standard iron alone. For these, the scraping iron can be just the tool for the job. With the low bedding angle, the scraping iron doesn’t sit in the plane like most dedicated scraping planes, but it still presents its edge to the wood in a manner that does a great job.

With the capabilities of the #62, from heavy wood removal in the early stages of stock prep, to finishing wood with a glassy smoothness, to shooting end grain, this is one of the most versatile planes around. If a customer works on smaller scale projects, the length of the #62 could also flatten the wood sufficiently, without the need for a full-sized jointer. Those that are looking for the “most bang for their buck” will easily see why purchasing a #62, along with the additional irons and Hot Dog handle, can make a lot of sense. Even those that don’t think they’ll need the toothing and scraping irons, might include an extra standard iron to keep honed at the higher 45 degrees. This will expedite going between mild grain work to the extreme grain with nothing more than an iron swap.

I hope to see some of you at our events this season, listed on the Lie-Nielsen website.

To take a closer look at the low angle jack plane, click here.

To see Highland Woodworking’s entire selection of Lie-Nielsen hand tools, click here.


Lee Laird has enjoyed woodworking for over 20 years. He is retired from the U.S.P.S. and works for Lie-Nielsen Toolworks as a show staff member, demonstrating tools and training customers.


Aug 022011
 

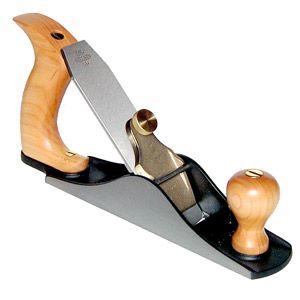
OK, so what plane do most people think about when someone mentions a smoothing plane? A #3 or #4 seems to be most common, but the “smoothing plane” moniker does reach from a #1 on up to the #4-1/2. All are good planes, but there is another choice that is often overlooked, and it just happens to have a bit more flexibility, as well. The plane I’m referencing is the #164 Low Angle Smoother.

The #164’s iron is ground at 25 degrees, and is bedded at 12 degrees with the bevel up. This configuration is ideal for planing end grain, but can do so much more. Many times I will utilize this same configuration of honing angles to plane reasonably straight face grain, with good results. If I start to encounter some difficult or crazy grain, increasing the honing angle of the iron can easily resolve any tearout. Specifically, honing the iron with a 45 degree bevel, which along with the bedding angle, will present a 57 degree cutting angle, resolves many issues with crazy grain. One other feature on this plane that makes a huge difference is the adjustable mouth. This feature allows the end user to dial in the ideal balance of fiber support and chip clearance.

If you are working to flatten a board with very figured grain, another alternative is to use a specialty blade – the toothing blade. The toothing blade has a large number of very small teeth (.030” wide and .030” between teeth) and due to this configuration, does not have the tendency to dive into the grain, like normal irons can. As you might imagine, after using a toothing blade, the wood surface is rough even though the wood has been flattened. You will want to follow up with a freshly sharpened standard iron to finalize the surface. There is one more specialty iron available for the #164. The 90 degree scraping iron. This still beds at the same 12 degree angle, but the edge of the blade is presented to the wood in a scraping orientation, and even though it looks different than many scrapers, works very well.

When I write about sharpening plane irons, there is usually very little difference between one plane and another. The #164, however, has a very unique and sweet blade adjustment system. When preparing the iron for the #164 for the first time, there is one thing you’ll want to do before sharpening/honing. There is a small metal plate attached to the top-side of the iron. This plate interfaces with the overhead Bailey type iron adjuster, and its placement is critical for proper function and retaining the intended full adjustment range. To ensure the plate is the same distance from the cutting edge every time you sharpen, create a reference block on a piece of MDF. To set the block in the correct location, take the iron/plate combo out of the plane, and lay the iron on the MDF. Place it with the bevel facing down towards the MDF, the cutting edge of the iron towards the block, and the non-sharp end off the edge of the MDF. From this position, gently slide the iron forward until you feel the edge of the metal plate, closest to the cutting edge of the iron, make contact with the edge of the MDF. Since the metal plate protrudes slightly, it is easy to feel when the two meet. Now slide the stop block gently up against the cutting edge of the iron. Attach the block in this position, using whatever method available to retain this exact position. I have successfully used a small amount of superglue, on the bottom of the block, to initially hold it in place. Following this, I will use a couple of screws to make the connection solid. Pre-drilling the holes in the stop block is usually a good idea, so there is less chance of splitting the wood. I’ve written elsewhere in this blog about general sharpening. Take a look at that post for more info!

When I work with the #164, I prefer to have a couple of the standard irons, with one honed at 30 degrees and the other at 45 degrees. This expedites the change from end grain work to crazy grain work in moments, by simply swapping out the irons. Then, based on the work, the specialty irons can add to the effectiveness of the #164, getting more bang for the buck, and widening the flexibility of this single plane.

I hope to see some of you at one of our upcoming events, listed on the Lie-Nielsen website.

To take a closer look at the low angle smoother, click here.

To see Highland Woodworking’s entire selection of Lie-Nielsen hand tools, click here.


Lee Laird has enjoyed woodworking for over 20 years. He is retired from the U.S.P.S. and works for Lie-Nielsen Toolworks as a show staff member, demonstrating tools and training customers.


Jul 132011
 

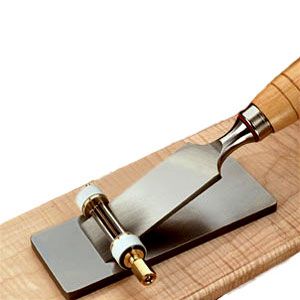
I’ve written elsewhere in this blog about general sharpening. (For example, read “Why Doesn’t This Plane/Chisel Work Like It Should??”). This article will focus on a special honing guide for handling some of the blades/irons that don’t play nice with my usual guides.

I have a couple of new spoke shaves, both of which need an initial sharpening. With the length and width of the irons, they require special attention. If you aren’t using a micro-bevel, hand sharpening is at least within the realm of possibility for many. The bevel is fairly wide, with the iron ground at 25 degrees, so it’s not too difficult to feel whether you are riding the bevel. Since I do utilize a micro-bevel, to minimize the time I spend sharpening, I started looking for a new honing guide compatible with these irons (as well as some other irons/chisels).

I read about a couple of interesting honing guide designs made by Richard Kell.  Both are very similar, with the only difference in the maximum blade holding width. The smaller version will hold chisels/irons up to 1” wide, where the large version will hold items up to 2-5/8” wide. Both versions have two separate wheels that ride just wider than the work being held.  The wheel configuration does limit the guide’s ability to apply a camber. Since my primary intended usage is in sharpening the spoke shave irons, I knew the iron’s width demanded I have the large Kell honing guide. Even with the larger capacity, I can still use this guide to sharpen even my narrowest chisels. With this information, some might question why anyone would buy the smaller guide. On extremely narrow blades/irons, the shorter guide rails of the small version may feel less cumbersome to some, but this is a personal preference.

The Kell guides are unique in that they utilize the guide rods as a reference surface, with the iron/blade riding below them, and the bottom surface against the rods. This can be a benefit if the top surface isn’t parallel to the bottom surface. Many other honing guides hold the iron in the opposite orientation. Just next to the inside surfaces of the wheels, there are replaceable polycarb washers. These washers are what directly contact the outside surfaces of the iron/chisel when clamping. These units place adequate pressure to the iron/chisel, with only hand tightening. Each Kell honing guide comes with a instruction sheet, including data relating to sharpening a range of angles. The data specifies how far the iron should project for each angle. I like to make quick-reference blocks so I can set the projection exactly the same each time. When making my reference blocks, I first set my iron so it rubs the whole bevel when touching the stone. For my irons, the projection distances required just a bit of tweaking to match exactly. Once I have it right on, I put the iron over the edge of a piece of MDF. I then apply some super glue to what will be the bottom surface of my reference block. I put the block up against the leading edge of the iron, and hold it until it is set. This first one is for 25 degrees, so I can refresh the grinding angle, after the micro-bevel has grown with multiple sharpenings. Next, I repeat this procedure for my 5 degree micro-bevel (30 degrees total), on the opposite side of the MDF.

For the actual sharpening techniques, read “Why Doesn’t This Plane/Chisel Work Like It Should??” for a thorough explanation. I still use the same 1000/8000 Norton waterstones for both the micro-bevel (and primary bevel when needed) and removing the burr from the back.

The Kell honing guide is quick and easy to use, and provides repeatable results. I’ve used the guide on some of my Japanese chisels and plane irons, too, with good results. So far I’ve not found any detracting features that would prevent a positive recommendation.

I hope to see some of you at one of our upcoming events, listed on the Lie-Nielsen website.


Lee Laird has enjoyed woodworking for over 20 years. He is retired from the U.S.P.S. and works for Lie-Nielsen Toolworks as a show staff member, demonstrating tools and training customers.

To watch an excellent demo video of the sharpening process, click here.
Check out the great selection in Highland Woodworking’s sharpening department.


Jun 302011
 

When I first started out, I had no formal fine woodworking training, nor any mentors from which to draw. I remember watching a woodworking video (yep, VHS back in the day) with Frank Klausz showing just how quick and easy it is to hand cut dovetails. Of course, after watching that, I had to go buy a back saw, so I could make some exquisite dovetailed pieces. I went to our local fine woodworking store and bought what looked like a reasonable candidate. NOT! I practiced and practiced with my saw, but I just didn’t seem to get any better. The saw cut extremely slowly and seemed to have a mind of its own when I tried to cut to a line.

OK, fast forward to present day. I bought my first Lie-Nielsen dovetail saw (15 ppi .020 thick plate) about five years ago. I had the opportunity to briefly try out one of the new Lie-Nielsen dovetail saws when a friend brought his into our club meeting. It felt like it could make a difference in my skills. After deciding to make my purchase, I couldn’t wait to try out my new saw. The first thing I noticed was just how good the beautiful maple handle felt in my hand. I started out by marking some vertical cuts and a series of angled cuts to run through to get the feel of my new saw. Next I laid out a couple of tails on a board and started cutting. It was just amazing how much difference my Lie-Nielsen saw made. After grabbing a second piece of wood, and verifying that my first dovetailing attempt wasn’t just a lucky fluke, I decided to see what was different about my two saws.

First off, the dovetailing operation is usually cut with a rip tooth configuration, since the cuts are primarily with the grain. When I checked my first saw, I noticed it was filed with cross-cut teeth rather than with rip teeth. (There was that lack of experience on my first purchase!) The thickness of the saw plate was a bit over 1 1/2 times as thick as my Lie-Nielsen saw. My original saw was .032” thick, while my first Lie-Nielsen saw is .020” thick. One other difference that really seemed to be a deal breaker was the amount of set each tooth has, which is where each alternating tooth is bent slightly to the opposite side. My old saw had about .005” of set on each tooth, which allowed the saw to float around in its own kerf, making accuracy extremely difficult. The Lie-Nielsen saw has .003” set on each tooth. This provides enough room so the saw plate doesn’t bind, but not so much that it wanders on its own. Once you start sawing with the Lie-Nielsen saw, it tracks extremely straight.

Lie-Nielsen has an extended line of dovetailing saws. Their first pistol grip handled version has 15ppi teeth and a saw plate thickness of .020”, the next in this line has a progressive pitch tooth pattern (16ppi at the toe progressing to 9ppi at the heal) with the same .020” plate, and the most recent version has the 15ppi teeth but a .015” thick plate. Lie-Nielsen also makes a dovetail saw with a straight handle. This saw has 15ppi and the saw plate is .015” thick. All of these saws do a great job and ultimately choosing becomes a personal preference. I personally prefer the pistol gripped version, compared to the straight handle, as the pistol grip style provides direct feedback as to the position of the saw plate. I would suggest coming to one of our events and trying all four saws, so you can each determine your own preference.

A few of the dovetailed boxes I’ve made

Oh, and just a brief blurb from Frank Klausz, while demonstrating cutting dovetails at our local club meeting a couple of years ago. Frank mentioned the Lie-Nielsen dovetail saw seems to be a bit too sharp when it is new. After he’d used it to cut a couple of hundred dovetails, he said it felt about right. I think this provides a bit of insight as to just how long the Lie-Nielsen saws may stay sharp.

I hope to see some of you at one of our upcoming events, listed at Lie-Nielsen.com.

To take a closer look at the Lie Nielsen dovetail saws, click here and here.

To see Highland Woodworking’s entire selection of Lie-Nielsen hand tools, click here.


Lee Laird has enjoyed woodworking for over 20 years. He is retired from the U.S.P.S. and works for Lie-Nielsen Toolworks as a show staff member, demonstrating tools and training customers.


May 312011
 

The scrub plane is also known as a model 40 1/2. It has similarities to other hand planes, but some distinct differences as well. This tool is used primarily for quick gross stock removal, as opposed to many planes that are usually set for fine finish work. With this in mind, the mouth has a very wide opening, to make certain the thick shavings will not jam. This plane can be used both on the face of boards as well as for edges. Normally the scrub plane is used between 45 degrees and 90 degrees to the grain direction. With the heavy cut of this tool, it can be problematic to use this plane with the grain. Unless the grain is extremely well behaved, significant tear-out is often a result.

I’ve had customers ask why they should buy yet another plane when they already have a Jack plane or a Fore plane set up with a nice wide mouth. When you look at the difference in the irons, I think it will become more obvious why the Scrub plane is an excellent addition to the regular kit. The iron on the Scrub plane is 1 1/2” wide, versus 2” on the #5 Jack or 2 3/8” on the #6 Fore. When working with such a heavily exposed blade, the amount of wood ultimately fighting against the user can be significant. The Scrub plane’s narrower iron allows a deep cut while not overwhelming the user. If you set the blade of the #5 or #6 for the same depth of cut, the width and ultimately the amount of wood removed will make it much harder to handle the cut.

One of the notable differences in the scrub plane is the fact that it does not have any mechanical adjustment for depth of cut. In this way it may seem more similar to wooden planes than most metal planes. There is a cap iron, with thumbscrew, that applies pressure to keep the blade at the desired depth of cut. When first learning this plane’s idiosyncrasies, a good starting point for the depth of cut is to place the plane on a flat surface, referencing the cutting iron with the sole. Starting more shallow is my preference, then apply light taps to the back of the iron to advance the blade in a controlled fashion. Once you become more comfortable with the plane’s behavior, you can sight down the sole to set a reasonable starting point for the depth of cut. Obviously, the less (as in less blade out) is more idea can still be a useful guideline even for the initiated.

The cutting edge of the iron is ground with a 3” radius, which takes a very scalloped cut. The means are different, but the end result surface can be similar to that left from carving gouges. There are a couple of ways to sharpen the iron for the scrub plane (see the youtube video on this subject). If you prefer to hand sharpen, it is easy enough to reference the bevel on your sharpening media, while essentially working the blade both across and pulling it towards your body. This will allow the full radius to make contact with the sharpening equipment. Just remember that a burr is the sign you’ve worked enough on the bevel side. The burr should be removed, after the bevel is sharp, by working the back of the iron on the sharpening media. The Charlesworth ruler trick is again a time saver. The iron is wide enough that it can also be held in many side-clamping honing guides. The guides with narrow wheels will accommodate the range of motion needed to sharpen the complete radius, while providing a good reference.

Using a scrub plane can allow extremely rapid stock removal, allowing efficient progress towards a defined dimension or reference surface. This is especially useful when moving from rough timber, working through other categories of planes (Jack, Jointer, Smoother..) to a final finished piece of lumber, or when dealing with the removal of large amounts of waste wood.

Come give one a test drive at one of our events. You might just be surprised at how useful a scrub plane can be, and how you’ve gotten by without one in your kit. I hope to see some of you at one of our upcoming events, listed on the Lie-Nielsen website.

To take a closer look at the scrub plane, click here.

To see Highland Woodworking’s entire selection of Lie-Nielsen hand tools, click here.


Lee Laird has enjoyed woodworking for over 20 years. He is retired from the U.S.P.S. and works for Lie-Nielsen Toolworks as a show staff member, demonstrating tools and training customers.

May 272011
 

One of our local woodworking stores asked me to do a hand plane demonstration the other day. Since they have a decent stock of products, I just brought a few personal pieces from home. These items were those I did not expect the store would have, but I believed would help add to my audience’s overall experience. I brought an old, not so great shape metal plane, a couple of wooden hand planes I made, some of my sharpening kit (angle setting jig and honing guide), and a small light hammer for adjusting the blade in the wooden planes, as well as the lateral adjustment of the blade in the metal planes.

I arrived at the setting about 30 minutes early, basically so I could take my time setting up before the demonstration started. The employees were kind enough to set me up on a large wooden workbench, which provided plenty of room to spread out the planes and my gear. After they found me some wood to use, I noticed there were no dogs in the workbench. Store management pulled a brass pair from inventory for me to use. After opening the set, it was readily apparent they were the wrong size. The dogs were the standard 3/4” round dogs, but this workbench had massive 1” dog holes. The face vise was still functional, even though all vise handles for the bench were missing.

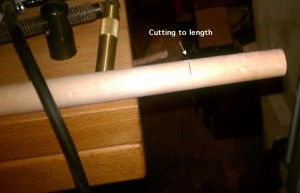
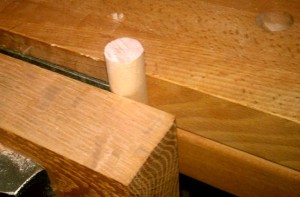
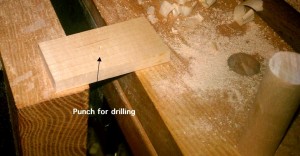
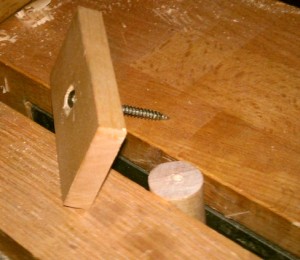
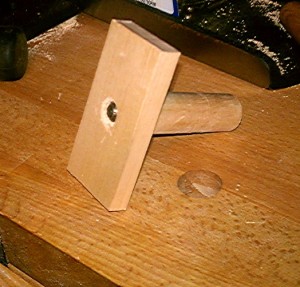
Since I intended to use the hand planes to make shavings, and to allow my audience to do the same, I needed to come up with a couple of solutions on the fly. I asked one of the employees to cut some 1” diameter hardwood dowel into a 3” length. Along with that, I asked for a small rectangular piece (about 2” x 3”) of thin plywood. The two were screwed together, making sure to slightly sink the head of the screw, so the plane wouldn’t hit it. This was sufficient to use as a stop, against which we planed the face side of the wood.

Dowel to length

Dowel in vise

Dog top

Dog almost together

Completed Dog

That took care of one of the two issues. The vise handle was even easier. The remaining section of hard wood dowel, which was about 2 1/2’ long, became a temp vise handle. Since they had no plan for long term use, I didn’t even worry about attaching knobs to the ends of the dowel, nor cut it down to a more manageable length. Whenever I needed to either tighten or loosen the vise, I just slid the dowel into the opening and rotated the mechanism.

Just remember to keep an open mind when dealing with adversity, and many times you’ll find a quick easy solution to your problem.

I hope to see some of you at our upcoming events, listed on the Lie-Nielsen website.


Lee Laird has enjoyed woodworking for over 20 years. He is retired from the U.S.P.S. and works for Lie-Nielsen Toolworks as a show staff member, demonstrating tools and training customers.