Kelley Bagby

I grew up around woodworking tools (see picture, age 4-5ish) but only recently started doing some of my own woodworking.

Sep 022011
 

This is the final post in a six-part series – to go back to the first entry in the series, click here. If you just want to go back to the most recent entry, click here.

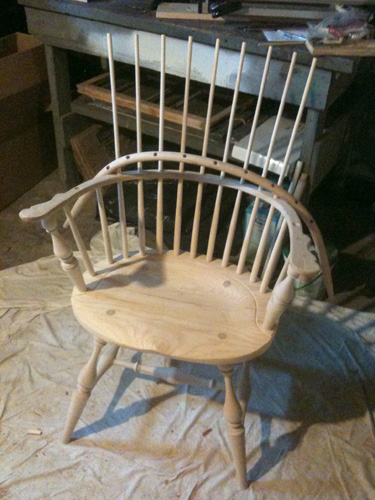
I have built a Windsor Chair.

I still don’t believe that I have any right to claim those words, yet here is a finished chair in front of me, that I put together with my own two hands (with a few assists from some convenient power tools…) Sure, I built it from a windsor chair kit, but does that matter to the beginning woodworker? Perhaps, but only in the sense that I was actually able to complete it, which is only going to drive me onward to the next woodworking project. I can see how someone might get addicted to this.

But let me back up a bit. Last time I posted on this blog, I was expecting a new bow to arrive by mail. When I unpacked it, I immediately set it next to old bow, to get a sense of how much the wood had actually moved due to the humidity. The comparison was impressive, to say the least.
If you haven’t read the previous post, just know that there is an easy solution to this issue, and it doesn’t occur very often at all. Chris Benner, who makes these kits, said he had encountered one other similar situation in all the years he has been selling them. I was just lucky enough and inexperienced enough to let it happen to me. If you have one of these chair kits at home, or are planning to purchase one, just follow Chris Benner’s advice for the bow and you should have no problems:

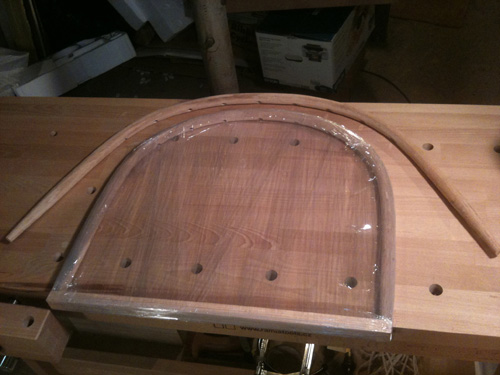
Take a 24? piece of scrap lumber and drill a couple 3/4? holes in it at the center distance between the two bow holes in the arm. Then when you unpack the kit, place the bow in the two holes to keep it from opening up.

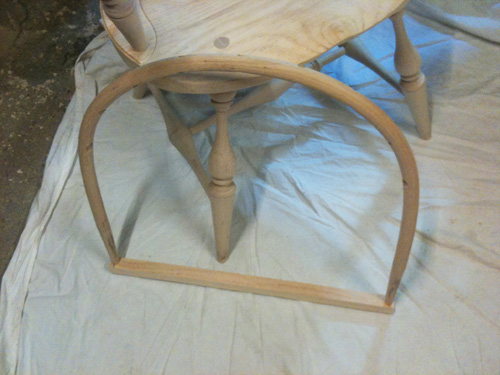
The new bow was delivered already inserted into such a piece of scrap lumber, as you can see here:
Alright, now that I received the final piece, it was time to get back to work. The next step was to install the correctly-fitting bow onto the spindles, so after a bit of sanding, I did a quick dryfit to make sure it really would work, then took the plunge. I applied glue to one spindle hole at a time, then maneuvered the bow to fit over that spindle. After about three spindles were installed on each side, the bow fit well into the arm holes at the bottom. The bow is definitely a close fit, but I suppose that is how it must be for something that you want to last for many years. The last few spindles required that same combination of finesse and brute force that I’ve been developing throughout the chair build, but I eventually got it to fit and sit the correct distance from the base of the chair.

Next I drove a chisel into the top of each spindle above the bow, and then hammered a glue-covered wedge into the space created by the chisel. A bit of dry-time was required at this point, so I took a break to go grab a drink and reflect on how much easier the bow installation process had been then what I had imagined. I wonder if I’ll hit a point someday where I’ll stop doubting my capabilities to the point of sometimes being afraid to go forward with a woodworking project. It is refreshing to jump into a project like this on a regular basis and try something that I don’t already know how to do.
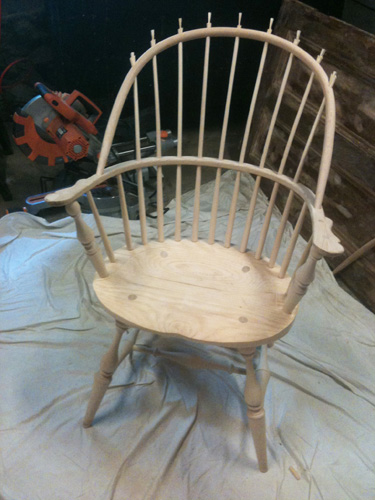
After sufficient drying and reflection time (i.e. once I finished my drink), I came back to cut off the spindles close to the bow, then sanded down what was left. I drew this part out a bit more than was probably needed, realizing that I was close to completion. It’s a bittersweet moment when you realize that all of the work you’ve done to finish something is at an end. After one last sanding pass, Voila – we have a chair.
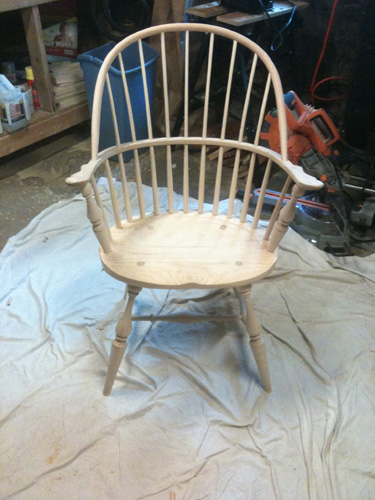
Now of course, there is the matter of how I am going to stain or paint the chair, and I’m going to put a bit of thought into that. Painting would do a better job covering up the little mistakes that I know are there, but if I stain the chair and can see these little mistakes every day, they will act as reminders of what I’ve learned from each mistake. I haven’t decided yet which tactic I will take. I am proud of this chair, mistakes and all, so maybe I’ll just go with what I think will look the nicest.

A few lessons I’ve learned in this process:

  • scheduling woodworking doesn’t always work out. I imagine all the experienced woodworkers who read my words in that first post about the schedule I was on responded by saying “Good Luck with that!” And they would have been right. For future projects I will try to be flexible with my time schedule, but it is probably good to have it in place at the start so I will stay motivated to keep going.
  • Improvisational woodworking is not a bad thing – I used this experience as an opportunity to improve my skills with a number of different tools, including jigsaw, sander, coping saw and chisel. And next time I’ll have a better sense of which tool works best for each scenario.
  • I think it was critical that I read the instructions several times through before I started. Improvisational woodworking and learning as you go are at their best when you know where you are going next. Reading the instructions allowed me to stop and ask questions at times when I wasn’t sure how to proceed, and really learn something in the process.

So now that I’m done with this project, what should I do next? Oh, the possibilities…

Aug 312011
 

The Highland Wood News has recently introduced a new monthly column, by popular demand. It seems there are quite a few woodcarvers in our ranks, and we’d like to give them a little more attention on the pages of Wood News. So we’ve started the Show Us Your Carving column, in which a different woodcarver’s projects will be featured each month.

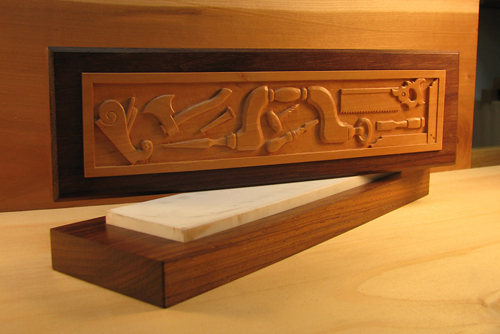
This past month we featured the work of Kari Hultman, who you may know better as The Village Carpenter. Kari has been writing a really excellent woodworking blog for many years, and it is always a fun read. Although she has been working with wood for almost 19 years, she has only recently attempted relief carving. Looks like she has already taken to it beautifully though! Take a look at one of her impressive pieces below, and CLICK HERE to read the entire column, which features more of her carving works.

If you are interested in having your work featured in a future Show Us Your Carving column, we’d love to get PHOTOS of your favorite woodcarving projects along with captions and a brief history of your woodcarving. (Email photos at 800×600 resolution.) Receive a $50 store gift card if we show your carving work in a future issue!

Aug 302011
 

Terry Chapman attended Peter Galbert’s Windsor Chair class last year, and he had a ball. Today we are taking a look back at the writing he did for our blog that week, in anticipation of the new week-long class that Peter is offering at Highland this year starting October 31st.

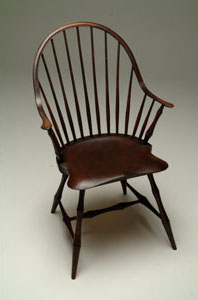
This year’s class features a beauty of a chair – the continuous arm windsor, an icon of American furniture. If you’ve ever wanted to build yourself an heirloom piece of furniture that you can pass down to your children or grandchildren, Peter’s class is a great way to make this happen.

And if you want an insider’s perspective on what the class is like, click below to take a look through Terry Chapman’s posts from last year – you won’t be disappointed, but you will be entertained.

2010 Peter Galbert Windsor Chair Class, Day 1

Ready to sign up to make your own piece of heirloom furniture? Click here to find out more about the Continuous Arm Windsor Chair class being offered this fall at Highland Woodworking by Peter Galbert.


Aug 292011
 

Highland Woodworking is pleased to introduce you to Curtis Turner, our newest contributing writer to The Highland Woodturner. Even though he has been a “Turner” his entire life, he knew turning was a skill that required the guidance of a master to develop it fully. He worked closely with an experienced turner, who helped him train his eye (and hand) to blend curves, develop pleasing forms and sharpen tools efficiently.

The guidance he received in his early days of turning has convinced him that success in woodworking credits back to both formal instruction and membership in a community of woodworkers.


Aug 262011
 

This is the fifth post in a series – to go back to the first entry in the series, click here. If you just want to go back to the most recent entry, click here.

Here is where I realize why it is good to learn about wood fundamentals when starting out in woodworking, and why experience really counts. It turns out I achieved the perfect storm of conditions required to make a steam-bent piece of wood (in this example, the bow that was going to go on my chair) start returning to its original straight form.

The chair kit is originally wrapped all together when you receive it.

I opened up the kit in mid-June, and then circumstances caused me to delay starting for a week. After a slow start, a two week trip out of town, and a busy July, I had finally progressed to the point of installing the bow, which by that point had been sitting, unwrapped, in the humidity of my basement for a good two months.

The bow and the arm, still wrapped together (the bow is under the arm) - the arm helping to stabilize the curve of the bow.

The ‘unwrapped’ part is key – the chair kit is delivered with the bow and the arm taped together, and the arm is stable enough that it generally does a great job helping the bow to hold its curved shape. If you do unwrap the bow, Chris Benner (the maker of these chair kits) has the following advice:

Take a 24″ piece of scrap lumber and drill a couple 3/4″ holes in it at the center distance between the two bow holes in the arm. Then when you unpack the kit, place the bow in the two holes to keep it from opening up.

Now what I should have done when I realized my bow had already opened up too far is to soak the bow in hot water and then fit it into the piece of scrap lumber as described above. But not knowing yet that there was a problem (and being generally pretty gung-ho about the chair at this point – it really has been inspiring to see it nearly complete!) I pushed and tugged and tried with all my might to make the bow fit, until I heard a nasty splitting noise that did not sound right. When I pulled the bow off the chair, I saw that I had cracked the wood at one of the spindle holes. Nothing too terrible, but enough that I would need a new bow to complete my chair now. See what I mean about a perfect storm?

If you have purchased one of these chair kits, or are planning to, the answer for how to keep the bow sufficiently curved is actually quite easy. And a great lesson if, like me, you just didn’t know the right questions to ask.

You can either: 1. Complete the assembly, from unwrap to bow installation, in less time than I did (i.e. less than 2 months!); 2. Live in a less humid climate, or do the chair assembly in the winter instead of the height of summer; 3. Use Chris Benner’s brilliantly simple solution of creating a form with scrap lumber to maintain the curve while you are finishing the rest of the assembly; or 4. If all else fails, when it looks like the bow isn’t going to fit, consider soaking it and fitting it into the piece of scrap lumber as described above so it regains its previous curved form. And 5. if all else really fails and you end up with a cracked bow like I did, give us a call at Highland, and we’ll make it right.

Ready for the new bow to arrive!

Now that I’m waiting for my replacement bow to come in the mail, it seems like all i want to do is work on my chair. Funny how that works. I’m so close to the end I can practically taste it – maybe that was the extra bit of motivation I needed to complete the home stretch. More about that next time – see you then!

This is the fifth post in a series – to read the next entry, click here. To go back to the first entry in the series, click here.

Aug 252011
 

This month’s edition of The Highland Woodturner is now available! This month we’ve got a new column from woodturner Curtis Turner, who appears by his name to have been born into the craft. He makes some compelling arguments for why you should consider taking a class if you want to advance your woodturning skills.

We’ve also got a new article and video by Woodturning Snob Terry Chapman about another of the Easy Wood Tools turning tools, the Easy Detailer. Phil Colson provides a great tip on keeping wood finishes fresh for your next woodturning project, and Larry Sorenson displays his ‘Three Mile Island’ vases, turned out of some stunning olive wood that was destined for the firepit.

Throw in a couple of great deals on woodturning tools, and you’ve got the latest and greatest of The Highland Woodturner. Check it out!

Aug 192011


Highland customer Kerry Lancaster had just completed an addition on his workshop and realized he needed a workbench besides his tablesaw, which was currently doing double duty. Inspired by a book he purchased in Colonial Williamsburg, Kerry studied plans, gathered his materials, and started building his own Andre Roubo Workbench.

CLICK HERE to read his story.