Jim Randolph

Aug 042015
 

No Southern-fried Southern boy wants to be called a Yankee, but we share the characteristics of shrewdness and thrift.  Thus, each month we include a money-saving tip.  It’s OK if you call me “cheap.”

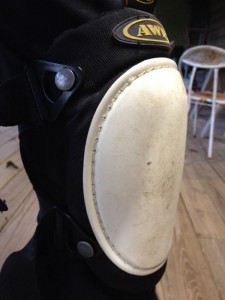
Woodworkers spend a good bit of time on their knees.  Praying for guidance and safety before each working session in the shop is a good way to get started.  Kneeling to work on the floor or work on the bottom of a piece is a common position too.  Kneepads are a good invention even though they restrict blood flow to the lower legs, are really hot and can pinch the skin behind the knees.

Kneepads are great, especially if you’re working in numerous locations distant from each other. However, they have some drawbacks.

Kneepads are great, especially if you’re working in numerous locations that are distant from each other. However, they have some drawbacks.

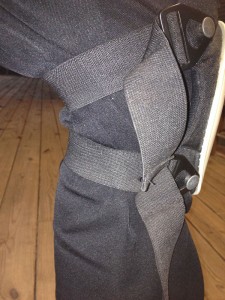
Spend much time on the floor with these straps binding behind a flexed knee and you’ll feel them digging in to you.

Spend much time on the floor with these straps binding behind a flexed knee and you’ll feel them digging in to you.

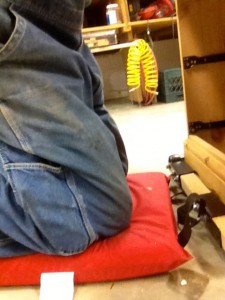
An economical alternative is a throwable PFD (personal flotation device) for kneeling.  It’s thick, soft, durable and withstands getting wet.  It has not one but two handles for hanging when not in use, and is easy to move from one position to another.

A throwable PFD is a comfortable, durable, economical choice that protects the knees while offering a soft, cushioning effect.

A throwable PFD is a comfortable, durable, economical choice that protects the knees, while offering a soft, cushioning effect.

—-

Jim Randolph is a veterinarian in Long Beach, Mississippi. His earlier careers as lawn mower, dairy farmer, automobile mechanic, microwave communications electronics instructor and journeyman carpenter all influence his approach to woodworking. His favorite projects are furniture built for his wife, Brenda, and for their children and grandchildren. His and Brenda’s home, nicknamed Sticks-In-The-Mud, is built on pilings (sticks) near the wetlands (mud) on a bayou off Jourdan River. His shop is in the lower level of their home. Questions and comments on woodworking may be written below in the comments section. Questions about pet care should be directed to his blog on pet care, www.MyPetsDoctor.com. We regret that, because of high volume, not all inquiries can be answered personally.

Aug 032015
 

So, you don’t have one of those new battery-powered impact drill-drivers, either, eh?  There are some workarounds:

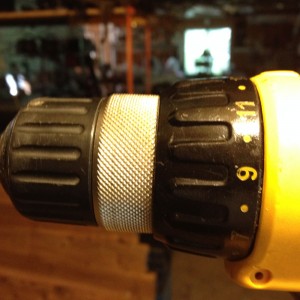
1) You can use the slip clutch built into your drill-driver, which allows an on-off-on-off application of power that will gradually advance the screw you’re driving.

By setting the slip clutch on your drill to a setting that won’t drive a screwhead under the surface of the wood you can “slip up on” how deep the screw goes by continuing to apply power.

By setting the slip clutch on your drill to a setting that won’t drive a screwhead under the surface of the wood you can “slip up ” on how deep the screw goes by continuing to apply power.

2) There is no substitute for real impact action.  An air-driven impact wrench can be used just like a battery-powered impact, just not as conveniently.  And, you have to select the right impact wrench.  For example, a big, ½-inch-drive model will power any lag bolt through any piece of wood, and split the wood in two, if you wanted it to!

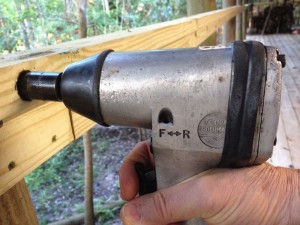
Until Hurricane Katrina’s flood came, I had all of the auto mechanic tools from a previous career. A 1/2-inch drive Chicago Pneumatic had served me well over four decades. After mine drowned, my dear friend Karl gave me this Central Pneumatic. For driving these 7/16" bolts attaching the horizontal component of this handrail to the pilings, the big ½” drive air gun was the cat’s meow. Sorry. We veterinarians talk like that.

Until Hurricane Katrina’s flood came, I had all of the auto mechanic tools from a previous career. A 1/2-inch drive Chicago Pneumatic had served me well over four decades. After mine drowned, my dear friend Karl gave me this Central Pneumatic. For driving these 7/16″ bolts attaching the horizontal component of this handrail to the pilings, the big ½” drive air gun was the cat’s meow. Sorry. We veterinarians talk like that.

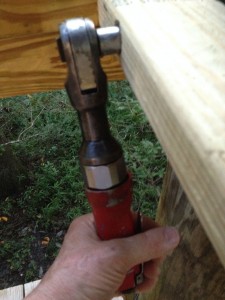
 This ratcheting impact gives you considerably more control, and you can advance a threaded fastener manually anywhere along its path, say, if you needed to assess the amount of compression or resistance while deciding how much further to go. Not too fast, but very flexible. This was also a post-Katrina gift from friend Karl.

This ratcheting impact gives you considerably more control, and you can advance a threaded fastener manually anywhere along its path, say, if you needed to assess the amount of compression or resistance while deciding how much further to go. Not too fast, but very flexible. This was also a post-Katrina gift from friend Karl.

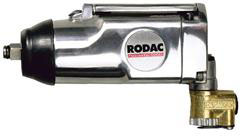
In the 1960s I bought the handiest little air-driven impact I always called a “Rodac.” With only a 3/8" drive, it didn’t have a lot of power, but it was fast and had a lot of control with the speed varied by how far one presses down the paddle on the top. I never replaced it, but was glad to see they are still available.

In the 1960s I bought the handiest little air-driven impact I always called a “Rodac.” With only a 3/8″ drive, it didn’t have a lot of power, but it was fast and had a lot of control with the speed varied by how far one presses down the paddle on the top. I never replaced it, but was glad to see they are still available.

When I say the Rodac was fast, here’s an example:  For access to hidden bolts, socket manufacturers make a universal-joint device.  I was forever putting a socket on the U-joint and the U-joint on the Rodac, hitting the paddle actuator only to have the nut I was removing come off easier than I expected.  That left the U-joint to flop in the air, sling the nut clear across the shop and the U-joint into my fingers before I could get my hand off the paddle.  It was fast.

If you need an air-driven impact for a small job, install a quick-disconnect onto your portable air tank, commonly used for refilling flat and underinflated tires. Sometimes this is faster than rolling out a long air hose and waiting for the compressor to complete a cycle.

If you need an air-driven impact for a small job, install a quick-disconnect onto your portable air tank, commonly used for refilling flat and under-inflated tires. Sometimes this is faster than rolling out a long air hose and waiting for the compressor to complete a cycle.

—-

Jim Randolph is a veterinarian in Long Beach, Mississippi. His earlier careers as lawn mower, dairy farmer, automobile mechanic, microwave communications electronics instructor and journeyman carpenter all influence his approach to woodworking. His favorite projects are furniture built for his wife, Brenda, and for their children and grandchildren. His and Brenda’s home, nicknamed Sticks-In-The-Mud, is built on pilings (sticks) near the wetlands (mud) on a bayou off Jourdan River. His shop is in the lower level of their home. Questions and comments on woodworking may be written below in the comments section. Questions about pet care should be directed to his blog on pet care, www.MyPetsDoctor.com. We regret that, because of high volume, not all inquiries can be answered personally.

Jul 072015
 

Repairs can be a load of fun.  Just let your imagination go.  You may need to repair a goof you made, a defect nature provided, a nail hole in wood with “character”, or you might be creating your own character by inserting a repair where no defect originally existed.   Drilling out a make-believe “worm hole” for example. Traditional techniques include Dutchmen and wooden plugs.

The Dutchman is a classic patch or repair, although sometimes it is placed symmetrically in a piece just for its beauty, as an accent. The patch can be contrasting or matching.

The Dutchman is a classic patch or repair, although sometimes it is placed symmetrically in a piece just for its beauty as an accent. The patch can be contrasting or matching.

The materials for the repairs can be chosen to hide the fix or highlight it.  The site of the defect might be a good place for a Greene and Greene ebony plug.

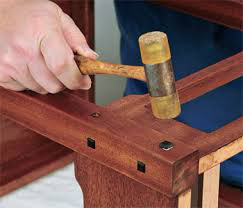
Ebony plugs, a la the Greene Brothers, aren’t so much a repair as an accent. Black plugs have become synonymous with their work.

Ebony plugs, a la the Greene Brothers, aren’t so much a repair as an accent. Black plugs have become synonymous with their work.

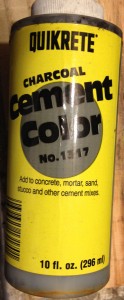
Epoxy repairs can be a load of fun.  You can take good old two-part epoxy and mix in the color ingredient of your choice.  CLICK HERE to read how to make your epoxy syringes last as long as possible.  One I’ve used several times is black concrete coloring. Whether you’re coloring concrete, stucco or epoxy, this stuff is powerful.

Whether you’re coloring concrete, stucco or epoxy, this stuff is powerful. This bottle will probably be handed down to my great-grandchildren. When they need to color something black in their woodworking 3-D printer, they can add just a little bit.

This bottle of concrete coloring will probably be handed down to my great-grandchildren. When they need to color something black in their woodworking 3-D printer, they can add just a little bit.

Some experimentation on scraps of wood similar to your project will give you the needed experience without putting your furniture at risk.  Believe me when I say it doesn’t take much black powder to get the epoxy as dark as you want it!  Start filling from the bottom of the defect and work to the top.  Let some flow proud.  Some porous species will let the color flow into the wood, another good reason to practice on scraps in case you don’t like that effect.  Once cured, it sands easily, and can even be polished if you prefer to draw attention to the site.  I rather liked the look after a few practice samples, so I incorporated it into Brenda’s bedside table project made from Hurricane Katrina-flooded, used oak flooring.

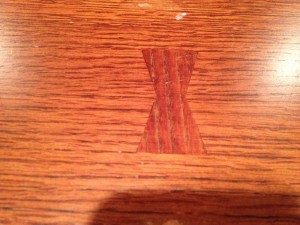
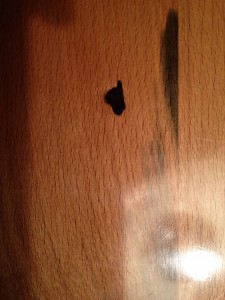
This is a closeup of one of the tops. It demonstrates an understated amount of seepage of color into surrounding wood fibers.

This is a closeup of one of the tops. It demonstrates an understated amount of seepage of color into surrounding wood fibers.

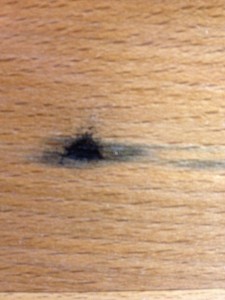
In another location the same species of oak, sawn with a different grain pattern, allowed substantial movement of color into surrounding wood fibers.

In another location the same species of oak, sawn with a different grain pattern, allowed substantial movement of color into surrounding wood fibers.

For a more subtle, but still structurally strong effect, you can mix dust from your sander’s exhaust into the epoxy.  Depending on the size and shape of the opening, the repair might totally disappear.

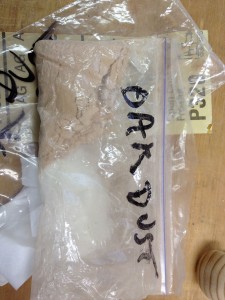
As I sanded (and sanded and sanded) this project, I used the random orbit sander’s bag to collect oak dust to use in this and future oak/epoxy repairs.

As I sanded (and sanded and sanded) this project, I used the random orbit sander’s bag to collect oak dust to use in this and future oak/epoxy repairs.

——-

Jim Randolph is a veterinarian in Long Beach, Mississippi. His earlier careers as lawn mower, dairy farmer, automobile mechanic, microwave communications electronics instructor and journeyman carpenter all influence his approach to woodworking. His favorite projects are furniture built for his wife, Brenda, and for their children and grandchildren. His and Brenda’s home, nicknamed Sticks-In-The-Mud, is built on pilings (sticks) near the wetlands (mud) on a bayou off Jourdan River. His shop is in the lower level of their home. Questions and comments on woodworking may be written below in the comments section. Questions about pet care should be directed to his blog on pet care, www.MyPetsDoctor.com. We regret that, because of high volume, not all inquiries can be answered personally.

Jun 102015
 
Do you have “project creep” every time you start a new job?  It seems that I do.  What started as a new top for my wife’s cheap bedside table turned into two new pieces of furniture.  CLICK HERE to read how that happened.

Project creep is also known as “as long as we’re doing this we might as well…”  A task starts out with a certain scope, but that vision gets expanded into additional components along the way. The present job (click here to read about it) started as handrails for our lower deck, but turned into much more.

When I was but a pup of a carpenter, one of my mentors, Jack English, taught me how to make a half-lap joint with a circular saw when you can’t use a dado blade.  In this case, I was working with 20′ 2x4s and I had only 13′ of open space from the radial arm saw to the farthest wall, so quick and easy dado blade cuts were not an option for me.

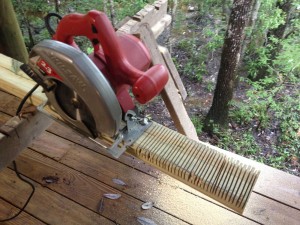
The technique is simple, and most of you have probably used it:  Using a circular saw, cut kerfs through the area you want to lap, being very careful not to cut too deep and keep your shoulder perfectly square.  You can always take off more wood, but making spacers for a half-lap joint made too deep is both difficult and unsightly.  The closer the cuts are to each other the “finer” the cleanup will be.
An accurate depth setting, or, better yet, a slightly conservative setting, and you won’t be throwing away so many boards.  Make the kerf cuts close to each other for a faster, easier cleanup.

An accurate depth setting, or, better yet, a slightly conservative setting, and you won’t be throwing away so many boards. Make the kerf cuts close to each other for a faster, easier cleanup.

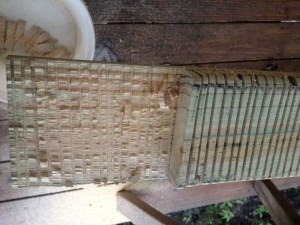
At this point, if you smack the remaining wafers of wood with your hammer, you’ll have a jillion little pieces to pick up from the floor, and lots of remaining wood in the joint to remove as you refine the joint.
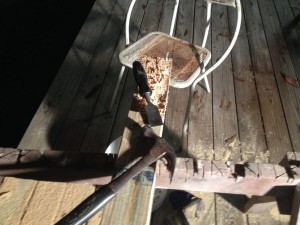
For demonstration purposes I used the hammer-only technique here, and you see how much material still needs to be cleaned.  That’s because the only part that breaks off is close to the hammer head.  Also, pine has a lot of knots, so this treated pine adds an added factor that the knot wood won’t break off cleanly.  Yes, it’s dark, but I’m not averse to working deep into the night, if I’m having fun.  I’m also not averse to sitting down to put myself closer to the work to gain a better angle for driving the chisel.)

For demonstration purposes I used the hammer-only technique here, and you see how much material still needs to be cleaned. That’s because the only part that breaks off is close to the hammer head. Also, pine has a lot of knots, so this treated pine adds an added factor that the knot wood won’t break off cleanly. Yes, it’s dark, but I’m not averse to working deep into the night, if I’m having fun. I’m also not averse to sitting down to put myself closer to the work to gain a better angle for driving the chisel.

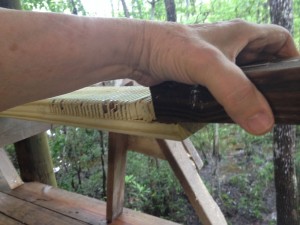
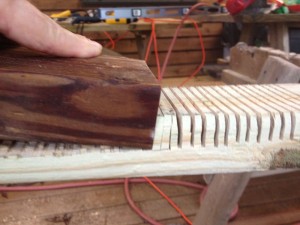
Instead, take a board the same width as your joint, put the end grain against the first wafer, angle it down a little toward the joint, then hit the board with your hammer or mallet.
A little bit of a downward angle and a series of good, smart smacks gets the process started.

A little bit of a downward angle and a series of good, smart smacks gets the process started.

Keep driving the wafers forward toward the back of the joint, piling up like a squeezed accordion.
Drive like a defensive tackle and keep compressing those wafers.  Each one will help dislodge the next and keep the pressure down low on your cuts, leaving you less to clean up.

Drive like a defensive tackle and keep compressing those wafers. Each one will help dislodge the next and keep the pressure down low on your cuts, leaving you less to clean up.

Unless you’re unlucky enough to have a knot in the joint, you’ll have very little cleanup to do.  A sharp chisel makes short work of the remaining debris.
As you see, there isn’t a lot of work left to be done.

As you see, there isn’t a lot of work left to be done.

Want to make even shorter work of it?  Fire up the belt sander.  If you sand the joint smooth instead of chiseling, I recommend being a little more conservative with your initial saw setting for depth of cut, and lots of test fits.  It doesn’t take an 80-grit belt very long to go too deep in this scenario.  Just be sure to keep the sander flat in both planes, or your joint will be trashed.  Any remaining fine-tuning with your chisel won’t take more than a few minutes.
I made each of these joints the width of the piling it was adjacent to, so some were 7" and some were 10".  While most traditional half-laps are the same length as the width of the board, 3½” in this case, there are no rules, and I wanted lots of strength and screws attaching the boards to the pilings to go through the joints.

I made each of these joints the width of the piling it was adjacent to, so some were 7″ and some were 10″. While most traditional half-laps are the same length as the width of the board, 3½” in this case, there are no rules, and I wanted lots of strength and screws attaching the boards to the pilings to go through the joints.

Joints were going well, and all of the vertical 2x4s were up and the half-laps looked quite good.  Then, I began to think…

Thinking.  That should have been my first clue that project creep was on its way.  “These are good joints, but how much more visible will the horizontal components of this handrail be?  Enough to make a way to use the dado blade for an even prettier half-lap joint?”
Jun 022015
 

No Southern-fried Southern boy wants to be called a Yankee, but we share the characteristics of shrewdness and thrift.  Thus, each month we include a money-saving tip.  It’s OK if you call me “cheap.”

During a substantial part of building my deck handrail, a veritable monsoon hung over the top of our town.  While the local TV station reported about 18″ of rain in 4 days, we emptied over 32″ from our personal rain gauge.  Even though I was working on a deck that has another deck on the level above, that deck isn’t a roof, and significant rainwater alternately dripped or poured through the spaces between the upper deck boards.  Here are some cheap (read “free”) ways to protect your tools.

Some tools don’t care if they are wet or dry.  I didn’t fuss over the Swanson Speed Square, but some other tools needed attention to ensure they didn’t suffer from exposure to rainwater.

It is my routine to cover tools small enough to be encased.  I put my drills back in their original carriers when I’m finished with them:

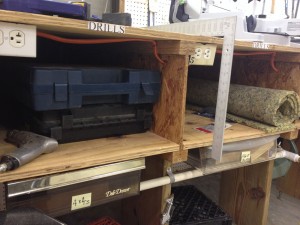
Open shelves under what I call my “saw table” make it easy to see what’s in place. Labels over each shelf make easy work of finding exactly the tool you want.

Open shelves under what I call my “saw table” make it easy to see what’s in place. Labels over each shelf make easy work of finding the exact tool you want.

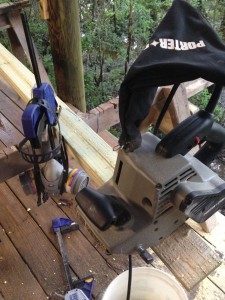
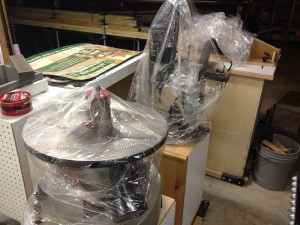
Portable and benchtop power tools get covered with plastic from the cleaners:

Because I wear a starched, long-sleeved shirt 7 days a week, we always have plenty of plastic bags from the cleaners. When the clerk asks me what kind of starch, I say, “Super heavy-duty stainless steel.” She writes, “heavy.”

Because I wear a starched, long-sleeved shirt 7 days a week, we always have plenty of plastic bags from the cleaners. When the clerk asks me what kind of starch, I say, “Super heavy-duty stainless steel.” She writes, “heavy.”

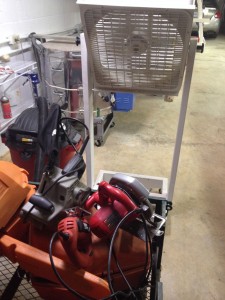
Some tools were outside while I was working, but sat under a covered porch, so they were “exposed,” but not dripped-on.  I was confident that those would be OK if they were dried quickly, but it was just as important that they be dry on the inside as out.  I set them up so that air could circulate around and through them, then turned on my free fan (see my April, 2013 tip).  OK, it’s not a totally free technique, because I do have to pay for the electricity, but that is way less than buying a new tool.

By putting tools on top of these chain saws, plenty of air could circulate around them, ensuring good drying inside and out.

By putting tools on top of these chain saws, plenty of air can circulate around them, ensuring good drying inside and out.

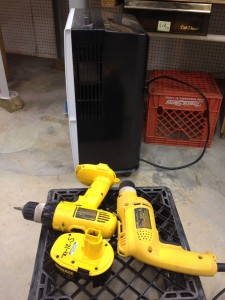
Sometimes I put things I want to dry in the outflow of the dehumidifier. The air is extremely low in moisture, so its drying effect is dramatic.

Sometimes I put things I want to dry in the outflow of the dehumidifier. The air is extremely low in moisture, so its drying effect is dramatic.

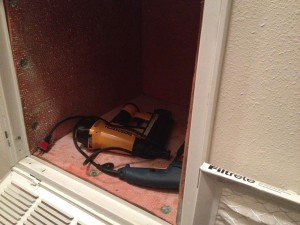
The Bosch drill and the Bostick finish nailer both saw action during the worst downpours, and were the most expensive tools in use.  To dry them thoroughly, I opened the air-conditioner return air plenum and put both inside.  They can sit there until I need them again.

Can’t you just see it? A week goes by before I get back to the handrail, then, “Now, I wonder where I put the drill and the nailer.” At least they will be good and dry by the time the heater gets its annual Fall preventive maintenance. Alan, our AC repair guy, will think he’s hit a bonanza when he takes the filter out!

Can’t you just see it? A week goes by before I get back to the handrail, then, “Now, I wonder where I put the drill and the nailer.” At least they will be good and dry by the time the heater gets its annual Fall preventive maintenance. Alan, our AC repair guy, will think he’s hit a bonanza when he takes the filter out!

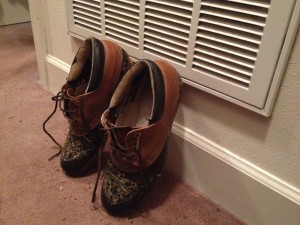
Another free use of the air conditioner plenum: When your shoes get wet, whether from perspiration, rain or flood, lean them up near the return air duct on your AC and they will dry thoroughly. Assuming, of course, that you have more than one pair of shoes.

Another free use of the air conditioner plenum: When your shoes get wet, whether from perspiration, rain or flood, lean them up near the return air duct on your AC and they will dry thoroughly. Assuming, of course, that you have more than one pair of shoes.


Jim Randolph is a veterinarian in Long Beach, Mississippi. His earlier careers as lawn mower, dairy farmer, automobile mechanic, microwave communications electronics instructor and journeyman carpenter all influence his approach to woodworking. His favorite projects are furniture built for his wife, Brenda, and for their children and grandchildren. His and Brenda’s home, nicknamed Sticks-In-The-Mud, is built on pilings (sticks) near the wetlands (mud) on a bayou off Jourdan River. His shop is in the lower level of their home. Questions and comments on woodworking may be written below in the comments section. Questions about pet care should be directed to his blog on pet care, www.MyPetsDoctor.com. We regret that, because of high volume, not all inquiries can be answered personally.

Jun 012015
 

Incorporate your highest standards and best practices into even the roughest of projects.  It’s good practice, it keeps your skills up and prevents falling into bad habits.  If it takes a little longer, it is time well-spent.  For example, I recently built a handrail on my outdoor deck project.

For the first 18 years of our home’s life we had no railing whatsoever on this deck. We like the open view. Recognizing the increasing danger of falling as we age, we decided we should at least have something to grab if we stumbled, yet still maintain the beautiful view.

For the first 18 years of our home’s life we had no railing whatsoever on our deck. We like the open view as seen here. Recognizing the increasing danger of falling as we age, we decided we should at least have something to grab onto if we stumbled, yet still maintain the beautiful view.

It certainly didn’t need to be fancy.  It needed to be splinter-free and strong in case anyone fell against it (it’s about 10 feet down at the high end and close to 20 at the low end.).  As I was working on this, I tried to get my half-laps as tight and flat as possible.  Sure, it makes for a better-looking end product, but it provides the practice to making good-looking joints, too.

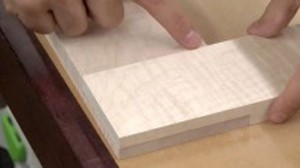
Half-lap joints may usually be thought of as being the stuff of fence rails and hidden structural parts.  It just happened that Marc Spagnuolo published a mirror frame project video while I was working on these handrail half-laps, raising the half-lap to an art form.

This is a beautiful example of half-lap joint at its finest, by Marc Spagnuolo. permission granted

This is a beautiful example of a half-lap joint at its finest, by Marc Spagnuolo (permission granted for reprint)

A half-lap joint is a blowout waiting to happen, with the very high risk of missing chunks of wood existing on all four sides.  One must be careful to either provide a backer-board for each cut, or work toward the inside of the joint.  If the “lap” is too high or too low, the joint is ugly and sloppy-looking.  Ditto if the shoulders aren’t square.  But, it’s all about how much time and care one is willing to invest in a project to have it look as good as it can be.

When visitors lean against my handrail I want them to be able to marvel at the quality of the workmanship.  Even if no one ever came to see us, when I look at the rails I want to be able to be proud of them. The point is not whether I always achieved fine woodworking with my handrail project.  The point is that I strove for it and sought to do my best at every step along the way, keeping my standards high.


Jim Randolph is a veterinarian in Long Beach, Mississippi. His earlier careers as lawn mower, dairy farmer, automobile mechanic, microwave communications electronics instructor and journeyman carpenter all influence his approach to woodworking. His favorite projects are furniture built for his wife, Brenda, and for their children and grandchildren. His and Brenda’s home, nicknamed Sticks-In-The-Mud, is built on pilings (sticks) near the wetlands (mud) on a bayou off Jourdan River. His shop is in the lower level of their home. Questions and comments on woodworking may be written below in the comments section. Questions about pet care should be directed to his blog on pet care, www.MyPetsDoctor.com. We regret that, because of high volume, not all inquiries can be answered personally.

May 192015
 
You just thought I screamed when I saw the baby possum.
When I looked up and saw this snake skin in the un-likeliest of places, I immediately froze.
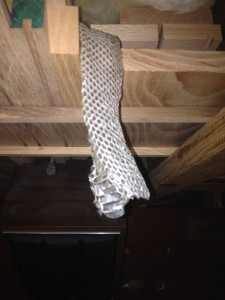
I couldn’t believe my eyes. Our practice doesn’t include exotic animals, but I knew enough about snakes to know this one wasn’t alive. Still, I was instantly terrified. I knew, at some point, its live owner had been here and could still be lurking. Maybe even right here!

I couldn’t believe my eyes. Our practice doesn’t include exotic animals, but I knew enough about snakes to know this one wasn’t alive. Still, I was instantly terrified. I knew, at some point, its live owner had been here and could still be lurking. Maybe even right here!

Standing on a ladder, it reminded me of when I worked in microwave communications electronics.  Our teachers always told us, “It’s not the big voltage that will kill you.  You’ll be careful around it.  But the little voltage, if you let your guard down, will startle you, make you jump, and you’ll inadvertently throw yourself into a high voltage circuit.”  I could just picture myself seeing a real, live snake and falling off the ladder in response:
“What killed ol’ Jim?” asked one mourner.
“A nonpoisonous snake.”
In the March, 2015, issue of Wood News Online we published a tip designed to save you space while making the most of scraps of wood you want to save. The gist of the tip was to use the area between ceiling joists for storage.  By arranging materials appropriately, you can store anything from big-enough-to-fit to small-enough-to-sit-on-top-of-the-big-stuff.  Of course, there’s a practical limit to how small you really want those smallest pieces to be, yet, it’s ultimately a personal decision.
For example, I have some redwood that came from the sign that stood in front of our veterinary practice for 24 years, until Hurricane Katrina knocked it down.  I’ve made some projects out of that wood that are priceless to me.  Not everyone is sentimental, much less about wood, but I am, so I have saved some pretty small pieces of that redwood just in case I have some use for a tiny bit of it somewhere.
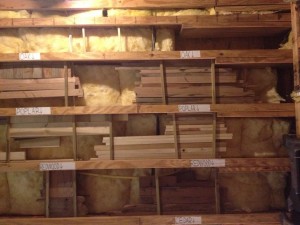
As you can see, some of these redwood pieces are really small, some are really rotten, but every scrap holds a memory, and stands a chance to be fitted into a project someday.
As you can see, some of these redwood pieces are really small, some are really rotten, but every scrap holds a memory, and stands a chance to be fitted into a project someday.

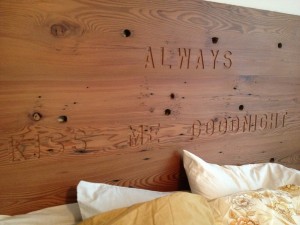
The 2x12 redwood boards that made the rails of our pre-Katrina Animal General Hospital sign were planed, sanded and glued up to make this simple, rustic headboard. The engraved phrase came from a Delta Airlines SkyMall catalogue advertising a needlework project. I wrote down the expression while on a flight to see our grandchildren, and kept it tacked to the shop wall for years before finding the right place to use it.
The 2×12 redwood boards that made the rails of our pre-Katrina Animal General Hospital sign were planed, sanded and glued up to make this simple, rustic headboard. The engraved phrase came from a Delta Airlines SkyMall catalogue advertising a needlework project. I wrote down the expression while on a flight to see our grandchildren, and kept it tacked to the shop wall for years before finding the right place to use it.

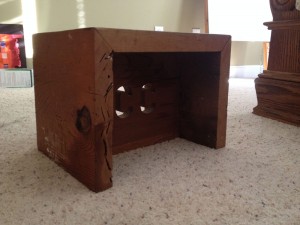
My Grandson Charlie’s stool was made from cutoffs of the same 2x12 redwood.

My Grandson Charlie’s stool was made from cutoffs of the same 2×12 redwood.
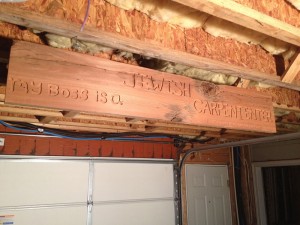
This sign hangs in the automobile-parking area of our garage, which shares space with the woodworking area. There’s a story that goes with the inscription underneath, but that’s another post.

This sign hangs in the automobile-parking area of our garage, which shares space with the woodworking area. There’s a story that goes with the inscription underneath, but that’s for another post.

Likewise, I have some oak tongue-in-groove flooring with an interesting backstory.  My wife bought some really cheap bedside tables from the “real wood” store, but she needed more top surface on hers.  The best I could come up with for short-term use was an old lauan panel I’d attached to some 2x4s with a picture-frame molding around it.  It was so ugly that Brenda covered it with a red cloth, awaiting a suitable and appropriate top for her “real wood” chest.
That task dwelt on my honey-do list for a long time until, one day, I got the idea to go to Lowe’s for some oak flooring.  I could just glue and nail it to a substrate, attach the top, and with a little sanding and some finish Brenda’s new table surface would be ready to reveal itself to the public.
At Lowe’s, I looked around, but I couldn’t find any oak flooring.  Third in line for the attention of the Lowe’s employee on duty in the hardwoods department, I waited, only to hear him say, “Oh, we don’t carry that.” “Oh, well,” I thought, I would just have to find out who does.  Then, I heard a sweet female voice behind me, saying: “Excuse me, sir.  I don’t mean to butt into your business, but I heard you asking about oak flooring.  I have some.  Does it have to be new?  My husband and I salvaged it from one Katrina-flooded house to use in another Katrina-flooded house.  If you would like to come by and look at it, just call me.  Here’s my address and my cell phone number.”
Now, this lady didn’t know me from Adam, yet she stood there with her little six-year-old daughter beside her, giving me her address and phone number, like it was 1946.  There is still a little trust and innocence in the world!
We met, she showed me the old floorboards, and I knew I had found a treasure trove.  “Take whatever you’d like, but we still need about this much,” she said, motioning to a small portion of the stack. Well, “stack” might be a little generous.  “Pick Up Sticks,” the child’s game, comes to mind when trying to describe the way the boards had been haphazardly thrown into the old garage.
I did some selecting as I went.  Some were curved along their length.  Many were twisted, and I do mean wickedly twisted.  Some were cupped.  Because these two homes were so close to the Bay St. Louis, MS, beach, they were probably underwater for days after Katrina’s winds were gone. Even the best pieces would require a good bit of milling. But, OH!  The character!  Worm holes, termite holes, nail holes!
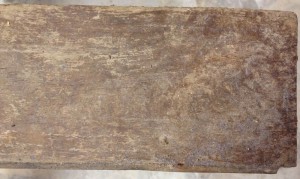
This is what the oak flooring looked like before cleanup and milling.

This is what the oak flooring looked like before cleanup and milling.

Trying not to be greedy, I took about the square footage I thought I’d need for a big top for Brenda’s side of the bed and a small top for my side, plus about 50% for waste, plus about 15% for miscalculation. There were still a lot of boards left.
I could hardly contain my eagerness so I began to unload, sort, and stack as soon as I arrived home.  Decades of grit filled the grooves and clung to the tongues, so each piece needed to be steel-bristle-brushed by hand before machining.
As soon as the first board came from the planer, I knew I had some epic wood.
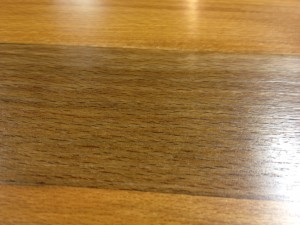
And, this is what those ugly boards turned into!

And, this is what those ugly boards turned into!

And a problem….
“How can I possibly put boards this beautiful atop a 1/4-inch-thick ‘real wood’ table?” I asked myself.  The obvious answer was, “I can’t, it would be an insult.”
Thus were born the oak bedside tables in the accompanying pictures. It took several forevers to cull enough boards for the top to make it reasonably flat and produce acceptable joints.  Grain-matching was out of the question, so I just tried to keep adjacent boards from clashing.
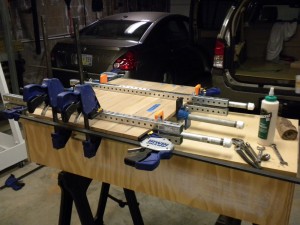
As you can see from the abundance of clamps, keeping this panel flat was a challenge. Stiff, square steel cauls helped. A glue with more open time would have helped, too.

As you can see from the abundance of clamps, keeping this panel flat was a challenge. Stiff, square steel cauls helped. A glue with more open time would have helped too.

As nice as it would have been to have solid wood for the sides, there just wasn’t enough material to make panels, but we are fortunate to have a good hardwood plywood dealer close by.  I didn’t think it would be possible to stain to match, so I just tried to coordinate.
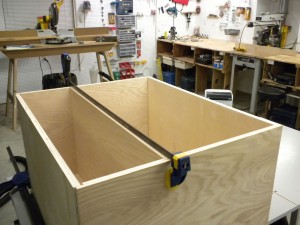
When home center plywood just won’t do, it’s great to have a source for really good hardwood plywood. No voids, no patches, no blemishes.

When home center plywood just won’t do, it’s great to have a source for really good hardwood plywood. No voids, no patches, no blemishes.

To make the top appear thicker I glued up a 10-inch-wide panel from cutoffs, then cut four strips and glued them along each edge, with a full-width board across the front.
Alan Noel taught me his wool-waxing technique via email.  CLICK HERE to read Alan’s column on wool-waxing.  The technique is as simple as applying wax with 4/0 steel wool and yields a surface with unbelievable smoothness.
The project gets Brenda’s seal of approval.  Like me, she’s sentimental, and using wood with a story for these two tables makes them all the more valuable.
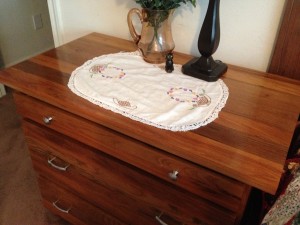
Brenda was pleased with the final result. A smaller, matching unit is on my side of the bed.

Brenda was pleased with the final result. A smaller, matching unit is on my side of the bed.

Oh, and the original “real wood” bedside tables?  They became rolling stands for our oscillating spindle sander and stationary mortising machine.  With drawers to hold accessories, they do a pretty good job.  I have mobile bases on every tool in the shop.
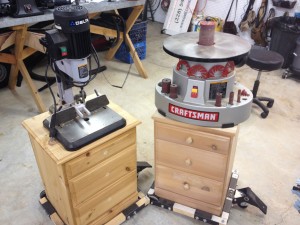
Not calling for heavy-duty function, these “real-wood” cabinets are up to the job of holding the oscillating spindle sander and stationary mortising machine.

Not calling for heavy-duty function, these “real-wood” cabinets are up to the job of holding the oscillating spindle sander and stationary mortising machine.

Thanks to the rigid portable bases that always fit because you determine the dimensions, they are very stable when in use, and just the right height.
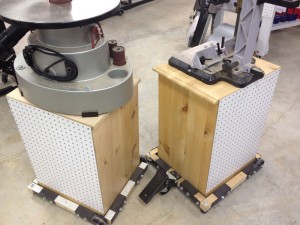
As the backs of the units are several inches from the backs of the drawers, they just seemed to cry out for the space to be utilized for storage, so I attached some pegboard. I haven’t found a use for it yet, so I tell myself it stiffens the thin “real wood” carcass.

As the backs of the units are several inches from the backs of the drawers, they just seemed to cry out for the space to be utilized for storage, so I attached some pegboard. I haven’t found a use for it yet, so I tell myself it stiffens the thin “real wood” carcass.

And, the snake skin?  I had to use a pair of pliers to pull it down.  I couldn’t bring myself to touch it.  Trying to figure out how he got there with no ladder, I inquired of a colleague whose practice includes a lot of exotic animals.  From a closeup of the skin he said it was probably a rat snake; we have a lot of them around our house.  He also sent me a link to a video showing just what good climbers snakes can be.
 —
Jim Randolph is a veterinarian in Long Beach, Mississippi. His earlier careers as lawn mower, dairy farmer, automobile mechanic, microwave communications electronics instructor and journeyman carpenter all influence his approach to woodworking. His favorite projects are furniture built for his wife, Brenda, and for their children and grandchildren. His and Brenda’s home, nicknamed Sticks-In-The-Mud, is built on pilings (sticks) near the wetlands (mud) on a bayou off Jourdan River. His shop is in the lower level of their home. Questions and comments on woodworking may be written below in the comments section. Questions about pet care should be directed to his blog on pet care, www.MyPetsDoctor.com. We regret that, because of high volume, not all inquiries can be answered personally.