When you purchase a chisel, depending on whether it is new or used, the bevel angle could either be what the maker decided was optimal for its intended usage, or a middle-of-the-road balance. Now if it is a used chisel, the angle could be just about anything, depending on the previous owner’s choices. Ultimately, once you own the chisel, you can decide to either leave the bevel angle alone, or fine-tune it to your needs.
I have a few Hirsch brand chisels (high carbon steel) I purchased about 25 years ago. These were my first attempt at “moving up” to better chisels. Compared to A2 steel or Japanese White & Blue steels available currently, this might make some chuckle, but these were quite a jump from my four-piece clear yellow handle Stanley chisel set. The Stanley chisels wouldn’t hold an edge long enough to make it to the wood (or at least that is what it usually seemed like). When I bought the Hirsch chisels, I wasn’t sure what sizes I’d want (or need), as I was still trying to figure all of that out. So, I bought a range of sizes, and one of those chisels was a huge 50mm chisel. When I started to get better at my woodworking, I started making very small boxes and such, so that chisel just sat around. I ran across that chisel recently and noticed how I’d only ever honed it once, and the bevel angle was between 30 – 35 degrees.
This is a decent angle, if you are intending to drive it with a mallet, but I wanted to adjust it to a lower angle so it would be better suited for paring. I ended up choosing an angle between 20 – 25 degrees.
Adjusting the bevel angle on a chisel or a plane iron can be very quick, or very time consuming, depending on whether you want a higher or lower angle than what you’ve already got. If the tool has too low of an angle, it is simple and quick to raise the tool, in relationship to the sharpening media, and take a few strokes. This is very much like the sharpening/honing process I have written about regularly, when starting with a fresh plane iron with a 25-degree bevel, and then honing a few strokes with it raised up to 30 degrees. This is a very simple process and extremely quick. Now, if the tool has a bevel angle that is higher than you want, you must remove the excess material on the bevel (which can be dramatic, depending on the angle change), in order to implement the lower angle. You can remove the excess material by hand, using diamond stones, sand paper, water or oil stone…which can be a great workout for strengthening your hands, forearms and even shoulders. Or, you can use a multitude of choices that are powered, like a high-speed/low-speed grinder, a belt sander, or one of the super-slow speed grinders where the wheel rotates through a water bath. I have used each of these mentioned methods over the years, and all are functional, but some require a lighter touch to make sure you don’t cause problems for your tools. One of the main problems to be concerned with is drawing out the temper of the steel. The steel in your tools are hardened through a process of heat treating, and if you accidentally (or intentionally) raise the steel’s temperature beyond a specific point, and don’t have the ability to repeat the remaining process, you’ll end up with steel that is either softer and won’t hold a good cutting edge, or harder and more brittle. This is not an issue when using the water bath super slow grinders, but the other powered choices can generate heat quite quickly, IF you use a heavy hand.
Since I had quite a bit of material to remove from the bevel of my chisel, I opted to use my combo high/low speed grinder. I have a Oneway Wolverine platform rest, which I find easy to adjust and the mass of the platform does a good job as a heat sink. For those who are not familiar, a heat sink in this context is a large and thick enough piece of metal that can draw/absorb away the excess heat generated into a tool, in this instance from the grinding process. This is useful, but still does not negate the need for a light touch. For this grinding process, I was using a 60-grit wheel that was freshly dressed. This grit wheel removes material fairly quickly, and imparts less heat into the tool than a higher grit wheel. As the wheel starts to clog from the removed metal, it becomes less aggressive, and can again cause overheating. Just pay attention to how the wheel behaves, and dress it with a diamond wheel dresser when the wheel’s cutting action slows.
Before starting, make sure you are wearing a safety face shield AND safety glasses, which provide an extra level of protection for those non-replaceable eyes we use every day. You really don’t want to get metal shavings into an eye! You also want to make sure you don’t have on any loose fitting clothing that can find its way into the moving grinding wheels.
Ok, with the platform set as close to the wheel as I can get it, without it making contact with the wheel(s) (I rotate the wheels by hand to check before turning the grinder on), and the platform set at the desired angle, we can get started. I cover the tip of the bevel with a black Sharpie marking pen, so I can tell how close I’m getting to the cutting edge, since I choose not to grind to the edge of the tool I’m working. Since the cutting edge of the chisel is thin, it can heat extremely quickly when it is engaged with the grinder. The edge of the chisel can easily exceed the “critical” temperature, losing the temper at the cutting edge. Staying just slightly away from the cutting edge makes it a little easier to control this issue, but a very light touch is best when getting close to the edge. After the grinder is on and up to speed, I put the chisel onto the platform and gently move it forward until I just touch the wheel. From this position, using a light touch, I move the chisel from side to side, checking my progress often.
I keep one of my hands up close to the end of the chisel (without being close enough to the wheel to get hurt), so I can feel if the chisel is becoming too hot. I remove the chisel after every couple of passes, and feel up closer to the cutting edge. If it is too hot to be comfortable to my fingers, I place the back of the chisel onto the metal platform, and hold it there until cooled. The heat sink aspect of the platform is very useful. I’ll usually remind myself to reduce the pressure I’m using on the grinding wheel, after I notice the chisel is too hot, since this is a good sign of impatience. Just slow down and take your time. You’ll end up doing a better job and there is much less chance of damaging your tool.
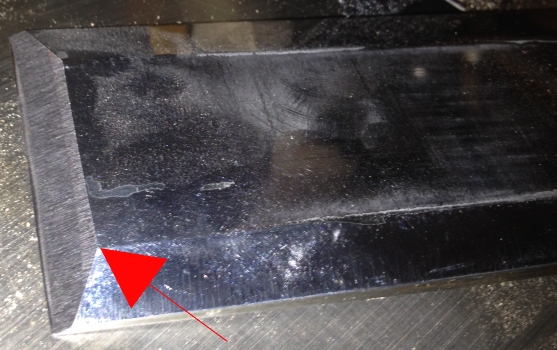
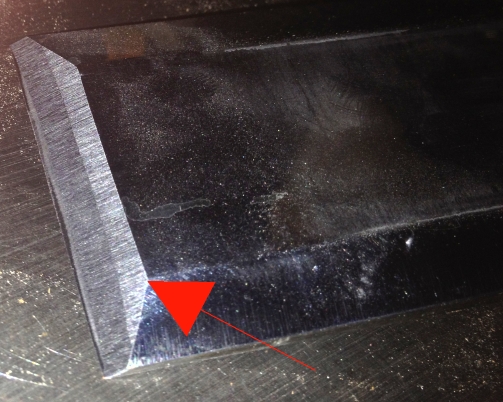
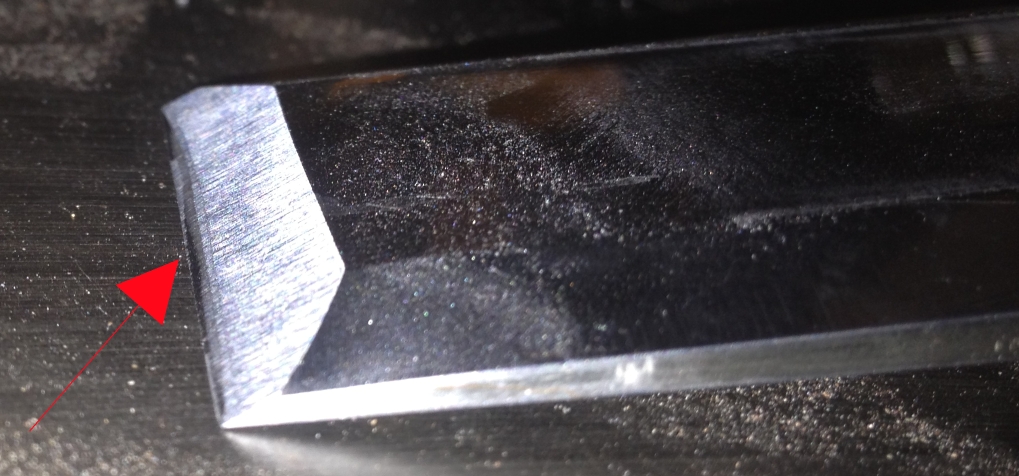
I stopped the grinding when I saw I had just under a 1/16” of the Sharpie left at the end of the chisel. In the picture below, I removed the sharpie from the original cutting edge, so the polished edge might better show this point.
At this point, I go to my honing stones. As per usual, for me, I start with my 1000-grit water stone, and work on it until I can feel a consistent burr all the way across the back of the chisel’s cutting edge. I then move to my 8000-grit water stone and with the freshly ground chisel, will take between 5 – 10 strokes. The 8000-grit stone polishes the metal to a mirror-like finish. With this, I can check to make sure I have a consistent honing across the tip of the bevel. As long as this is true, I’m ready to move to the back of the chisel, so I can remove the burr. Remember to keep the chisel flat on its back for this process. When the burr is gone, and you’ve honed the back to 8000-grit, you are finished.
(*Not all tools receive the same attention at the factory. Specifically, the back of this 50mm chisel was not even close to flat from their factory. Luckily, there was a slight hollow in the back, which makes it look somewhat like a Japanese chisel or plane iron. I say luckily, since I was able to remove a small amount of metal to get the cutting edge in plane with the strips of metal along the sides. If the back had a bulge in the center instead, I would have had to remove a lot of metal to obtain the same flat reference.)
My newly adjusted 50mm chisel feels like a new addition to the family. With its size and heft, it behaves somewhat like a Slick. I’m really glad I decided to modify the bevel angle, as I’ll be much more likely to utilize the chisel in this configuration.
I’d like to include one caveat, specifically about A2 tool steel, that you should consider before deciding to adjust a tool to a low bevel angle. Remember that A2 tool steel needs to have a bevel angle no lower than 30 degrees, due to the size of the carbides. If you have an A2 chisel/iron with a bevel angle below 30 degrees, there is a great likelihood you will experience chipping at the cutting edge. A2 is a great tool steel, and retains an edge for a long time, but just keep the bevel angle at 30 degrees or above.
I hope this article helps you to reintegrate a stagnant tool, or even open up the opportunity that might exist in a used tool. Please feel free to let me know if you have any questions.
Lee Laird has enjoyed woodworking for over 20 years. He is retired from the U.S.P.S. and works for Lie-Nielsen Toolworks as a show staff member, demonstrating tools and training customers. You can email him at lee@lie-nielsen.com or follow him on Twitter at twitter.com/is9582


