I have been thinking about dipping into spoon making (Wow, did anybody not see that one coming?) for a long time. A couple of months ago, I finally did it and I think I like it.
Several things got me started — Peter Galbert on his website shows how he makes spoons during those long cold winter nights by the fireplace up there in far north Massachusetts. Then he sells them to benefit a favorite charity. Go to http://chairnotes.blogspot.com and search for spoons in the list at the bottom right or click “Spoons for Hunger” at the top right of his page. His spoons are beautiful and painful to me as I am reminded of how far I have to go.
Another source for spoon making ideas is Robin Wood in England. Go to http://www.robin-wood.co.uk/ and see what he has to offer. If I lived in England and did wood working, I would call myself Robin Wood. I love his bowls, too. He uses a foot-powered lathe to make bowls and you saw them in that recent Robin Hood movie with Russell Crowe, the one with the medieval wooden Higgins boats the French used to invade England. I laughed out loud. Robin gives classes and next time you cross the pond, you can sign up. He does beautiful work which is also painful to me.
Try Roy Underhill’s “The Woodwright’s Shop” for show #3108 with Peter Follansbee on carving Swedish spoons. The main thing I learned from this one is to use green wood (duh!). I mean I did not get that when I started. I was picking up old chunks of wood from around the shop and then dust was flying everywhere and I never got it done, and my admiration for spoon carving was rising all the time. I was about to give it up as too hard and too much trouble when I watched Roy and Peter and they set me on the green wood path.
The fourth source is Drew Langsner over at Country Workshops in North Carolina. Go to countryworkshops.org and check out his videos and maybe you can sign up for a class.
When I first started looking and learning, all the instructors used traditional tools to carve spoons. You start out with an axe and then move to a carving knife and a curved hook knife, a spoke shave and anything else with a edge that will remove wood. Took me about three days of effort before I discarded some of that junk. I finally went to the band saw, a hand grinder and the spindle sander — anything to get that wood off there. If I could make the chain saw do it, I would.
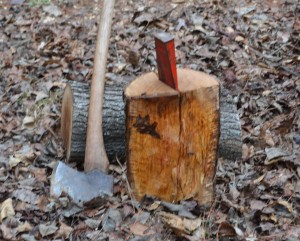
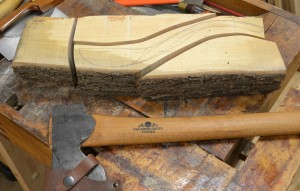
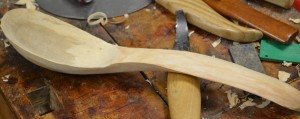
I had some green Bradford pear wood that I got when a tree blew over at the office. I split it out to a suitable blank and sketched a shape I liked from one side and then from the top and put it on the band saw to get the basic shape. I moved to the axe (from Highland) and a stump (from the yard) and started hacking away. Surprising how much wood (or fingers) you can take off with an axe while still maintaining control of the work. I found the trick to a good spoon is getting it thin enough to make it look delicate while leaving it thick enough to be strong. I like a shape which is wide horizontally at the handle and tall vertically near the bowl. The transition between the two is lovely when done right.
The tools I used are some I already had around the shop including the short axe, and a spoke shave. The other odd group of tools is a set of Exacto hobby tools which are small and very sharp, and include a small spoke shave which is marvelous for final shaping, and a round head cutter sharpened on one side. I went to Highland and bought two new tools which are really nice for the work. One is a small carving knife which came very sharp with no need for honing. It works like a champ. The other is a curved hook knife which is used for hollowing out the bowl of the spoon. I was surprised at how well that little knife worked. You can see all the tools in the picture.
The single biggest problem is holding the work so you can carve on it. Roy Underhill showed how you actually carve the bowl first since it is the hardest to shape. Plus you can clamp the square handle in the bench vise so you can work the bowl. I found there is a delicate balance between holding and carving, and eventually you end up holding the whole thing against your chest while you carve. One of these days I will have to make a shaving horse which I think will work better without breaking the spoon.
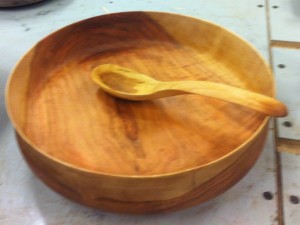
As I said, I am not proud and I will use any power tools I have to get the wood off. I did learn to wrap the unfinished piece in kitchen plastic wrap to keep it from drying out until I get back to it the next day. So far it takes me about four or five hours over a couple of day to get one done, but I think I will get faster. I have done about four spoons so far and the last one was pretty good. I had a bowl out of cherry that looked really nice and I noticed the spoon matched the bowl, even though they are different species. It made a really nice bridal gift.
Think you might like to make a spoon one day?
2 Responses to “Woodturning Projects: Making a Spoon by Hand”
Sorry, the comment form is closed at this time.


I love the spoon. I completely agree about the delicate balance between holding and carving. Too many times I am clinching and scared of slipping or too soft and gentle and can’t get anything accomplished.
You amaze me George!