Mollie Simon

Dec 102015
 

IMG_3994‘Tis the season to be jolly, merry, and ever so slightly stressed outparticularly when it comes to gifting.

The process of gifting can be fun and satisfying, but also terribly puzzling, especially if a friend or family member has a specialized hobby with a unique lexicon and complicated gizmos, gadgets and who-knows-whats to choose from.

For non-woodworkers, sifting through woodworking gifts can be like entering a foreign country. Highland Woodworking artisan Cooper van Rossum said it is helpful to have a few questions answered before starting the gift hunt.

For example, it is important to find out whether a person prefers hand tools or power tools or whether he or she is a fan of a particular design style or period.

“No one wants to do investigative reporting, but try to start a conversation with the person about their work,” Cooper said.

When shopping in-store for experienced woodworkers, Cooper said it is helpful to bring pictures of the work someone does so Highland employees can make better gift suggestions.

Below are some of Highland Woodworking instructor, Sabiha Mujtaba, and Cooper’s ideas to satisfy every woodworker on your shopping list.

The Never-touched-a-saw-before Beginner

For beginning woodworkers, Sabiha said it is best to avoid overly complicated tools or machines requiring extra inputs as these can overwhelm and turn off newcomers.

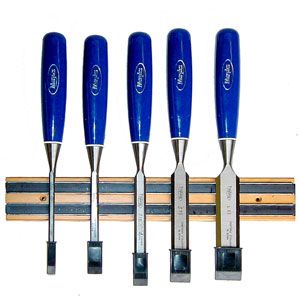
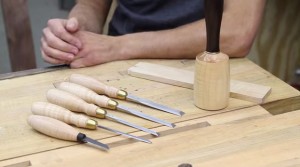
If your friend wants to start woodworking, but they do not yet know what kind of projects they like (turning, carving, furniture making etc.), Sabiha suggests starting with a basic boxed set of carving tools or chisels.

“Those give you all the different styles of tools and sometimes when giving a gift you want to start with something that has a complete set,” Sabiha said.

In addition, Sabiha recommends the carving sets as they are nicely packaged and have presence under the tree.

Even for skilled woodworkers, the sets never hurt as Sabiha said it is hard to have too many of a given tool.

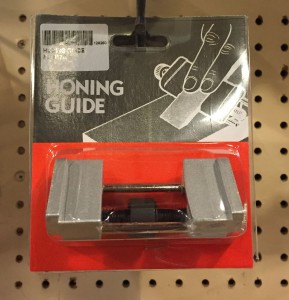
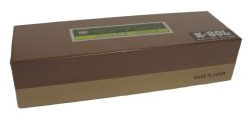
If you go with a chisel set, Cooper strongly recommends pairing it with a basic Honing Guide and “1,000/6,000” Combination Stone so that the recipient can sharpen his or her new prized tools.

Without sharp tools, the learning process can be unnecessarily challenging, Cooper said.

Honing Guide

Honing Guide

Combination Waterstone - Large 1000 / 6000 Grit

Combination Waterstone – Large 1000 / 6000 Grit

For experienced woodworkers, Sabiha and Cooper both said it is important not to stress about whether a person already owns an item.

“With some things like sets of drill bits, it really doesn’t matter is you have lots because they wear down,” Sabiha said.  

The Turner

For advanced or beginning turners, Sabiha recommends getting colored wood pieces for turning wine toppers, pens, or bowls. 

If someone usually turns furniture legs or items such as peppermills, it can be fun to get them gifts which introduce a new area of turning-such as bowl making.

Sabiha, a veteran carver, also suggests getting beginning carving items for any type of woodworker so that they can embellish their work, no matter the style.

The Organization King or Queen and the New Shop Owner

If someone just began putting together a dedicated shop at home or if they are one who likes an organized workspace, Cooper points people to Magnetic Tool Holders.

Magnetic Tool Holder

Magnetic Tool Holder

These are a fairly inexpensive investment that can clean up a shop, and they vary in style from basic metal strips to magnets camouflaged behind an elegant wooden cover.

The Eager Youngster

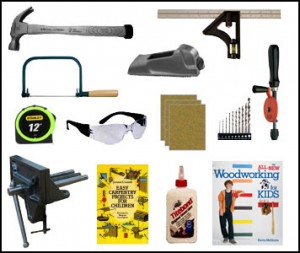
For kids who have already demonstrated an interest in woodworking, Highland also offers a complete Woodworking Tool Kit for Kids, which Cooper suggests pairing with a book to give a youngster a great starting point for a wider variety of projects.

Kids Woodworking Tool Kit

Kids Woodworking Tool Kit

The Seasoned Woodworker

When it comes to experienced woodworkers who already have extensive shops and all the tools you thought could exist, Sabiha suggests focusing on high quality items which people may not necessarily want to buy themselves.

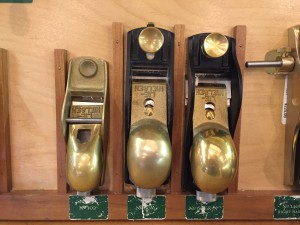
She recommends Lie-Nielsen Planes in particular, which she said people enjoy collecting and are a “pleasure for a woodworker to own.”

These come nicely boxed, adding to the gifting experience, Sabiha said.

Lie-Nielsen Planes

Lie-Nielsen Planes

Similarly, Cooper recommends going with Blue Spruce tools, which are a high quality upgrade for many woodworkers.

Blue Spruce Toolworks Hand Tools

Blue Spruce Toolworks Hand Tools

He is a particular fan of these because many of them have had their wood handles or mallet heads infused with a polymer resin for exceptional durability.

The Hands-On Novice

Woodworking tools can be a big investment, especially if you are unsure of what type of work someone might want to try.

Instead of going “down the rabbit hole” of finding the perfect tool, Cooper said pre-purchasing a class is a great option. For around $100, he said specialized classes let beginners identify their interests, from carving to turning to furniture making, and also allow them to get hands on help finding the starter tools they need.

The Picky Subject

If all else fails, Sabiha and Cooper both suggest going with a Gift Certificate and letting your friend or family member choose exactly the tool or item they have been saving up for. As an added bonus, Highland prints their gift certificates on actual wood!

Highland Woodworking Gift Certificate

Highland Woodworking Gift Certificate

To make a gift certificate more personable, you can pair it with a book.

For adults, Cooper recommends The Anarchist’s Tool Chest, which is a detailed guide to tools and what to have in your shop, or a period design book perfect for a coffee table conversation piece.

For younger, aspiring woodworkers, Zany Wooden Toys is a fun choice, Cooper said.

Toy Making Books

Toy Making Books

Stocking Stuffers

To fill up stockings, Sabiha said focusing on small safety items is a good route as they are not too expensive. For example, she suggests getting gloves, thumb guards, or safety masks, especially if you are also gifting woodworking tools.

The popular Elipse P100 Dust Mask

The popular Elipse P100 Dust Mask

Cooper also recommends inexpensive tools such as Center Finders, which can simplify work for recipients.

And if you need anymore gift ideas, take a look at the Highland Woodworking 2016 Gift Guide for dozens of more ideas!

Oct 192015
 

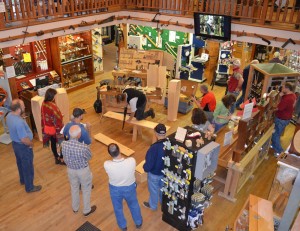
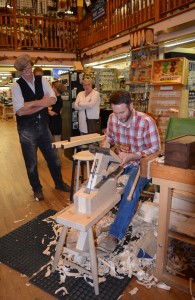
roy1“Customers are dying for this product,” Roy Underhill said on Saturday during Highland Woodworking’s Fall Open House and Sale.

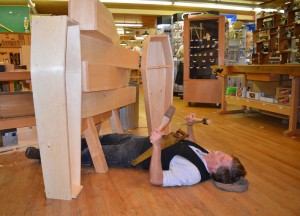
Just in time for Halloween, Roy spent the morning showing customers how to construct a coffin, throwing in puns while demonstrating how to make kerfs and how to steam and shape wood.

Roy has been the host of The Woodwright’s Shop on PBS for over 35 years and knows how to mix craftsmanship with theater.

In cutting the wood to size, Roy pulled out his favorite “R.I.P.” saw (known as a rip saw to the rest of us) and snapped into a solid Transylvanian accent while making a coffin “to die for.”

roy2

Roy autographing his novel, Calvin Cobb – Radio Woodworker

“You have to be careful not to make a grave mistake, or it will come back to haunt you later,” Underhill said while emphasizing how to cut the proper angles and how to plane the edges.

Fans from his show came and had his novel, Calvin Cobb: Radio Woodworker, autographed during the demo and even got in on the action with some sawing. 

Roy works exclusively with hand tools; the only “power tool” used for the demonstration was the tea-kettle needed to boil water.

Grant Lutz, who was demonstrating green woodworking with a three-legged stool during the open house, also showed the power of working by hand.

Lutz teaches at Highland and began the stool demonstration by first splitting a piece of wood and then slowly forming blanks for the legs.

To do this, he had to carefully watch the grain of the wood and take it down one layer at a time.

Roy watching Grant Lutz demonstrate green woodworking

Roy watching Grant Lutz demonstrate green woodworking

“Green woodwork has a warm quality and a lot of depth to it,” Lutz said. “I like that it is organic, and you let the wood dictate what happens.”

Lutz said he chose to demonstrate a stool because it is a good beginner project.

“If you just want to learn how the tools work, a spoon is also a great place to start,” Lutz said.

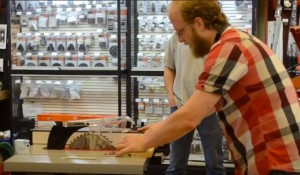
The morning also included demonstrations of Easy Wood Tools and the new SawStop JobSite Table Saw.

Many people are familiar with the idea of the SawStop: it is supposed to halt immediately if it comes across a finger.

While hearing this in theory is comforting, seeing it in practice is a different experience. To demonstrate the stopping device in action, Ben Arthur tested the SawStop with a hotdog, which is conductive like a finger.

Ben Arthur demonstrates the SawStop JobSite Table Saw

Ben Arthur demonstrates the SawStop JobSite Table Saw

Immediately upon contact with the hotdog, the blade dropped down below the table out of harm’s way and the braking mechanism instantaneously stopped the blade’s rotation. This left the hotdog entirely unscathed.

According to SawStop FAQ, “When the safety system activates, it will sometimes damage one or more teeth on the blade. Some users discard and replace the blade, while others choose to have their blades inspected/repaired by a qualified specialist.” So you can either discard the blade, like Ben usually does, or have it repaired.

The brake cartridge into which the blade cuts when it drops can be plugged in for research by SawStop so they can look at the exact signal and moment when it was stopped.

But, while the SawStop can save fingers, Roy joked during his demonstration that he uses the original brake on his hand tools: he stops moving his arms.

RIP (saw) Roy

RIP (saw) Roy

CLICK HERE to see more photos from the Fall Highland Woodworking Open House with Roy Underhill.

Aug 182015
 

After seven hours around a lathe, three blocks of wood, a refresher course on angles, and one accidental projectile [no one was harmed in the making of this article], I am excited to have taken my first spin at woodturning.

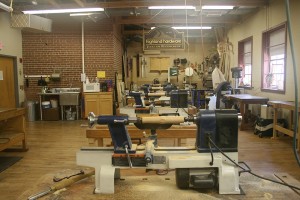
The setting for the course, Beginning Turning, was the shop and classroom situated on the top floor of Highland Woodworking. With wall-to-wall tools, goggles, machines, and examples of woodwork, the room itself makes you want to get your hands busy, which is what we did almost immediately.

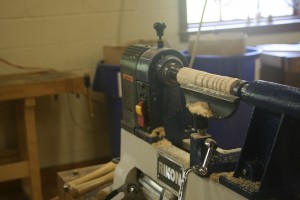
Our classroom and shop for the day

Our classroom and shop for the day

Hal Simmons, our instructor for the day, kicked off the class by introducing his own woodworking history. Having taught since the 1990s at Highland and with a background as a Red Cross disaster response volunteer, I felt we were in good hands to safely fire up the power tools.

The first step for us was going over the basics of the lathe, from the different types on the market to how to adjust the speed. Our small class of four included eager students with a variety of backgrounds, from someone interested in getting into pipe making to one who was gearing up for a chair making course. Because of this, we had a range of goals and different experiences, which Hal tried to tailor his turning tips towards.

After reviewing tool names and basic safety, particularly with where to position oneself while working on the lathe, we began by setting up blocks of scratch wood and using a spindle roughing gouge to bring them down to workable cylinders. From there, our focus was on learning about the different shapes – coves, beads and planes – that we could create.

Practice piece

Practice piece

For me, one of the lessons that stood out was in how to handle the relationship between the tools and the lathe. Instead of putting in force, Hal described letting the machine do the heavy lifting and being there as a guide. For anyone who has sat with a sewing machine, as I often do, this is a remarkably similar mantra. When you first learn to sew, there is a tendency to push and pull the materials through instead of letting the foot of the sewing machine do its job. While the parallel between the lathe and sewing was a helpful point of reference, it did not necessarily make it easier to train my muscles for the turning tools though!

In particular, creating coves (concave shapes), proved difficult for me, but with a class of only four people, I had plenty of help in getting the angle between myself and the tools corrected and adjusted until I was able to work on our projects for the day: turning a honey dipper and then a spinning top.

What I enjoyed about each new step we learned though was the emphasis on a process. Not unlike the work I did with saws in high school, it is nice that there are steps that you need to follow in turning. For example, beads were made by “opening the flute,” “rubbing the bevel,” “engaging the cutting edge,” and then lifting and rolling the tool until the flute appeared closed.

For me, this simple procedure made it easier to tackle than, say, clay sculpting or drawing where a certain amount of disorder is needed before creative pictures or pieces can form. While it takes a bit to see where the end turned product is going, it is nice to be able to have a structure to follow as a complete novice.

Beyond the structure, another advantage to turning as a beginner class is that the machine itself lacks some of the intimidation that can come with a table saw or bandsaw. While just as much care needs to be taken around each, there is less of a fear factor to jumping in with the lathe than in overcoming some of the nerves of having a rotating blade in front of you.

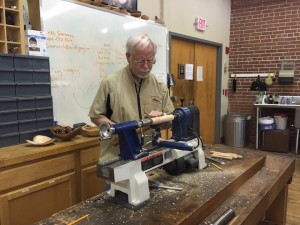
Demonstration

Demonstration

In learning our way around the machine, Hal demonstrated each new cut or process for making an object and then let us take over at our individual paces (my pace being pretty slow) and individual work stations – each equipped with a lathe and tool box. From there, we got the hands-on help needed to go from making wonky cuts to clean looking pieces that began to resemble the elegant samples.

What I did not expect during the day and during the hands on class was a bit of a history lesson along the way. Hal managed to tie that in though, explaining how the 45 degree angle of the skew tool is a descendant of the French guillotine and describing the historical changes to the clutch, which we needed for the small, delicate spinning tops.

I just recently began reading Malcolm Gladwell’s book, Outliers, which discusses the need to put in 10,000 hours of practice to achieve mastery in a field. While seven hours is a fractional step in that direction, it was definitely a great taste of turning, and Hal provided advice on how to take what we learned a step further. His suggested practice is simply taking a piece of wood and forming a line of coves and beads each day to build up the muscle memory for crafting designs.

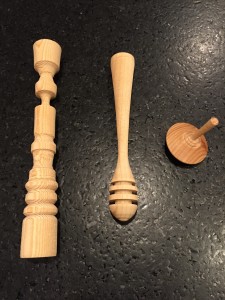
Completed honey dipper and top alongside practice piece

Completed honey dipper and top alongside practice piece

If you are looking to try some woodworking where you can end with a tangible product and also see the direction in which you can carry the skills, then turning is definitely for you. Even if you may not have a lathe at home or access to one elsewhere, I had the chance to come out with a greater appreciation for how items that have always been around me are made and the work that goes into handcrafted objects. Understanding how to really work with a piece of wood to create something new comes with a sense of gratification not available in an IKEA showroom.

CLICK HERE to read the August 2015 issue of The Highland Woodturner.


Aug 112015
 

EDITOR’S NOTE: We would like to introduce our newest blogger/store reporter, Mollie Simon, a Journalism major at The University of Georgia who has recently begun pursuing her interest in woodworking.


IMG_1036If I were to describe my current woodworking skill-level, I would put it about a half step below symmetrical bird feeder construction and a half step above IKEA shelving assembly. As a sophomore journalism student at the University of Georgia, I tend to build ideas with words more often than with hammers and nails.

Despite that, I am a tinkerer at heart, and am eager to learn my way around a wood shop and figure out how to craft new projects. My dream is to become a journalist and someday own a farm, a bakery, or a bed & breakfast (or maybe a combination!), so I know that the ability to work with wood tools will be handy.

Usually, I spend my free time bent over my sewing and felting machines, seam-ripping my way through fabric and designing zipper-laden bags. I have probably made enough hats, scarves, skirts, quilts and other miscellaneous items that you could stack them up to make a solid set of chairs; but, if you gave me the wood and tools to make a real chair right now… well, you might be sitting on the ground for a while.

Hopefully though, I will soon be graduating from IKEA assembly to bigger, better, and more solidly crafted things as this Saturday, I will be taking my first class at Highland Woodworking. I am excited to have the opportunity to blog about the class, Beginning Turning with Hal Simmons, and share it with my fellow novice woodworking fans through Wood News and The Highland Woodturner.

Having grown up in Atlanta, I remember passing Highland Woodworking many times and am hoping to now combine my interest in woodworking with my love for words by writing about events at Highland and also writing about different classes.

With this first class, my goals are pretty simple: get to know the lathe and progress from mitered corners to learning how curved wooden items are crafted.

While I had the chance to take four years of engineering classes in high school, I never did a great job of working on independent projects at home and moving from merely piecing wood together to piecing it together with style. I got to learn my way around AutoCAD and befriend the miter saw, table saw and bandsaw, but there were endless hand tools and machines I never touched. Fortunately, it is never too late to change that.

What has always drawn me to sewing is what also inspires me about the art of woodworking: the ability to create something new and tangible at the end of a day’s work. I am looking forward to sharing what I can turn out in a day this Saturday!

CLICK HERE to read Mollie’s blog about the actual class.