Molly Bagby

Jul 242013
 

A few weeks ago we began blogging about Highland Woodworking owner Chris Bagby and his wife Sanne’s progress with the installation of a Little Free Library in their front yard in Atlanta, GA. The Little Free Library is a nationwide community movement project that involves the creation of a birdhouse-sized structure that is placed in your front yard and then filled with books that can be shared with others in your neighborhood. Sanne has been keeping track of their progress through her own blogging and today we present the final installment of The Little Free Library with the Grand Opening and Post Opening.
———————————————————————————————————————-

To see the previous entry about Library Theme and Placement, click HERE.

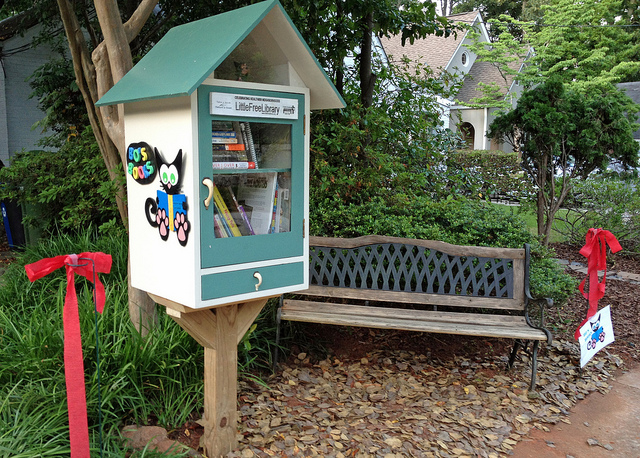
The final step in the project is attaching our official “Little Free Library” sign that displays our registration number on it. The door had been specifically sized to accommodate the sign just above the window that provides a view into the cabinet. We were ready to open up for business! We accomplished this task just 10 minutes before the ribbon-cutting ceremony was to begin, so we finished just in the knick of time!

9068165922_f7a5df83e0

We had set up a festive table with snacks and some ice-cold bottles of water to make it a real celebration. The LFL was cloaked by a table cloth and flanked by poles from which we’d suspended a bright red crepe paper “ribbon.” Neighbors, adults and children alike, most bearing books, started to arrive, eventually numbering about 40. Three sisters aged from 8 to 14, and their parents, both educators, were amongst the first to arrive. I asked the girls if they would do us the honor of cutting the ribbon. With some shyness at first, they all agreed.

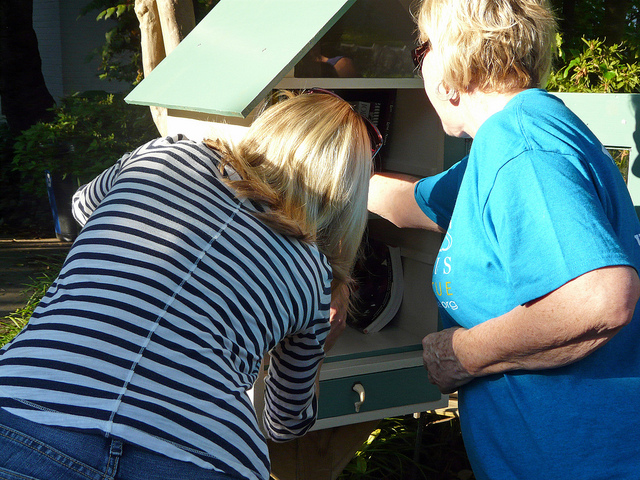
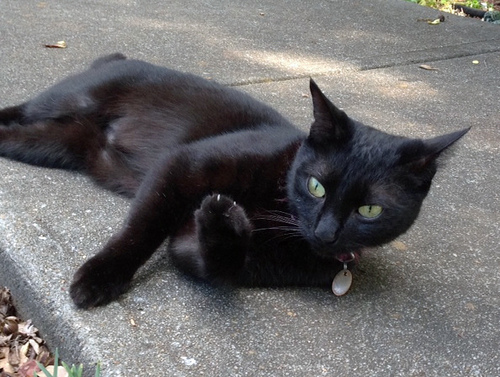
I made a little speech welcoming everyone to the event and explained briefly how the LFL movement got started and how it works, and then the ribbon-cutting occurred. The two younger girls, Elena and Abby, did the cutting while older sister, Isabella, whipped off the cloth revealing the library, itself! We got cheers and applause and more than just a few “AWWWS!” and chuckles from those who notice the library’s name: “Bo’s Books.” Bo, our cat who had been slinking around amidst the crowd, was picked up and cheered. He loves the attention!

9065824393_1101077842_z

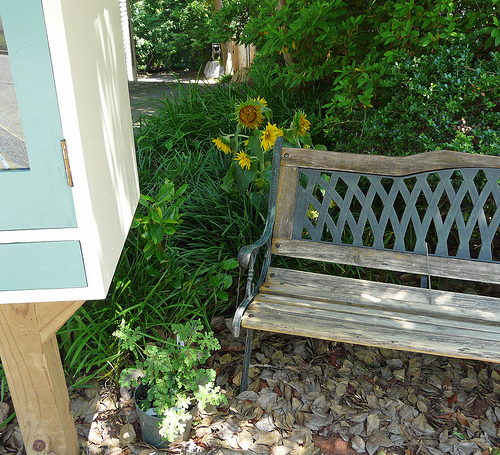
Right from the start, our LFL saw books being exchanged. Some of the users claimed a seat on the bench and shared the books they had brought themselves, while others sat at the picnic table we’d set up. Most people were gathered near the snacks table, chatting and catching up with one another. Some of the discussion I heard was “how nice it is to get together like this and how we should all do it more often.” Clearly, our LFL is achieving its goals of “building community.”

Since the Grand Opening, I’ve planted a sunflower behind the bench to serve as a cheerful greeting to visitors and a mosquito repelling plant next to the bench to encourage folks to sit and enjoy browsing through their chosen books without suffering the annoying the buzz and bites. While we are officially registered as a Little Free Library with the organization, we are waiting to be listed in their online database and shown on their worldwide location map. Then, we’ll really feel official! You can see the map of all of the Little Free Libraries around the world by clicking HERE.

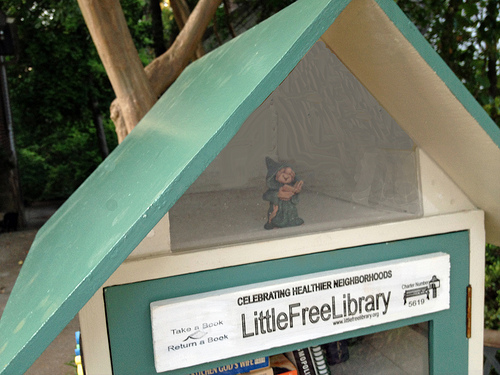
9065934365_7266f0e95e_z

Jul 192013
 

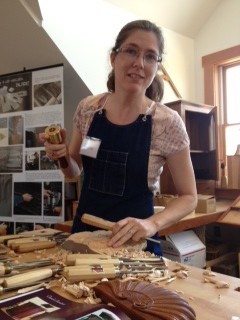
This week’s Follow Friday is Mary May, woodcarver extraordinaire and founder of Mary May’s Online School of Woodcarving. We previously featured her in our January 2012 Show Us Your Woodcarving section of Wood News, and she will be teaching a Fundamentals of Woodcarving class this December in our Atlanta store, which you can find more information about and sign-up HERE. We also got the opportunity to learn more about Mary May this past weekend at the Lie-Nielsen Open House in Warren, ME, where she was doing woodcarving demos throughout the weekend, which you can see in the video below.

Mary May began woodcarving in 1992 after becoming inspired by all of the intricate carvings she saw in churches, castles, and other old buildings during a trip to Europe. She began studying the craft and working with many different master carvers all around the world in order to learn as much as she could about woodcarving. Specifically, she has an interest in traditional furniture and architectural carvings and specializes in carving the details on these pieces. She has her own business dedicated to this craft called Cornerstone Creations, LLC in Charleston, SC, where she currently lives.

While in Maine, we talked to Mary about her online school, which is a great way for beginner woodcarvers to become familiar with woodcarving at their own pace. At the moment she has 12 online tutorials for beginning carvers, which are completely free and allow the carver to become familiar with their gouges and other tools, and then carve some simple projects. (Note – you will have to register at her site before you can access the free tutorials.) The beginning projects include a Donut, a Simple Flower, and a Camellia Flower seen below in the pictures. Once you get hooked and finish the beginner projects, you can sign up for her monthly pass for $10 a month and have access to the entire library of carving videos, which she updates monthly. As a beginning carver myself, I’m planning to take her online tutorials and will be sharing my experiences in later blogs to come!

Scroll below pictures of several of the carvings that she was working on during the Lie-Nielsen Open House. You can visit her website HERE to view many more pieces by Mary May.

molly1

carvingtools

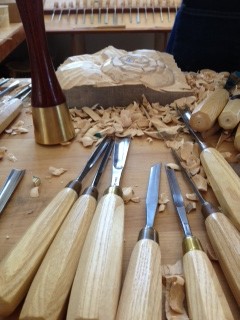
Mallet and multiple carving gouges she used for her pieces.

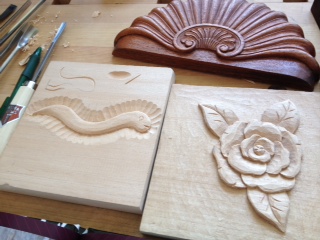
wormandflower

The Worm and Camellia Flower are two of her beginning projects.

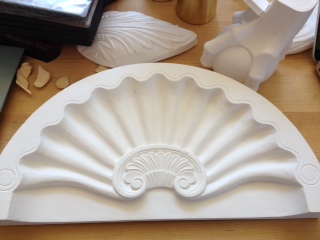
inverseshell

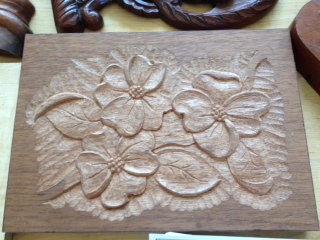
betterflowers

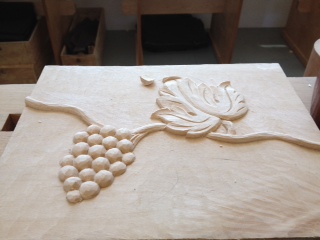
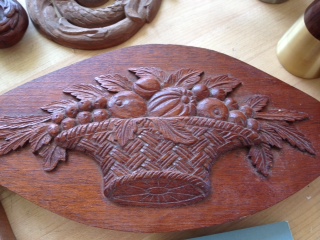
fruit

fruitbowl

———————————————————————————————————————————————————————-Fridays on the Highland Woodworking Blog are dedicated to #FollowFriday, where we use this space to further highlight a woodworker, carver, or turner who we have featured in our monthly e-publications Wood News or The Highland Woodturner. Would you like for your shop or woodworking to appear in our publications? We invite you to SEND US PHOTOS  along with captions and a brief history and description of your woodworking or shop (Email photos at 800×600 resolution.) Receive a $50 store credit redeemable towards merchandise if your submission is featured in a future issue.

Jul 122013
 

Today’s Follow Friday is woodcarver Alexander Grabovetskiy, who was featured in the Show Us Your Woodcarving section of our July 2013 Wood News. Alexander first discovered woodworking when he happened to find his grandfather working on a project in his workshop. His grandfather got Alexander doing his own woodworking right away by giving him his own chisel and mallet. This started a lifelong passion for Alexander who began studying the craft and working as an apprentice for Professional Carver Vladimir Tokarev when he was 16. Unfortunately, when he was 19, Alexander was arrested by the Soviet Union because of his religious beliefs and his refusal to join the army, and he was sent to jail. While in jail, he made use of his time there and was able to continue his woodworking skills making tables and kitchen sets. After 2 years in jail, Alexander was released with the help of Amnesty International, and with no job, he decided to start his own business and became a professional woodcarver. Alexander and his family immigrated as political refugees to the United States in 1996, and 2 years later, Alexander was able to start his own corporation, Aalmark. He has become notably famous within the woodcarving community after being named the Woodworker’s Institute.com International Woodcarver of the Year for 2012.

Architectural Carving Wall Decoration

blog3

Wall decoration detail

Alexander works in a lot of different styles of carving including high relief, sculpture, and ornamental. He says he will try pretty much anything, just give him some wood and then he will carve something out of it. Alexander’s company, Aalmark, specializes in architectural wood carving, which includes moldings, capitals, brackets, fireplace mantels, doors, paneling, among other things. The most important aspect to his carving is that it is all handmade and created with the human touch.

blog4

If you have any questions about his pieces or methods, feel free to email Alexander HERE. You can also view his website HERE.

———————————————————————————————————————————————————————- Fridays on the Highland Woodworking Blog are dedicated to #FollowFriday, where we use this space to further highlight a woodworker or turner who we have featured in our monthly e-publications Wood News or The Highland Woodturner. Would you like for your shop to appear in our publications? We invite you to SEND US PHOTOS of your woodworking shop along with captions and a brief history and description of your woodworking (Email photos at 800×600 resolution.) Receive a $50 store credit redeemable towards merchandise if we show your shop in a future issue.

Jul 052013
 

Today’s Follow Friday is woodworker David Picciuto, who was featured in the Show Us Your Woodworking section of our July 2013 Wood News. David has always been into art and design with a photography background, which is actually what got him into woodworking in the first place. He was looking into frames for his photography and was shocked at the price of them, and like many people decided it would be cheaper to just make his own frames. While he didn’t actually make any frames in the beginning , he bought the woodworking tools to make them and quickly got hooked to the craft.

With a modern approach to woodworking, David runs his own website known as Drunken Woodworker, which you can visit HERE. He describes his website as “your repository for woodworking inspiration and resources. With a focus on design and smaller, crafty projects like bandsaw boxes, wine displays, pencil holders, art supplies and everything else made of wood. I have a growing library of bandsaw box plans, patterns,woodworking tutorials and videos including links, feeds and podcasts from some of my favorite woodworking artists and instructors.” Whether you’re looking for ideas or just want to see some creative and interesting pieces of woodworking, you should definitely check it out!

Below are some of his pieces, which you can see more of at his website HERE.

drunkww1

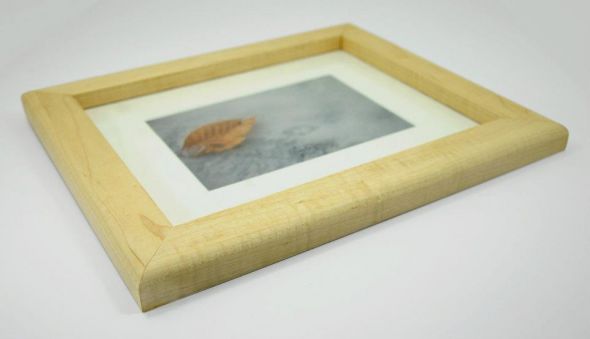
Picture frame made from maple and finished with pure tung oil and wax.

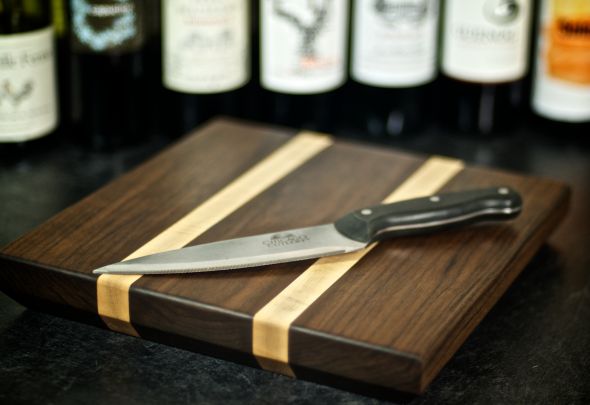
Thick wood cutting board made out of dark walnut and maple. Large 12″ x 12″ cutting surface and nearly 2″ thick. Very heavy, weighing in at 6.1 lbs. Finished with mineral oil and paraffin wax. No other oils or chemicals has touched this board making it food safe

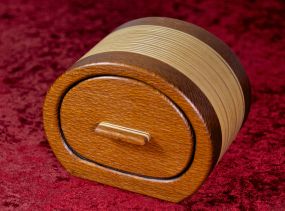
“Omaha” Bandsaw box made from lacewood and baltic birch plywood. Finished with Highland Woodworking’s 3-part finishing system.

Wine bottle and glass holders. Mahogany, purple heart, red oak. Finished with wipe-on poly.

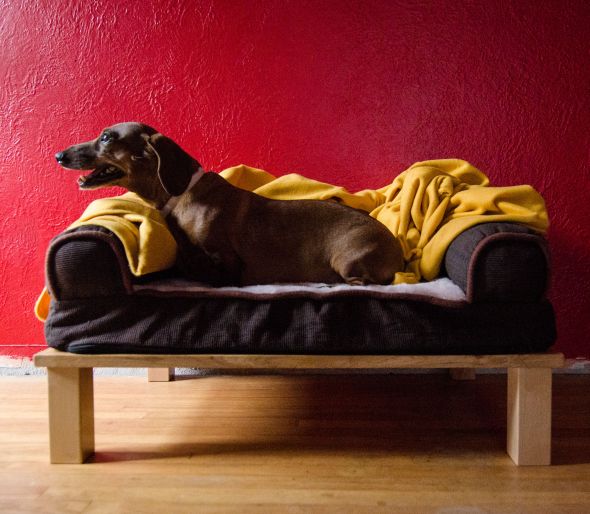
Dog Bed Riser-Made from cherry plywood with red oak edging. Finished with boiled linseed oil and polyurethane.

If you have any questions about his pieces or methods, feel free to email David HERE. You can also follow him on Twitter HERE.

———————————————————————————————————————————————————————-

Fridays on the Highland Woodworking Blog are dedicated to #FollowFriday, where we use this space to further highlight a woodworker or turner who we have featured in our monthly e-publications Wood News or The Highland Woodturner. Would you like for your shop to appear in our publications? We invite you to SEND US PHOTOS of your woodworking shop along with captions and a brief history and description of your woodworking (Email photos at 800×600 resolution.) Receive a $50 store credit redeemable towards merchandise if we show your shop in a future issue.

Jul 032013
 

A few weeks ago we began blogging about Highland Woodworking owner Chris Bagby and his wife Sanne’s progress with the installation of a Little Free Library in their front yard in Atlanta, GA. The Little Free Library is a nationwide community movement project that involves the creation of a birdhouse-sized structure that is placed in your front yard and then filled with books that can be shared with others in your neighborhood. Sanne has been keeping track of their progress through her own blogging and today’s blog features the theme of the library as well as the physical placement of the library in the yard.
———————————————————————————————————————-

Previous Entry: The Roof Addition

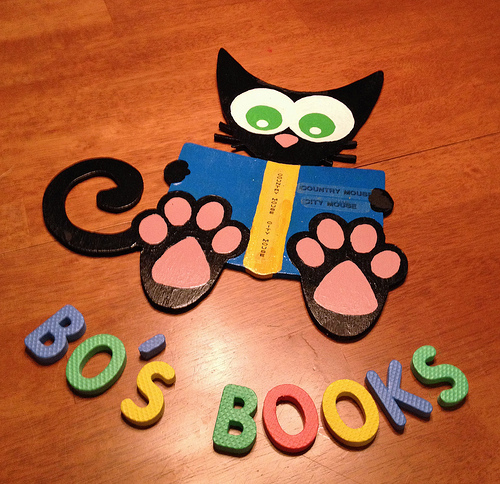
It’s time to execute the theme for our library. Our little black cat, Bo (short for Bodacious) is the love of the neighborhood. This friendly little guy has endeared himself to just about all of the kids and adults for blocks around our home. He even has some feline and canine friends in the mix! Chris came up with the idea of “Bo’s Books” as the name of our library, and that was all I needed to hear. I scoured the internet for cat images and found a delightful little clip-art cartoon, complete with a book.

Bo, the cat

Bo, the cat

I traced an outline onto a piece of luan and Chris cut out the shape using the scroll saw. I proceeded to sand and paint it. A few modifications to the original design to make it look more like Bo, and then it was complete. I gave a title to the book Bo is reading, a tongue-in-cheek impulse: “City Mouse, Country Mouse!” Hope this makes some people laugh! I found a leftover piece of the luan, shaped it using the scroll saw and then painted it black. I bought some colorful foam letters to spell out the title. I glued the letters onto the board using contact cement. These luan boards will be mounted onto the side of the library cabinet.

Bo hovered around constantly while all this activity took place. I think he was aware that he was being “copy-catted,” but it was difficult to tell whether he was annoyed or flattered by it! I think it’s a good likeness, don’t you?!

bo'sbooks

Now that the library is fully constructed and decorated, it is time to set it up in its permanent home. We know exactly where in our front yard that we want to place it, but we experiment with the placement of a bench nearby. We settle on a placement that is sheltered under a crape myrtle tree with the bench situated at an angle next to it and in front of a lovely shrub that spans ours and our neighbors’ yard. Our neighbors are delighted with our LFL plans and give us permission to trim the shrub and even loan us an electric trimmer that gets the job done in a hurry! We remove the many tangled vines that have crept high into the shrubs and trees that circle the area.

The monkey grass that’s growing where we plan our cozy little library spot has gotten tall and crowded. I haul out the garden tools and we begin digging out the various clumps. They are heavy and the roots are well-established and tangled. We manage to fill two large wheelbarrows with massive clumps. It’s hard work but satisfying to see the area, now cleared of the the monkey grass and filled with small stones  instead. We transplant some of the monkey grass to the edges of our driveway and to an area behind the bench and library cabinet. This creates a nicely defined and sheltered nook for users to browse through the books. I used the palm sander to smooth out the wooden slats on the bench – we don’t want anyone to experience any unfortunate splinters!

benchrocks

Chris finds a 6’ length of 4×4 left over from our deck construction 20 years ago. He follows the instructions for building the post and mounting platform. It calls for a 5-foot post sunk into the ground at a depth of 2 feet. We try this, but it looks too high. Younger children will not be able to even reach the bottom of the cabinet and only the tallest adults will be eye-level with the upper shelf. Chris lops 10 inches off and we try again. Still too high, I say. Chris saws off another few inches. The cabinet now sits only about 24 inches off the ground, which seems perfect. While the grown-ups may need to bend a bit to find their books, all but the youngest children (who likely would need supervision anyway) will be able to help themselves to the books – Viva L’Independence!

post

We’re nearing the “finish line” of our project. Time to invite the neighborhood to a Grand Opening – I went around the neighborhood in the final week of working on the LFL, leaving invitations “from our cat, Bo,” on everyone’s mailboxes to come to the “Grand Opening” of the newest neighborhood Little Free Library.

invitation

CLICK HERE to see the final blog post about the project, with the Grand-Opening of Chris and Sanne’s Little Free Library!

Jun 282013
 

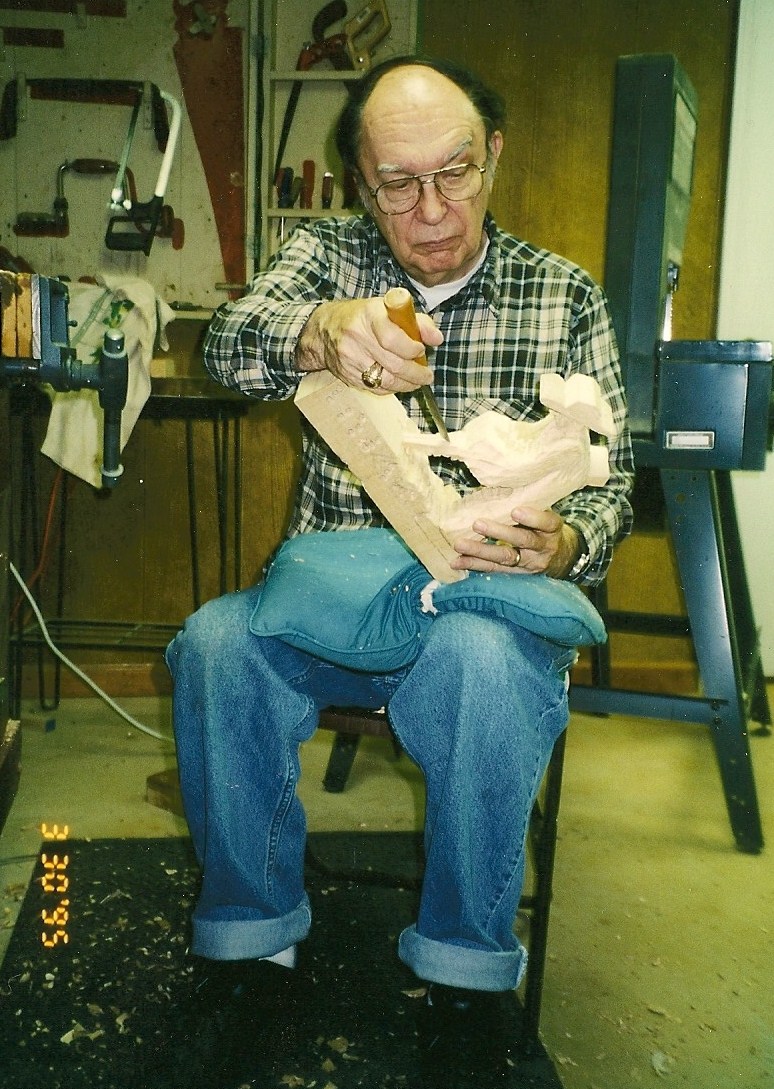
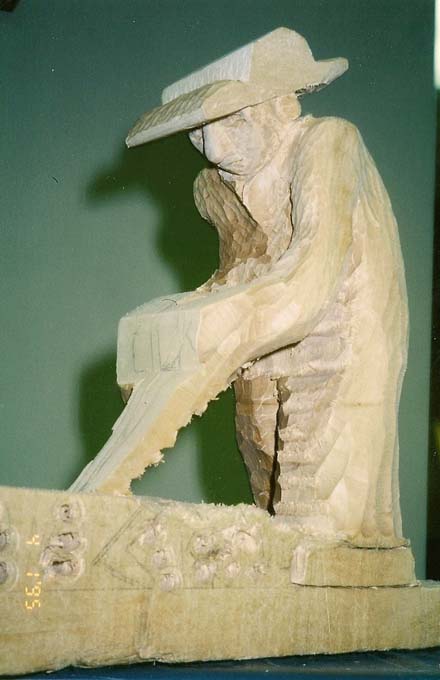
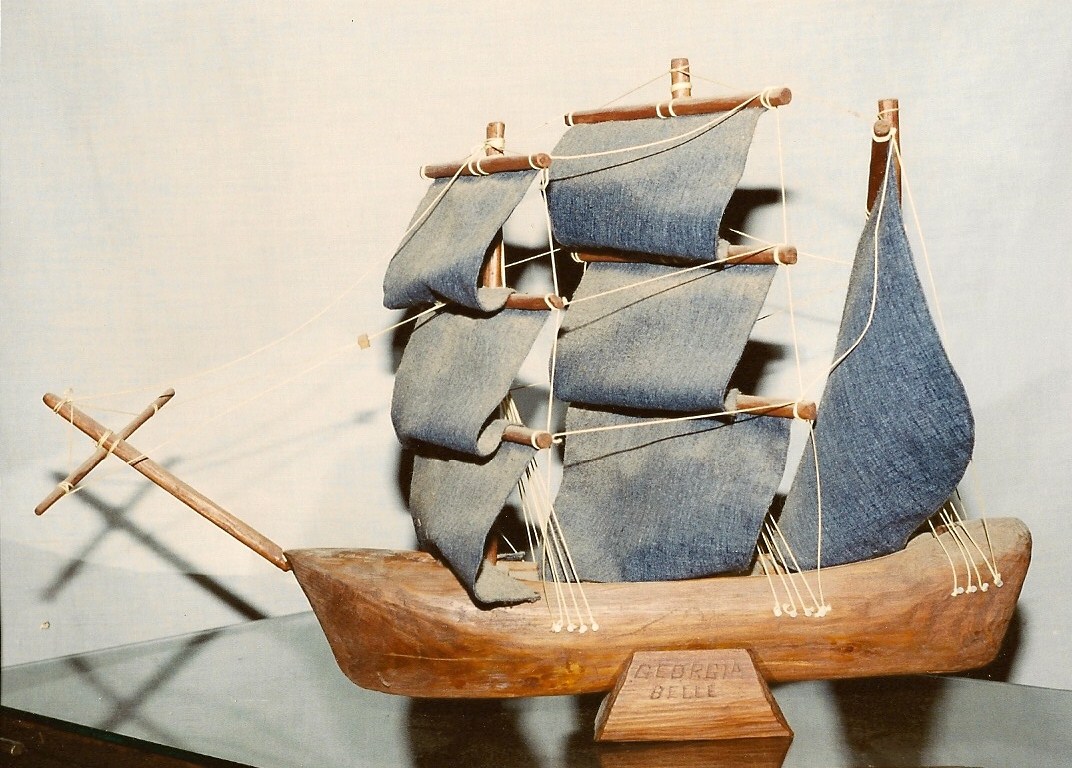
calphotoWe’re back in action with our #FollowFriday series. This week we are following Cal Logue, who was the featured wood carver in our June 2013 issue of Wood News. Cal grew up in several different Alabama towns and began carving over 30 years ago. He carves a wide variety of people and scenes, mostly carving pieces that reflect topics from the Southern region.

On the subject of carving, Cal gives the following advice from his website: “To wood carve one needs suitable wood and sharp tools.  Ideally one will use wood that allows the carver to carve in any direction, much like a bar of soap.  With basswood, for example, you can carve a nose or handle of a spoon in any direction.  Whereas with pine, one generally must go in the direction of the grain.  Sharpening tools is more a mystery than a science.  For example, I will sharpen six gouges (carving tools) at the same time and three will be sharp and three dull…It is vital to anticipate where you will need to leave wood to carve each area.”

Cal has an interesting method within his wood carving, where he uses a drill press to put holes in the piece he is working on, in order to make it easier to remove wood with a gouge in later steps.

As you can see in the photos below, Cal has a lot of interesting carving pieces!

cal1

cal3

calmontage

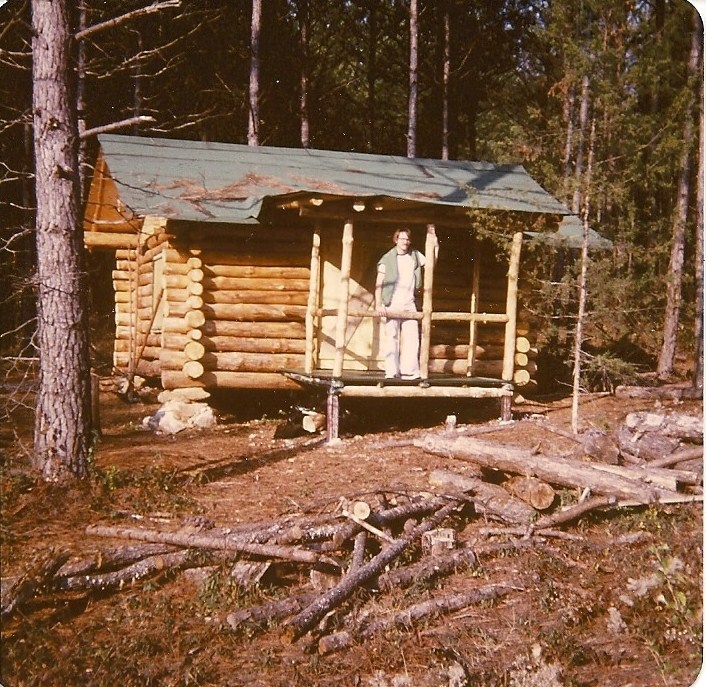
Another bigger project that Cal has accomplished in his woodworking career is the building of a log cabin with two other people. They built the entire cabin from the foundation to the roof!

calcabin

You can view more photos and learn more about Cal’s carving career on his website by clicking HERE.
———————————————————————————————————————————————————————-

Fridays on the Highland Woodworking Blog are dedicated to #FollowFriday, where we use this space to further highlight a woodworker or turner who we have featured in our monthly e-publications Wood News or The Highland Woodturner. Would you like for your shop to appear in our publications? We invite you to SEND US PHOTOS of your woodworking shop along with captions and a brief history and description of your woodworking. (Email photos at 800×600 resolution.) Receive a $50 store credit redeemable towards merchandise if we show your shop in a future issue.

Jun 212013
 

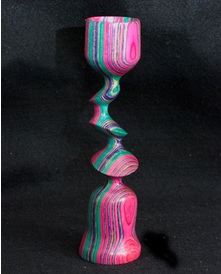
bissonette1Not only is today the first day of Summer, but it is also Follow Friday! Today, we are featuring woodturner, Ray Bissonette, from Snyder, NY, who was featured in our June 2013 issue of The Highland Woodturner. Although he first got  interested in woodturning while in shop class at school, he didn’t really pursue the craft until he got his own lathe and began to experiment with different pieces. From this experimentation, he developed his “don’t try this at home” approach to woodturning, which has been the idea behind many of his off-center and eclectic looking pieces that were made with an “unconventional use of conventional tools.”

Many of Ray’s signature pieces are made using the following process, as described by Ray:

“I turn the shaft round with a slight taper toward the tail stock, shape the exterior of the cup, then remove the tailstock. After hollowing and finishing the cup, I begin the white knuckle part. I loosen the chuck and shift the workpiece somewhere between 1/8 and 3/16th inches (I don’t measure), re-tighten really hard and cut my first offset section. When that is complete, I repeat the process in 90° increments to produce the progressive twist which I prefer to a “crankshaft” pattern. The horizontal and vertical contours I get are not possible to my knowledge with an offset chuck. However, I’m told the process is inherently risky to the workpiece, worker or both”.

To find out more about Ray’s wood turning and to view more images of his work, you can visit his websites HERE and HERE. You can also email him directly HERE.

ffraybissonette

———————————————————————————————————————————————————————-

Fridays on the Highland Woodworking Blog are dedicated to #Follow Friday, where we use this space to further highlight a woodworker or turner who we have featured in our monthly e-publications Wood News or The Highland Woodturner. Would you like your woodworking to appear in our publications? We invite you to SEND US PHOTOS of your woodworking  along with captions and a brief history and description. (Email photos at 800×600 resolution.) Receive a $50 store credit redeemable towards merchandise if we show your woodworking in a future issue.