Matthew York

Matthew York has been a woodturner since 2004 and has been interested in woodworking since he was a teenager. He currently lives in downtown Atlanta and has a small shop in his basement. He is an avid woodworker and is always available to talk about the craft. He can be contacted at fracturedturnings@gmail.com or visit his website at fracturedturnings.com. You can also follow him on twitter at @raen425

Jan 202015
 

Have you ever wandered around your shop desperately looking for a tool, or some glue, or even the work piece you just had in hand? I know I have. I’ve had those moments of, “I just saw X a few minutes ago, where did it go?” and have been frustrated by all the time I wasted looking for things around my shop. I’ve worked on getting organized a few times, done grand cleanings of my shop where I get everything put in a particular place, but these never really seem to stick. A few months ago I saw a video series by Steve Johnson, the Down to Earth Woodworker, about the organizational system he uses for his shop. Steve uses a modified version of the manufacturing principles known as 5S and his discussion of these principles really hit home with me. I’ve been building my shop toward those principles over the past few months but now I have an even better opportunity to learn from Steve.

This coming Sunday, Steve will be offering a class on his 5S principles at Highland Woodworking. Steve will be speaking about the various principles he incorporates in his shop, and how you can apply them to your own shop. I know I am certainly looking forward to learning from Steve. The 5S principles are intuitive enough that I feel I can follow them once I get them implemented and Steve’s instructions have always been very helpful.

The 5S principles are loosely based on a Japanese manufacturing strategy that many companies have adopted to improve workflow and time management. The principles are based on 5 words beginning with the letter S and designed to engender particular modes of behavior when you apply them to your workshop. The 5S’s are Seiri (Sort), Seiton (Straighten), Seiso (Shine), Seiketsu (Standardize), and Shitsuke (Sustain). Applying these principles to your life in the workshop should provide more quality time within the shop. I know Steve’s video series on the 5S principles helped me somewhat and I am looking forward to learning and listening to his points directly during the class. It is my hope that by attending the class I can further refine my own use of the 5S principles and make my time in the shop more productive and valuable.

If you would like to join Steve in this Sunday”s Better Shop Organization seminar, there are still spaces available and you can sign up directly on the Highland Woodworking website by clicking HERE.


Matthew York has been a woodturner since 2004 and has been interested in woodworking since he was a teenager. He currently lives in downtown Atlanta and has a small shop in his basement. He is an avid woodworker and is always available to talk about the craft. He can be contacted at fracturedturnings@gmail.com or visit his website at fracturedturnings.com. You can also follow him on twitter at @raen425

Jan 062015
 

Welcome to our 2015 Woodworking Resolutions blogger series. Every year we invite our bloggers to share their resolutions specific to their woodworking goals for the new year. Click each link below to read our bloggers resolutions!

Matthew York

Every year when the calendar turns from December back around to January people make resolutions, promises that they hope to keep for the New Year. These also tend to serve as goals that they hope to strive for as the New Year marches along. As a woodworker we often make resolutions associated with our hobby, and I am certainly no different. For the year 2015 I have a few resolutions that I would like to focus on getting accomplished.

First I would like to apply some of the principles that the Down to Earth Woodworker discusses in his videos on 5S in the workshop. I like the idea of organizing my shop and cementing some habits that make working in my shop easier, safer, cleaner and more enjoyable. If you haven’t already I highly recommend checking out what Steve discusses in his 5s videos.

Another resolution I have lined up is my desire to show my work at more arts and crafts festivals. I love making things, and I find joy in what I do. I would also love to find a way to do woodworking full time instead of just as a hobby. While this may not be a realistic end goal right now, the idea of showing my work more often and gaining some customers is something I hope to accomplish in 2015.

I also want to focus on spending more time in my shop on a regular basis. I often go through spurts where I will work in the shop every day after work, and then there are days where I hardly touch a single tool. I’d like to work toward making it a habit to spend at least an hour or two every day or every other day in the shop. I think by spending more time working at a steady pace and less time working in spurts and manic phases I can accomplish more of the goals I am setting for myself.

Lastly I want to set aside some time this year and learn a new woodworking skill. In 2014 I took a class at Highland taught by Scott Meek over at Scott Meek Woodworks on making wooden hand planes. This January I am continuing that education by taking the Advance plane making class that Scott offers online. My goal for 2015 is to find something else in the wide woodworking world and learn how to do that. Currently I am leaning toward finding a chair making class and learning how to make chairs. I think chair making could be a lot of fun and it will complement some of the skills that I already possess.

Resolutions are often something that we make and then break within the first few weeks of January. Instead of setting myself impossible tasks or lofty goals I want to focus on taking small steps and building habits. By focusing on the little things, like organization steps within 5s, or spending more days but less time per day in the shop I can work to ingrain those habits. Make them muscle memories and by doing so advance along my journey as a woodworker.

Does anyone else have any woodworking resolutions for the coming New Year?


Matthew York has been a woodturner since 2004 and has been interested in woodworking since he was a teenager. He currently lives in downtown Atlanta and has a small shop in his basement. He is an avid woodworker and is always available to talk about the craft. He can be contacted at fracturedturnings@gmail.com or visit his website at fracturedturnings.com. You can also follow him on twitter at @raen425

Click below for more bloggers 2015 Woodworking Resolutions:

Nov 242014
 

The Holidays are always a time for Woodworkers to shine. Receiving a handmade gift from someone you care about is a wonderful treat, and as a woodworker it shows you are willing to invest time and skill into what you give to that person. I know that as a woodworker, I enjoy giving gifts to my friends and family that I make and I will be doing just that this coming Holiday season.

A Bradford Pear bowl I made as a gift.

A Bradford Pear bowl I made as a gift.

As a woodworker there are a couple things you can do in the outset to make your life a bit easier when giving gifts. I like to first determine the number of gifts I am going to be giving out. Then I take a look at that list and see if I want to do a single type of gift for everyone, or if I want to try and change things around. Lastly I like to think about the various people I am giving gifts to and determine if the project I have in mind is right  for that person. Once I have my list set and my projects determined, I can start planning out how I want  to tackle them through the coming months.

A Mawali Burl bowl I made as a gift.

A Mawali Burl bowl I made as a gift.

I find the hardest, but most essential part, is determining what exactly you are going to be making for each person. As a woodturner I tend to stray toward things that I can turn on my lathe, though now as I am branching out into the broader world of woodworking, my project ideas are growing. Another thing that influences my project choices is if the project stretches skills that I want to focus on. As I am growing my woodworking and my various skills I am looking for projects to help me with that. I have some boxes I want to make for friends so that I can work on my joinery skills; I have some casework I want to work on for others, so that I can work on a different set of skills.

With Holiday projects you can test your limits or take it easy, the most important thing is to get out there and make something for the folks you care about.


Matthew York has been a woodturner since 2004 and has been interested in woodworking since he was a teenager. He currently lives in downtown Atlanta and has a small shop in his basement. He is an avid woodworker and is always available to talk about the craft. He can be contacted at fracturedturnings@gmail.com or visit his website at fracturedturnings.com. You can also follow him on twitter at @raen425

Nov 112014
 

This weekend I had a wonderful opportunity to take a plane making class with Scott Meek of Scott Meek Woodworks. Scott designs and crafts fabulous wooden hand planes and was going to be teaching us his process for making a wooden smoothing plane. We started off the class by going over some differences between wooden planes and metal planes before heading to our benches and opening up the wrapped pieces of wood that Scott had brought us.

Part of our discussion at the beginning of class, and a topic that flowed through the entire weekend, was the idea that when you have the opportunity to do so, you should purchase the best tools you can. Scott gets a lot of flak on the internet because his planes cost quite a bit of money, comparable to a Lee Valley or Lie Nielsen plane and sometimes even more expensive. You might think, looking at them, that the money is not worth it, or that they are overpriced for what they are. After taking a class from Scott, and seeing everything that goes into making his tools, I think they are worth every penny.

Scott is obsessively attentive to every detail of his planes; each one is painstakingly handmade by him, all by himself. The only thing he doesn’t make by hand is the iron and the chip breaker. He is a craftsman, like many of us, and he puts the same effort and attention into his planes that we devote to our bowls, or our furniture, or our boxes.

When you buy a tool like a Scott Meek hand plane, or a Lie Nielsen chisel or plane, or a Woodpeckers straight edge, or some other tool brands that are made to last, you aren’t buying just a tool, you are buying something that is designed to last a lifetime and beyond. The plane I made in Scott’s class will be with me for the rest of my woodworking life, and because of that, the expense, spread out over so many years, is worth every penny to me. I could go on and on about tools and such, and I might in another post, but for now, let”s move on to the class at hand.

Our planes were going to be made out of quarter sawn white oak, so we spent some time discussing grain orientation and how exactly we wanted to lay out the plane within the blank of wood. We squared it up using the jointer and the planer and then took it back to our bench. Once we had our block set, we moved on to bed angle, incorporating the wear ramp, and exactly how we were going to make our first cuts.
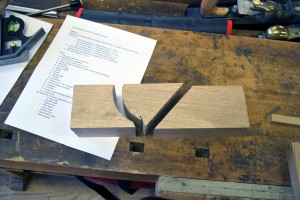
Made some Cuts.

Made some Cuts

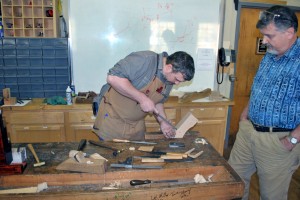
We made our first cuts and started work on truing the bed angle, sanding the wear ramp and creating the slot for the chip breaker to fit. Once we had those steps taken care of, we moved over to truing up the faces of our cheeks. We broke out the power tools once again and trued up the cheeks. All throughout the process we discussed tool choice and alternate methods of doing the various steps and then we worked on flattening and sharpening our blades. Scott was an excellent instructor, taking time to work with each of us and answer any questions we had. He worked at our pace and moved us through the steps with ease.
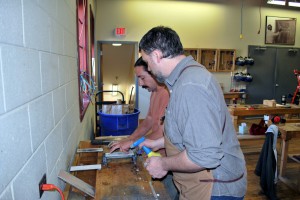
Sharpening.

Sharpening

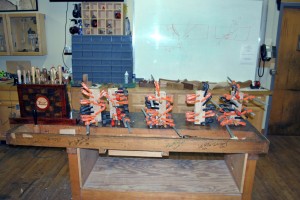
After getting our cheeks all cleaned up, we set them up with the internal plane parts and began our first dry assembly of the plane. Using screws and clamps we got the plane dry fit and assembled and ready to set the cross pin. Scott went over his method of crating the pin and discussed some other ways of creating the tenons for the pin; my favorite alternate method being turning the pins. However not having a lathe handy at the time, we cut the cross pins using Scott’s method and moved on to positioning the hole for the cross pin. Once we had the cross pin cut, the hole in the cheeks and everything lined up we were set to get the plane glued up. We took some glue, a whole mess of clamps and some handy dandy Scott Meek branded glue spreaders (also known as business cards) and got our planes all glued up. After the glue up we ended the first day of class.
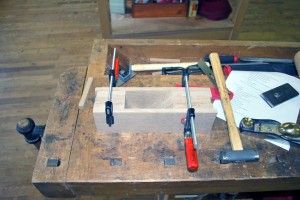
Getting ready to glue up.

Getting ready to glue up

All glued up.

All glued up

Day two of the class came on early, we hit the ground running and worked hard through the day. We walked into class and un-clamped our glue ups right away. Once we had the clamps off, we started cleaning up our squeeze out and getting things ready to start making our wedges. Scott went over designing the wedge and shaping it before we cut it out on the band saw and shaped it on the orbital sander. All the while as tools were in use we each took turns working on our sharpening skills as well.
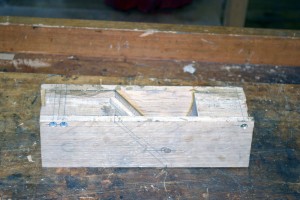
Glued up.

Glued up

Once we had our wedges, we worked on truing the sole and the cheeks so that we could begin opening the mouth of the plane. The mouth opening is one of the most intense and crucial parts of the process, and ensuring it is done properly can be a bit nerve wracking. One of our class members, Shannon, had the mouth of his plane open up on the Jointer as he was truing the sole, this was a nerve wracking moment since he didn’t know if it opened up too far or not but he got lucky and the mouth opened up perfectly for him. Shannon was the first to take shavings with his new plane.
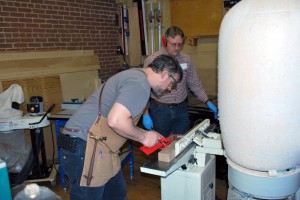
At the Jointer.

At the Jointer

Opening the Mouth.

Opening the Mouth

We broke for lunch and once we were back some of the class finished opening the mouths of their planes while others got to work on shaping the bodies. Scott discussed his design aesthetics for shaping the planes and we got to cutting, rasping, sanding and making the planes our own personal creations. This was my favorite part as it allowed us to truly shape the plane to our own hands.
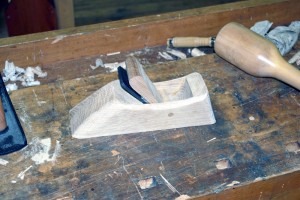
All shaped up.

All shaped up

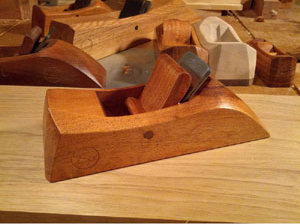
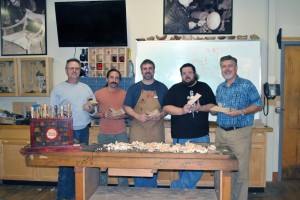
I will tell you all, that first moment you make shavings from a tool you created with your own hands is indescribably good. Pushing that plane across the wood and watching it work the way it is supposed to fills you with pride. You made that, and it works exactly like it should. The class was absolutely wonderful, I learned a whole bunch, and found a love for the hand tools that are the root of the hobby that I am so passionate about. Scott was an excellent teacher, patient and understanding. He worked with the four of us to make something amazing. We all walked out of that class with a skill we had not come in with, and a tool we could use to make even more. Class photo I’ve said it before, and I will say it again, as a woodworker, the classes that I have taken at Highland have been indispensable to my growth in this hobby, and this passion. Highland offers the opportunity to learn from masters of the craft, opportunities that you really can’t find anywhere else. If you get a chance, and I recommend you do, take a look at the class calendar at Highland. It is filled with amazing learning opportunities to elevate your skills to the next level.

Matthew York has been a woodturner since 2004 and has been interested in woodworking since he was a teenager. He currently lives in downtown Atlanta and has a small shop in his basement. He is an avid woodworker and is always available to talk about the craft. He can be contacted at fracturedturnings@gmail.com or visit his website at fracturedturnings.com. You can also follow him on twitter at @raen425

Nov 052014
 

As a woodworker, I’ve found we are often defined as either a “Hand tool” woodworker or a “Power tool” woodworker. There are others, like myself, who straddle the line between the two. These “Hybrid” woodworkers tend to mix the flavors of hand and power tool work for efficient shop time as well as other considerations. Since I’ve started incorporating more hand tools in my work, I’ve been building out my tool chest, incorporating various tools that enhance my work. One of the cornerstones of hand tool work are the hand planes, and some of the best wooden bodied hand planes on the market today are made by Scott Meek.

meek smooth plane classOn Saturday the 8th and Sunday the 9th Scott will be at Highland Woodworking offering a class on How to make your own Smoothing plane. In the two day class, you will spend time learning the fundamentals of putting together a wooden hand plane and you’ll leave the class with your very own wooden smoothing plane. After this class you can head back to your shop with your own completed tool and you can use it in your everyday shop life. But not only will you gain a new tool, you will gain new skills. With those skills you can build other planes, bringing more tools into your shop and hopefully, a sense of accomplishment as you make your own tools.

I first met Scott at the Woodworking in America show this past September. We stood and talked for a bit and I was able to use some of his fine hand planes. With a wooden plane you get far more tactile feedback from the wood you are planing. Since there is no metal body to absorb the vibrations and the sensations from the surface, you are really connected to the wood you are working with. Between your hands and your work is a solid piece of wood that lets you feel the surface you are creating far better than metal bodied planes do. A few weeks ago I got to meet Scott again at the Highland Woodworking open house, where I got to test drive his planes some more as well as talk to him some about their construction and the evolution of their design. I also got to watch as woodworking legend Frank Klausz worked with Scott’s planes. His verdict was the same as mine, that Scott makes exceptional tools.

On Saturday I am looking forward to learning how to make exceptional tools like Scott’s hand planes. I personally have my eye on taking the skills I learn in that class back to my shop and crafting a jointer plane of my own. I like the idea of crafting my own tools; of taking the skills I have as a woodworker and using those to create something with both form and function. I hope, if you are able, that you look to join me at the class over at Highland Woodworking. I think it will be a phenomenal opportunity and teach a set of skills that will only grow after you return to your shop.


Matthew York has been a woodturner since 2004 and has been interested in woodworking since he was a teenager. He currently lives in downtown Atlanta and has a small shop in his basement. He is an avid woodworker and is always available to talk about the craft. He can be contacted at fracturedturnings@gmail.com or visit his website at fracturedturnings.com. You can also follow him on twitter at @raen425

Oct 302014
 

I’ve been doing this whole woodworking thing for a few years now, and if there is one thing I have learned, and seen preached across the woodworking world as a whole, it is that sharp tools are important. If you have ever had the chance to use a really sharp tool versus a really dull tool, you will know exactly what I am talking about. If you are a newer woodworker, maybe you don’t. Either way, keeping your tools sharp is one of the key components to being a safe and effective woodworker.

I recently took a class with Frank Klausz and he shared an anecdote from his youth as an apprentice cabinetmaker that I think illustrates the importance of sharp tools. When he was a young apprentice he would often wait until his Master had left the shop for the day and then experiment with the Master’s planes, using them and feeling how different they were from his own. He would then work at sharpening his planes so that they were as sharp as those of the Master cabinetmaker. It was a night and day difference and taught him the value of sharp tools.

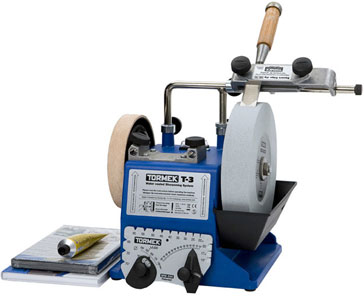
The reason I’m talking about having sharp planes and other tools and how important they are is that I recently got to work with a Tormek T3 grinder. The Tormek sharpening system is a brilliant little tool, and I was able to bring one into my shop for a few days and test it out.

Setting up the Tormek was relatively simple. It comes with an 8″-diameter 220-grit grindstone that can be temporarily graded to 1000 grit for fine honing by utilizing an optional “stone grader”. Also included is a “square edge jig” that makes it easy to precisely sharpen chisels and plane irons. It also has a leather stropping wheel on the other side that makes final honing very quick and easy. Tormek also sells several different accessories that allow you to use the T-3 to accurately grind different types of tools including gouges, knives, scissors, axes and even planer and jointer knives.

One thing I do recommend is that you fill the water tray after you place it beneath the stone; otherwise you might overfill it like I did and get your bench all wet, but lesson learned. The Tormek is a slow speed sharpening wheel and it also functions as a whetstone, which means your tools don’t get excessively hot which can harm the steel. The system itself was a breeze to use and allowed me to grind my tools to a rather satisfying sharpness.

Currently the T3 has been discontinued by Tormek and they are making way for a new system, which will allow the crafty woodworker to take advantage of the fact that Highland currently has some T3’s still in stock. These T3s are going to be moving fast so if you want a new sharpening system that is simple to use and allows you to sharpen your tools to razor sharp angles in just a few minutes I would recommend checking out the Highland website, the T3s won’t be around for long and they have a really great price.


Matthew York has been a woodturner since 2004 and has been interested in woodworking since he was a teenager. He currently lives in downtown Atlanta and has a small shop in his basement. He is an avid woodworker and is always available to talk about the craft. He can be contacted at fracturedturnings@gmail.com or visit his website at fracturedturnings.com. You can also follow him on twitter at @raen425

Oct 272014
 

Have you ever been in your shop standing over a work piece, your eyes scrunched up and your body craned over trying to awkwardly not block light while also working on a piece? You will understand my struggles recently as I was attempting to cut some dovetails in my basement workshop. I have decent lighting in the shop but I have discovered that no matter how much light you have around it never seems to be in the right place. Enter the LED Magnetic work light that Highland has available.

First let me explain, my shop is a small room in my basement that I converted from an office space. The shop has a tendency to spill over into my garage and the rest of the basement, especially since my small shop space is dominated by my Powermatic standing Lathe (The 3520B for those keeping track at home.) What this means for my lighting issues is that, in my woodturning shop space, I have pretty solid light while in my semi-shared garage space the lighting is less than desirable.

I purchased the magnetic LED work light recently on a trip to Highland and have been experimenting with it around my shop as I work in the evenings. Having a day job really cuts into the amount of time I can devote to working in the shop and I find myself wanting to work on projects rather than hang a new light fixture or re-arrange my bench placement. The LED work light steps in and solves most of my lighting issues with the flick of a single switch.

20141008_090204

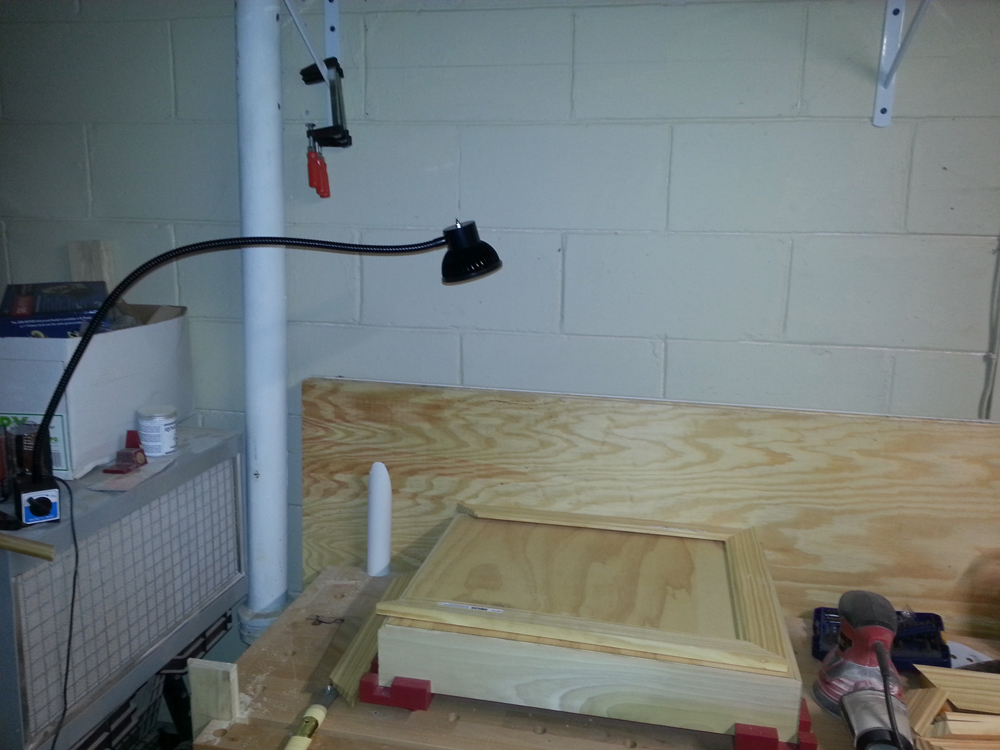
The light itself has a magnetic base that, through the magic of science, can be turned on and off via a toggle switch on the base. This allows you to engage the magnet only when needed and keeps you from having to struggle to remove the lamp once you are done with it. Let me tell you, the magnet is strong. I have some wood storage over my bench and the magnet was able to support the lamp hanging upside down from the rack, pretty nifty.

20141008_090527

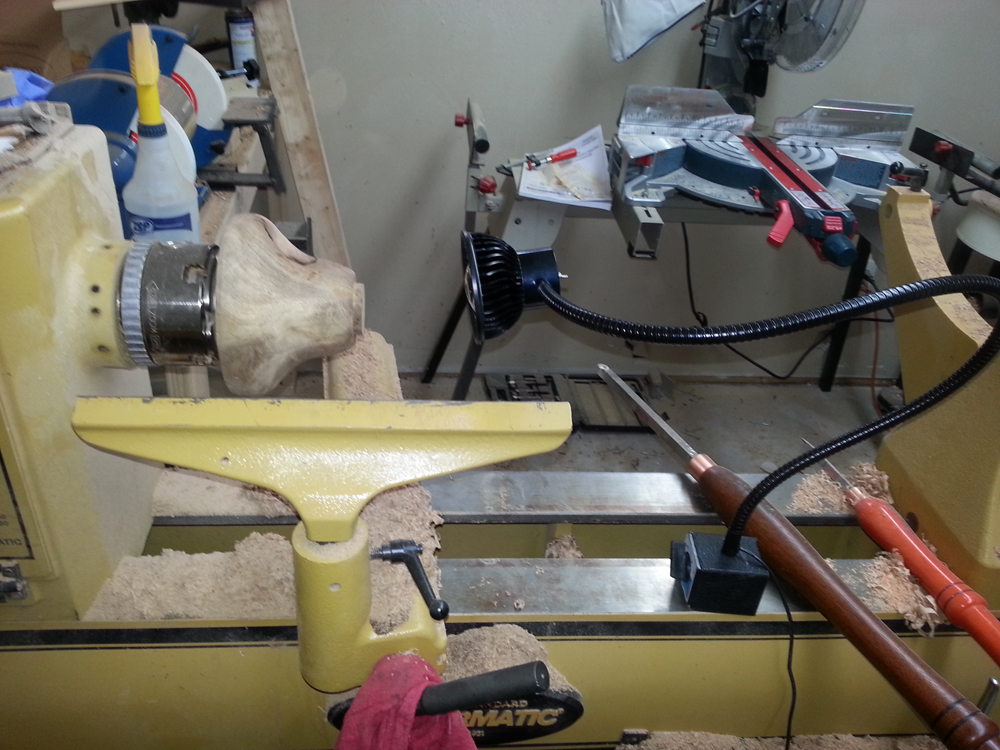
The light also possesses a swiveling adjustable snake arm, professionals call it a gooseneck, that allows the light to be positioned in all sorts of contorted poses so that you get the light exactly where you need it. This means no more back aches from trying to contort myself around the bench and not block my overhead garage lights. It also means that when I am turning on the lathe I can swing the lamp around and get some light inside my bowls or deep vessels which allows for a better turning experience.

I’m still experimenting with the light, but it has proven to be a wonderful addition to my workshop. The LEDs are bright, the illumination strong and the ability to get the light where I need it priceless. The lamp stays cool so I can bring it in close to pieces without risking damage and everything is housed nice and tight so the ever-present and pesky dust won’t seep in. The model I picked up is currently priced at $59.99 and is worth every penny I paid for it. You can find the light here http://www.highlandwoodworking.com/flex-arm-magnetic-led-work-light.aspx so get them while they last.


Matthew York has been a woodturner since 2004 and has been interested in woodworking since he was a teenager. He currently lives in downtown Atlanta and has a small shop in his basement. He is an avid woodworker and is always available to talk about the craft. He can be contacted at fracturedturnings@gmail.com or visit his website at fracturedturnings.com. You can also follow him on twitter at @raen425