Lee Laird

Lee Laird has enjoyed woodworking for over30 years. He is retired from the U.S.P.S. and works for Lie-Nielsen Toolworks as a show staff member, demonstrating tools and training customers. You can email him at lee@lie-nielsen.com or follow him on Twitter at twitter.com/is9582

Feb 232011
 

I remember when I first started woodworking and purchased some hand planes and chisels, no matter what I did, they never would work as I expected. I know many, if not most, woodworkers have had at least some period of time where they were less than happy with the results of their edged tools. One of the main reasons that mine initially didn’t work as expected nor as I’d seen in videos, was the fact that what I thought was sharp, wasn’t truly sharp at all. It’s funny how you can spend time on a sharpening stone (or insert just about any other method of sharpening here) and see polished surfaces, which I interpreted as “sharp”, but still make almost no progress. One of the missing puzzle pieces, for me, was when I finally got to try using a truly sharp plane iron and chisel. This completely opened my eyes as to whether or not my tools were sharp. NOPE! First thing that ran through my head was “So that’s what it feels like when it’s truly sharp”.

When I first started out I was trying all sorts of methods to get a sharp edge, from old carborundum stones (also known as a silicon carbide stone) and then on to some King water stones, scary sharp via sandpaper…The carborundum stone was slow removing material and the main reason I tried it was someone had left it in our garage when we bought the house. The King stones dished out so quick that soon all of my chisels and plane irons looked like they were smiling at me, since the surface shape of the stone is directly copied to the tool. I assumed I could just sharpen without needing to flatten the stone. What an eye opener. I had also watched master craftsmen sharpen their tools freehanded and I thought it would work for me, too.  I remember looking at some of the bevels on both my plane irons and chisels, and you’d think I was practicing at being a gemologist or something with all of the facets I made.

Let me step back for a moment and provide a definition of sharp. It is the intersection of two highly honed surfaces, coming to a point with zero radius. As far as I know, the zero radius is an ideal, but the closer you can get to the ideal, the better. I know there are those of you out there that get great results sharpening all their tools freehand, and that is a really good skill to learn, but I normally will only freehand sharpen the tools that don’t work well in a honing guide. (Think corner chisels and other similar tools…)
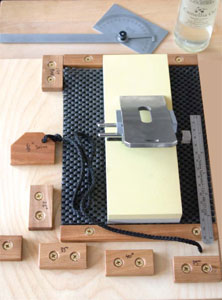
I sharpen almost every tool in my shop with a micro bevel about 5 degrees stronger than the main bevel. This does a couple of things. One aspect is with the micro bevel’s higher angle, the edge is somewhat stronger and may resist breaking down as quickly as a weaker lower angled edge. Another is the fact that only the very tip of the cutting edge is sharpened, which makes it much faster than working to sharpen the whole primary bevel surface. This last aspect also makes it trickier to sharpen freehanded, since the micro bevel is so narrow, that I can’t “feel” it on the stone to know I’m registering the correct angle. I’ve found that for most sharpening needs, I have complete repeatability using an inexpensive honing guide like this one sold at Highland Woodworking, in conjunction with a free plan for building a sharpening jig available for download. I personally sharpen on a Norton combination 1000/8000 water stone. I put my tool into my honing guide and register the sharp edge against the wooden stop on the jig, with the bevel facing down, appropriate for the angle I’m working, and tighten the guide. Next I’ll make sure my stone is flat, for which I normally use an x-course diamond plate. You could easily do the same thing with sandpaper on a flat surface, but that is up to you. One method we use to verify the stone is flat, is to take a regular pencil and mark a grid across the length and width of the stone. When all of the pencil is removed by your diamond plate or sandpaper, the stone is flat. Now, I’m ready to sharpen the bevel side of the tool, starting on the 1000 grit side of the stone. Many of our show attendees ask how we know when we’ve sharpened enough on any one grit. I use my thumbnail, moving along the back of the iron towards the sharp edge (just be careful and never move across the sharp edge). When I feel the burr or wire edge across the full width of the tool, then I know I’ve sharpened all the way to the edge, which is what is needed. I’ll then move on to the 8000 side of my stone, repeating the same steps.

The micro bevel will grow wider after honing multiple times, which can negate the time-savings of the micro bevel touch up. When this occurs, it is best to re-establish the primary bevel, so you can again utilize the micro bevel benefits. I reinitialize the primary bevel by placing sandpaper onto a flat surface like some thick float glass, some granite or the bed of a jointer. Use a second honing guide, so the grit isn’t transferred to your stones, and set the blade to the correct angle and work it back and forth until the original bevel is restored and the micro bevel is gone. Some prefer to utilize a grinder, but I like the strength of the flat primary bevel, compared to the slightly dished bevel caused by a grinder. Ultimately, this is a personal preference, so use whichever works best for you.

Now I’ve talked about sharpening one side of the iron/chisel, but as I mentioned in my definition of sharp, both sides must be highly honed. Without that, the lesser of the two will dictate the sharpness of the tool. I’m sure some of you out there are starting to cringe, at least those of you who have spent countless hours honing the backs of plane irons, to the point of a mirrored surface. Been there, done that! While this does fit the sharpening definition for the back, for plane irons it is unnecessary. We utilize a technique that David Charlesworth shared with us, called the ruler trick, that allows us to hone just the area nearest the cutting edge on the back, and still create a razor sharp tool. This does create the very smallest micro bevel on the back of the iron but is so small as to be negligible in function. (Do not use this technique on chisels, as you want to retain the ultimately flat reference surface. Just work the first half-inch or so of the back when honing.) In the ruler trick, a metal ruler with an extremely thin cross-section is placed on a prepared honing stone, along one of the long edges. The ruler is held in place by the surface tension created by the water applied during preparation. The plane iron is placed across the stone, so that the sharp edge is slightly hanging off the stone, while the remaining portion of the iron is across the stone resting on the ruler. If you were to put the sharp edge directly on the stone, the iron could easily gouge it. Now, keeping the iron flat against the stone and ruler, slide the sharp edge off and on (only about a 1/4” onto the stone) the stone repeatedly until the burr or wire edge is removed. This usually takes about 10 or so strokes, but test to make sure you are finished. When the burr or wire edge is gone, you should have a razor sharp tool.

With this method of sharpening, the beginner is immediately vaulted to a new level and will find their tools working as they were intended. They will also be able to quickly and reliably either refresh or initialize plane irons and chisels. Come out to see us at one of our shows if you still don’t feel comfortable sharpening, or if you’d like to try out some tools we’ve sharpened with this method. I hope to see some of you at our events across the country.  Feel free to come up and say hello.


Lee Laird has enjoyed woodworking for over 20 years. He is retired from the U.S.P.S. and works for Lie-Nielsen Toolworks as a show staff member, demonstrating tools and training customers.

To watch a great demo video of the sharpening process, click here.
Check out the great selection in Highland Woodworking’s sharpening department.

Jan 312011
 

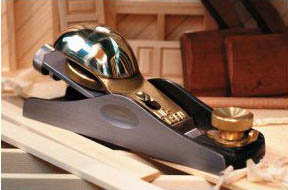
Generally, the block plane is one of the most reached for planes in most shops. Most block planes are small enough to live in an apron pocket, so it is never more than an arm’s length away. Besides the convenient size, they are extremely flexible in their usages.

Specifically, the 9-1/2 block plane is the regular angle (as opposed to the low angle) block plane with the adjustable mouth. The “regular angle” refers to the angle at which the blade iron sits in the plane body, which is 20 degrees. The “low angle” version of this plane is the 60-1/2 block plane, and its blade iron sits at 12 degrees. The primary difference between the two is the low angle’s ability to trim end grain, like when working on a butcher-block top.  The only other difference is the feel of these planes in your hand. The 9-1/2, with its slightly higher angle lifting the back of the blade and cap iron, can stretch the smallest of hands a bit more than the 60-1/2.

The adjustable mouth on these planes allows you to easily bring the throat in tight when working to remove extremely thin shavings, supporting the wood to prevent tear out. Just as easily, the mouth can be opened up allowing a thicker, less refined shaving fit through, when working to remove material more quickly. If a thicker shaving was attempted, If the throat set too tight, the shaving would jam and you’d have to stop and clear the shaving, before continuing. This would certainly slow down your work.

As you might have already imagined, these block planes have a wide range of functionality. You can easily use it to put a chamfer on tenons and along the long grain surfaces, breaking the edges of any carcass or box, use it as a smoother on small scale work for face, edge or end grain. The block plane can certainly fill in for a wide range of tasks, even though it may not rise to the level of replacing specific purpose made planes. A pinch hitter can always come in handy.

Since the block plane has its iron in a bevel up configuration, you can also buy a spare blade or two that you can use to hone higher angles. This would allow you to just swap out the irons, if you were working on some really figured wood, as the higher bevel angle on the iron is in essence the same as changing to a higher frog angle in the bench planes (which use the iron in a bevel down orientation). Highly figured woods respond better to a higher angle of attack, which (without getting too deep into the science of it) allows the shaving to release without the normal tear out.

Don’t overlook the 9-1/2 adjustable mouth block plane for your shop.  I think you will find it a go-to for a multitude of jobs.

I hope to see some of you at our events across the country.  Feel free to come up and say hello.


Lee Laird has enjoyed woodworking for over 20 years. He is retired from the U.S.P.S. and works for Lie-Nielsen Toolworks as a show staff member, demonstrating tools and training customers.

Jan 142011
 

I received a question recently relating to the restoration of an old plane.  We’ll focus on the iron bodied bench planes for now. There are times when we find, or are given, an old plane that we’d like to put back into use.  How the plane was stored will directly affect the condition and magnitude of work required to ultimately use it as it was intended.

If the plane was stored in a damp environment, without proper precautions, then it is likely to have rust on much of the body and blade. If I find a plane that is very rusty, then I usually try to weigh the importance or uniqueness of the plane. If it is either important or unique, then I’ll likely go forward with the restoration and work that goes along with that.  If on the other hand, it is an every day type of ubiquitous plane, I will normally just move on to another plane.  While the techniques and processes for restoration are valuable to possess and practice, ultimately a person’s time is worth something as well, and the decision must be made how much time to spend on a basic plane.

Once I’ve decided to go forward with a restoration, I’ll usually start with the sole of the plane.  If the sole is rusty, too, then I’ll use some 220 grit sand paper on a known flat surface.  This flat surface is usually a granite precision surface, a thick plate of glass or one of my shop surfaces (table saw top, jointer beds, …)  When I’m going to flatten a sole, I’ll put all the pieces together as if I was ready to plane wood, then back the blade up so there is no way it will make contact with the sand paper. This keeps the plane body with normal stress, so if there is any flexing, it will be the same as during use. After making a few passes over the sand paper, I’ll check the sole to see the progress.  All of the shiny areas are the portions that touched the sand paper.  I will continue with this until the complete sole is shiny.  I’ll use one of the SandFlex hand blocks to remove rust from the remaining external areas of the body. There are three different grits available, and it just depends on how much rust is present as to which grit level is appropriate. Before moving on, I’ll spray some Camellia Oil or Jojoba Oil onto a rag and wipe a light film over the areas we’ve completed.

Once I get the external body rust under control, I’ll remove the lever cap, blade/chip breaker, tote and knob. Next I’ll remove the screws holding the frog in place. Now the plane body is completely bare, I’ll check to make sure the area where the frog sits is in good condition.  It should be flat and make good contact with the frog. If there is any old grunge, clean it up and again apply a light layer of Camellia Oil or Jojoba Oil, and re-install the frog.

Next we’ll take apart the blade and chip breaker.  Usually the blade is what requires the most work to restore, but the chip breaker can have problems, too.  If the blade is rusty, use sand paper on a flat surface to work it back to shiny steel on the back of the blade. The bevel section of the blade is best worked while it is in a blade holder, so the correct base angle is established. At Lie-Nielsen, we begin with a base angle of 25 degrees on our blades. Depending on the shape of the bevel, and what angle it presently has, use 80 grit to completely re-establish the bevel. If the bevel is in decent shape and is already 25 degrees, you might choose to use 180 or even 220.  Follow this with sharpening at 1000 and then 8000 grit at a 30 degree micro bevel.  Once the work is complete on both the back and the bevel, apply a light layer of Camellia Oil or Jojoba Oil.  Put the chip breaker back onto the blade.  Check to make sure the chip breaker has no gaps between it and the blade.  If it does, it will likely allow shavings to gather and prevent the plane from working properly.  If there is a gap, we can either modify the front edge of the chip breaker or look for a replacement.  Many of the new chip breakers are more substantial and do a better job.  Still, restoring the original is an option.  If you decide to work on the original, make sure material removed is from the inside edge. The important section is the outer most edge, so that the chip breaker compresses and there are no gaps when it is tightened.

The next part is optional, and is primarily cosmetic. This includes cleaning the other interior surfaces of the plane body and the tote and knob.  Much of this can be cleaned with regular surface cleaners, assuming their original surface has not been compromised with rust onset.  Once clean, just reinstall the tote and knob, making sure they are snug, but don’t tighten to the point of damage.

The remainder of the restoration is setup.  Put the blade/chip breaker on the frog with the lever cap.  (I set my lever cap so it holds the blade while working, but still allows me to adjust the blade without releasing)  Make sure the blade fits through the mouth of the plane, when the blade is advanced. If the blade makes contact with the mouth, and won’t come through, remove the cap, blade/breaker and move the frog rearward (that is unless you have a plane where the frog’s to/fro adjustment can occur while the blade is in place). Tighten down the frog and try again.  Once you have the frog set so the blade is through the sole and the opening is appropriate for the shavings, then it’s just a matter of fine-tuning the settings to set the plane for operation.

Keep in mind that this is a how-to relating to bench planes. There can be slight differences in restoration for other types of planes.

I always enjoy seeing an older plane still working like they were intended. Good luck with your restoration and feel free to ask any questions in the comments.


Lee Laird has enjoyed woodworking for over 20 years. He is retired from the U.S.P.S. and works for Lie-Nielsen Toolworks as a show staff member, demonstrating tools and training customers.

Dec 302010
 

I have a lot of customers who want to discuss which one of our planes will ultimately leave the best final finish on flat wood.  Most of them are anticipating the comparison of our Low Angle Block plane v. our Low Angle Jack plane v. our 4 1/2. Many are surprised when I bring out one of our Scraping Planes.  I think part of the surprise is that the visual of the Scraping plane is completely different from most of the usual planes which have a blade that lays back towards the user.  Now with the scraping planes, the blade is angled forward, on the other side of 90 degrees, compared to the regular bench/block planes.

Many woodworkers will follow a smoothing plane with a hand-held scraper, which can leave an exquisite surface, depending on the skill of the user. Unfortunately, on the other end of the spectrum, it can leave scallops and other surface irregularities in the hands of the less proficient. This is where I see the scraping plane excelling, especially when working on flat surfaces.  Since the scraper (scraping blade) is carried in a plane body, it is much easier to end work with this tool without the fear of negative surface consequences.

So how do we set up one of these scraping planes?  Since it looks so different from the bench/block plane, it can seem like a completely foreign tool.  In actuality, it can be one of the easiest planes to set up for great results.  One of the first aspects of setup is the blade. The blade can seem strange for those who have previously used a hand-held scraper, and are familiar with the sharpening techniques for that tool.  On the scraping plane, the blade comes with a 45 degree bevel, which when honed is completely sufficient for finishing cuts. That’s right. Without needing to create a hook. Sounds a little bit different than the usual hand-held scraper, doesn’t it? If you don’t yet own a scraper plane, and would like to see just how effective this can be, take one of your widest bench chisels.  Hold it with the blade pointing straight down, with one hand on each side, and lightly pull the chisel across the wood, like you would a hand-held scraper.  You can adjust the angle of the chisel, similarly to the adjustment of the scraper plane, to get the best results. Amazing what it can do without the hook.  Some may still wish to apply a hook, which can make the plane a bit more aggressive. If you do this, you might have to play around with the angle of the blade so the hook engages properly, just like you do with a hand-held scraper. Now back to the setup of this plane: The blade is inserted into the mouth (some prefer to feed it up through the bottom to prevent any damage to the blade) with the bevel facing towards the rear of the plane. Just lightly snug up the thumb screw, to prevent the blade from slipping out and damaging the plane or yourself! With the blade in place, we can work on the angle of the blade.  We’ve found that 15 degrees forward of 90 degrees, towards the front of the plane is what works best for most situations.  Once the angle is set, place the plane on a flat wooden surface (which could be your workbench). Slightly loosen the pressure of the thumb screw, while holding the plane flat on whatever it is resting on, put a finger’s pressure on the middle of the dull end of the blade. This will just so slightly make the blade proud of the bottom of the plane.  Now, while holding the pressure on the blade, tighten the thumb screw.  You have successfully set up the scraping plane for nice fine final shavings, such that it can follow after a smoothing plane and leave a wonderfully smooth finish to the wood.

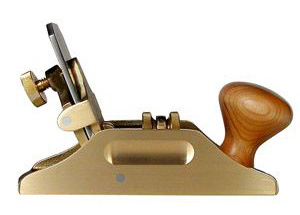
In my opinion, the Small Bronze Scraper Plane leaves one of the best surfaces one could ever hope to get.

I hope to see some of you at our events across the country.  Feel free to come up and say hello.


Lee Laird has enjoyed woodworking for over 20 years. He is retired from the U.S.P.S. and works for Lie-Nielsen Toolworks as a show staff member, demonstrating tools and training customers.

Dec 092010
 

A question I hear from customers at many of our shows regarding bench planes is: “Why are there so many different plane sizes and do/will I need ALL of them?”

In this article, I’ll talk about the range of bench planes, their sizes and purposes.

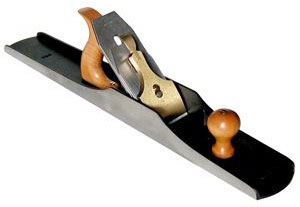
All of the bench planes (those that range from a #1 up through a #8) get split up into three basic categories: Smoothing planes, Jack planes and Jointer planes.  Each of these categories perform specific functions, but can ultimately cover ground outside of the primary function.

No. 3 Smooth Plane

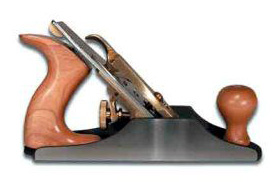
Starting with the smallest (and smallest numbers) are the Smoothing planes.  This encompasses the #1 through the #4 1/2, and the primary differences are the size and weight. The Smoothing planes are used for, well, smoothing a surface. These are usually setup for use with an extremely sharp blade just barely protruding and a very small mouth opening. This setup is ideal for taking a very fine shaving from a piece of wood that is already flattened, which ultimately can leave one of the best surfaces a piece of wood can ever hope to have.

No. 5 Jack Plane

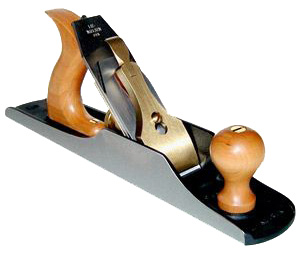
The next group is the Jack planes. These are the # 5 & # 6. Size and weight are the primary differences between these two planes. The Jack planes are usually setup to deal with initial stock removal (when the job isn’t so severe as to warrant using a scrub plane, which we’ll touch on in a later segment), which will deal with rough surfaced wood that may have a multitude of negative characteristics (twist, wind, bow, etc…) that are between you and a flat, square piece of lumber. Since the wood the Jack plane is used on is not usually flat and square, this plane is often setup with the blade protruding deeper and the mouth set much wider (to handle the thicker shaving created by the further advanced blade). These settings allow the plane to rapidly remove material, but will normally require additional work.

No. 8 Jointer Plane

The last of the bench planes are the Jointer planes. These are the #7 & #8. Size and weight are the primary differences between these two planes. The Jointer plane setup is somewhere between the Smoothing plane and the Jack plane, but usually much closer to that of the Smoother.  The Jointer plane’s primary purpose is to flatten wood.


Always remember that even though a bench plane size is normally used for a specific function, many can be used in other ways.  An example would be using a Jack plane with the blade opening closed up and the blade projection reduced, so it could function as a Smoother.

So now that you know how the planes sort out, the question is whether someone needs one of every size. Part of that depends on whether the end-user works with a wide range of sized projects. If the answer is yes, then it becomes a personal decision. I personally would recommend starting with one bench plane in each group and then expanding your set if/when it is necessary or desired.

Now that we’ve covered all the bench planes, you may be wondering about block planes. We’ll be talking about those in a later post, so check back again later.

Highland Woodworking’s full selection of Lie-Nielsen hand tools.


Lee Laird has enjoyed woodworking for over 20 years. He is retired from the U.S.P.S. and works for Lie-Nielsen Toolworks as a show staff member, demonstrating tools and training customers.

Nov 182010
 

I know that many woodworkers, both those new to the craft and even some who have been around for a while, might like to have some subtle instruction to improve their results when using a smoothing plane.

Anyone who has visited the Lie Nielsen booth at a woodworking show has likely both heard us describe the necessity of a sharp blade as well as watched as we demonstrate a very simple sharpening technique.  I won’t go into this technique here, but for those that would like more information, you may watch our video on plane sharpening below:

After setting up the sharp blade, many would think the remaining aspects of plane use would be without issue.  From my experience, this is not always the case.  Through time spent demonstrating and talking with other woodworkers, certain issues are common and recurring, so perhaps I can provide assistance.  At many shows, I’ll set up a plane to take a shaving that is somewhere between 1 and 2 thousands of an inch, in order to demonstrate just how sharp the blade is.  After I take some shavings, I’ll hand the tool to one of the attendees and let them see how it feels to use a sharp tool. What I’ve noticed is they often push the plane across the same board and the blade barely touches the wood, if at all.  This tempts them to adjust the blade so that it is protruding further than necessary.

The reason this is happening is the subtle pressure difference between what I was applying in a downward fashion, and the lack of pressure applied to the plane by the attendee.  I will actually utilize this pressure control when planing a board or panel.  I find I can set the blade for a relatively light cut and adjust to either a slightly thicker shaving or a lighter shaving simply by adjusting the pressure I apply to the plane.  The lightest shaving is obtained with the majority of the force applied across the board as if I’m making the plane just slide on top of the board.  To take a slightly thicker bite, the pressure is about half way between the light shaving and full force downward. You could think about this as if you were drawing a line starting from the edge of the board and going down and away at a 45 degree angle.  This is the direction I envision applying the force for the thicker shaving, as if I were following the line down the line at 45 degrees.

One other issue relating to setting up the plane’s blade.  If you can see the blade, when sighting down the sole, there is a good chance the blade is not sharp enough (a sharp edge is the intersection of two surfaces at a point, which will reflect no light) or will be very difficult to use, as it will take a very thick shaving. When we set up the smoothing plane’s blade at our shows, we are normally setting it for a very light shaving, using a small piece of wood to engage the blade.  It’s surprising how little blade is actually protruding when the blade is set.  Most of the people I’ve dealt with at our shows can not even see the blade, including myself, when sighting down the sole.

I hope this helps increase your enjoyment when using a smoothing plane.

Highland Woodworking’s full selection of Lie-Nielsen hand tools.


Lee Laird has enjoyed woodworking for over 20 years. He is retired from the U.S.P.S. and works for Lie-Nielsen Toolworks as a show staff member, demonstrating tools and training customers.

Nov 052010
 

For many years, I worked with mallets that I’d either made or purchased. I had a tendency to use them just as they were when they were first made. After a while, I decided I might be able to make slight alterations that would positively affect the comfort and potentially the usefulness of the mallet.  One mallet I made in 1990 and used for about 5 years before the light came on.  Ultimately I took the mallet and held it in my hand, the way I do when using it.  I did a little ambidextrous drawing with a pencil, around each of my fingers and also my thumb, so I could make sure when I removed material, it would fit my hand. Turned out to be a great decision.


More recently I turned some old oak into a nice smallish mallet.  The piece of wood was fairly short, so it didn’t lend itself to making the handle portion as long as I’d have liked to fit my hand.  Again, I decided there was some modifications I could do to ultimately make the mallet more user friendly. This time I decided I’d carve a notch where my thumb will sit, to make it more comfortable and hopefully more usable.  I snapped a picture of the mallet from it’s opposite side, to show what it looked like prior to “surgery”.

I started off by holding the mallet a couple of different ways to find what felt the best.  After I was sure of my decision, I again drew in pencil around the location of my thumb, while I was holding the mallet.

I used a couple of carving gouges, a #7 20mm and a #9 20mm.  I was able to hold the mallet securely with a hand screw, and held the hand screw in my bench vise.  I used my #9 gouge starting in the center of my marked area and making sure to work the correct direction for the grain of the wood. I didn’t want to pop off any chunks outside of my intended area.  I used my old square mallet to drive the gouge, especially at the beginning since I was working in Oak, which is fairly tough.  After I had a fair amount roughed out, I moved over to my #7.  For me, this gave me a little more control as it didn’t take as big of a bite with each strike.  After I had the shape I liked, I then stopped using the mallet and used the gouges more like paring chisels. I was able to take light cuts to smooth out the area where my thumb will ride on the mallet.  After all of that area was feeling good, I used the #7 very lightly again, on the edges of the carved section. I blended this section with the surrounding areas totally with the gouges. I didn’t use any sand paper, and the thumb recess feels great.  The key to using these tools is exactly the same as using regular chisels or hand planes.  Sharp tools are much more predictable and because of this are also much more safe to use.

Remember, even though the two mallets I modified were some that I made, you can still modify those that you buy.  Ultimately it’s all about making your woodworking experience better.

Until next time, keep woodworking.


Lee Laird has enjoyed woodworking for over 20 years. He is retired from the U.S.P.S. and works for Lie-Nielsen Toolworks as a show staff member, demonstrating tools and training customers.