This is the fifth post in a series – to go back to the first entry in the series, click here. If you just want to go back to the most recent entry, click here.
Here is where I realize why it is good to learn about wood fundamentals when starting out in woodworking, and why experience really counts. It turns out I achieved the perfect storm of conditions required to make a steam-bent piece of wood (in this example, the bow that was going to go on my chair) start returning to its original straight form.

The chair kit is originally wrapped all together when you receive it.
I opened up the kit in mid-June, and then circumstances caused me to delay starting for a week. After a slow start, a two week trip out of town, and a busy July, I had finally progressed to the point of installing the bow, which by that point had been sitting, unwrapped, in the humidity of my basement for a good two months.

The bow and the arm, still wrapped together (the bow is under the arm) - the arm helping to stabilize the curve of the bow.
The ‘unwrapped’ part is key – the chair kit is delivered with the bow and the arm taped together, and the arm is stable enough that it generally does a great job helping the bow to hold its curved shape. If you do unwrap the bow, Chris Benner (the maker of these chair kits) has the following advice:
Take a 24″ piece of scrap lumber and drill a couple 3/4″ holes in it at the center distance between the two bow holes in the arm. Then when you unpack the kit, place the bow in the two holes to keep it from opening up.
Now what I should have done when I realized my bow had already opened up too far is to soak the bow in hot water and then fit it into the piece of scrap lumber as described above. But not knowing yet that there was a problem (and being generally pretty gung-ho about the chair at this point – it really has been inspiring to see it nearly complete!) I pushed and tugged and tried with all my might to make the bow fit, until I heard a nasty splitting noise that did not sound right. When I pulled the bow off the chair, I saw that I had cracked the wood at one of the spindle holes. Nothing too terrible, but enough that I would need a new bow to complete my chair now. See what I mean about a perfect storm?
If you have purchased one of these chair kits, or are planning to, the answer for how to keep the bow sufficiently curved is actually quite easy. And a great lesson if, like me, you just didn’t know the right questions to ask.
You can either: 1. Complete the assembly, from unwrap to bow installation, in less time than I did (i.e. less than 2 months!); 2. Live in a less humid climate, or do the chair assembly in the winter instead of the height of summer; 3. Use Chris Benner’s brilliantly simple solution of creating a form with scrap lumber to maintain the curve while you are finishing the rest of the assembly; or 4. If all else fails, when it looks like the bow isn’t going to fit, consider soaking it and fitting it into the piece of scrap lumber as described above so it regains its previous curved form. And 5. if all else really fails and you end up with a cracked bow like I did, give us a call at Highland, and we’ll make it right.

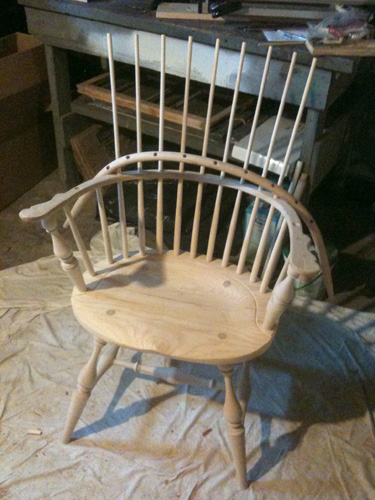
Ready for the new bow to arrive!
Now that I’m waiting for my replacement bow to come in the mail, it seems like all i want to do is work on my chair. Funny how that works. I’m so close to the end I can practically taste it – maybe that was the extra bit of motivation I needed to complete the home stretch. More about that next time – see you then!
This is the fifth post in a series – to read the next entry, click here. To go back to the first entry in the series, click here.


[…] the first entry in the series, click here. If you just want to go back to the most recent entry, click here.I have built a Windsor Chair.I still don’t believe that I have any right to claim those […]