Jim Randolph

Jan 042019
 

No Southern-fried Southern boy wants to be called a Yankee, but we share the characteristics of shrewdness and thrift. Thus, each month we include a money-saving tip. It’s OK if you call me “cheap.

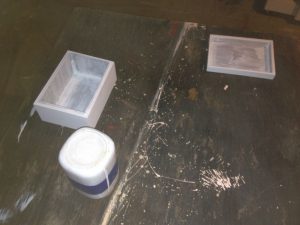
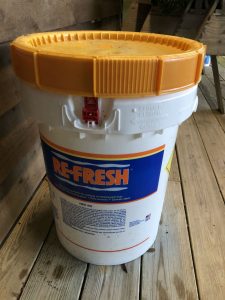
A 5 gallon bucket is the perfect diameter for immersing a 10-inch or smaller table saw or circular saw blade in your favorite blade cleaner. I shortened a bucket to about 6″ high, making insertion and removal really easy. Of course, you don’t have to cut down your bucket if you don’t have very many. I’m blessed with tons.

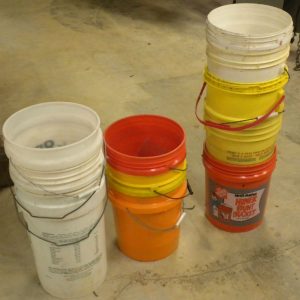
I have some buckets from the “orange” store, and I have some buckets from the “blue” store, but, I’ve never, ever, bought a bucket for use in the shop.

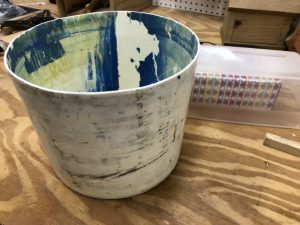
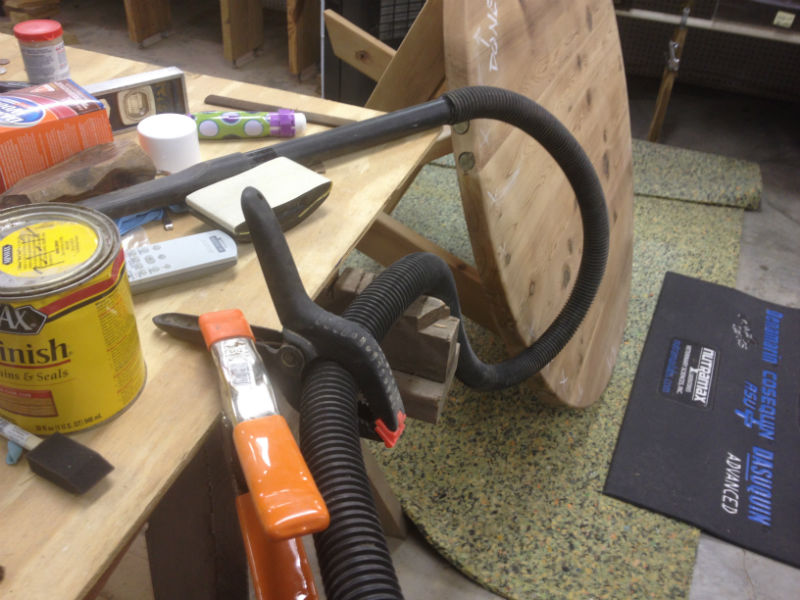
One nice thing about cutting most of the top of the bucket off is easy access. If you put a 10″ saw blade in here, you don’t have to fumble for it at the bottom of a canyon. Another advantage, though, is that it can double as a washing container for parts. Put some solvent in here, grab a toothbrush and some Scotch-Brite pad, and soon your item is clean.

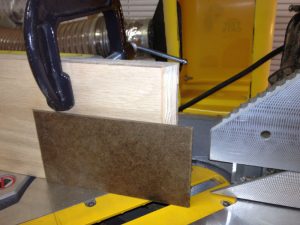
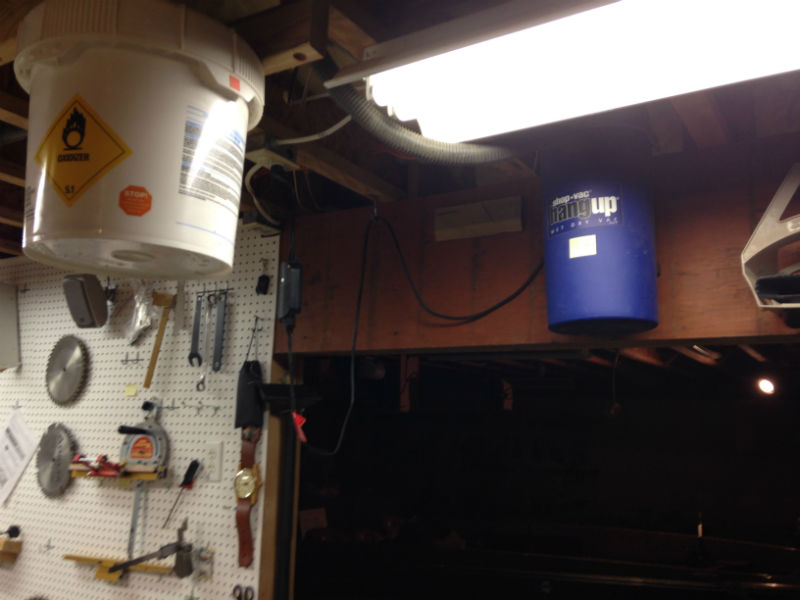
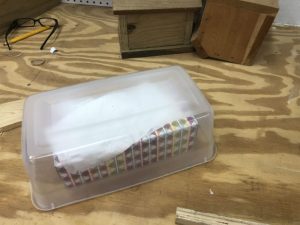
I finally found the ideal (read “free”) soaking container for a 12″ blade. Since I have a 12″ Delta radial arm saw and a 12″ DeWalt miter saw, removing pitch from them meant a lot of scrubbing until I found this bucket on the side of the road, took it home, and discovered it was perfect for soaking our dog’s Potty Park grass, and the lid ideally accommodated a 12″ blade.

What a find this huge bucket was. It certainly solved two problems for me.

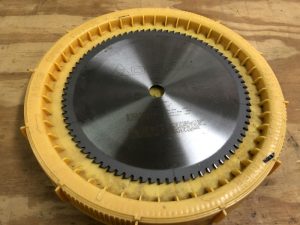
There is just enough diameter, without being wasteful, and just enough depth to fully immerse a 12″ blade.

Now, I warn you, it took years of optically scouring the roadsides before I came across this gem. Don’t think you’re going to
happen on a rare find like this tomorrow. But, maybe I have inspired you to believe, “Yes! It’s really out there waiting for me!”


Jim Randolph is a veterinarian in Long Beach, Mississippi. His earlier careers as lawn mower, dairy farmer, automobile mechanic, microwave communications electronics instructor and journeyman carpenter all influence his approach to woodworking. His favorite projects are furniture built for his wife, Brenda, and for their children and grandchildren. His and Brenda’s home, nicknamed Sticks-In-The-Mud, is built on pilings (sticks) near the wetlands (mud) on a bayou off Jourdan River. His shop is in the lower level of their home.Questions and comments on woodworking may be written below in the comments section. Questions about pet care should be directed to his blog on pet care, www.MyPetsDoctor.com. We regret that, because of high volume, not all inquiries can be answered personally.

Jan 022019
 

Welcome to “Tips From Sticks-In-The-Mud Woodshop.” I am a hobbyist who loves woodworking and writing for those who also love the craft. I have found some ways to accomplish tasks in the workshop that might be helpful to you, and I enjoy hearing your own problem-solving ideasPlease share them in the COMMENTS section of each tip.  If, in the process, I can also make you laugh, I have achieved 100% of my goals.

I needed to make a little tray-in-a-box. It was going to be simple, but I still wanted it to be pretty. I didn’t want defects in the wood, or any rough places, or the miter-sawn edges to blow out. I didn’t have time to make a zero-clearance backup for my DeWalt miter saw, so I made that quick and dirty, too.

The box was going to be painted, so thin, resawn poplar off the wood storage shelf would work great.

Step One was to make a rabbet along one edge for the bottom to sit in. It’s easiest to do that while there is just one board.

Next, I wanted to miter the corners, but  first, the miter saw needed a backer board.

A little scrap oak veneer plywood, slightly bigger than the project piece will act as a backerboard, supporting the fibers of the poplar as the saw blade slices through, preventing a fuzzy edge. Clamp it, then make an initial cut, and it’s ready to use.

With the four sides cut, glue them together. Bessey makes a nice strap clamp, and it’s on sale right now at Highland. I used what I had. When I decided I needed two clamps for stability, I went to the other side of the garage and got a hold-down strap. It worked fine.

A little glue squeezeout can be cleaned up when it tacks. You don’t want glue bulging under your paint. Be sure to check the diagonals to guarantee the box is square, or the lid will never fit.

Now, on to the bottom. Again, it’s a painted box, so hardboard works fine and doesn’t take up much space.

The bottom doesn’t need clamp pressure, so these little squeeze clamps hold it gently in place while the glue dries. The miters had been glued for about an hour, so I felt comfortable working with the box carefully, leaving the strap clamps on.

Hardboard works great to line the box and give it a lip for the lid. Again, it’s going to be painted. I glued it in place and clamped it until the glue cured.

The lid is similarly mitered, glued, strap-clamped and a hardboard top is glued into the rabbet.

… tray construction is almost identical to the lid, albeit with a slightly smaller perimeter.

A little primer and a couple of coats of paint, and it’s ready for gift delivery. I would have shown you a photo of the final box, but I asked Brenda to find it for me and she hasn’t been able to produce it yet. Take my word for it, it was cute.


Jim Randolph is a veterinarian in Long Beach, Mississippi. His earlier careers as lawn mower, dairy farmer, automobile mechanic, microwave communications electronics instructor and journeyman carpenter all influence his approach to woodworking. His favorite projects are furniture built for his wife, Brenda, and for their children and grandchildren. His and Brenda’s home, nicknamed Sticks-In-The-Mud, is built on pilings (sticks) near the wetlands (mud) on a bayou off Jourdan River. His shop is in the lower level of their home.Questions and comments on woodworking may be written below in the comments section. Questions about pet care should be directed to his blog on pet care, www.MyPetsDoctor.com. We regret that, because of high volume, not all inquiries can be answered personally.

Dec 052018
 

Fresh on the heels of the question in November’s Poll, “Does plywood belong in fine furniture?” I was faced with the question of whether paint is appropriate thereon.

I was listening to Wood Talk, Episode 451 “We’ve Changed After Ten Years.” Here’s how Shannon Rogers handles painting in his shop: Rag on paint, sand with 220 after the first coat, apply a sealer coat of shellac, which binds each coat of paint to each other, levels out the surface and traps any powder created from the sanding. The next coat of paint will be “super smooth” whether brushed or rolled. Topcoat with lacquer, which adds depth and reflection. “Turns that nice paint job into a professional paint job.”

Paint is on my mind these days, as I paint the front door of our home. Now, no one is going to look at this door closely enough to necessitate a fine-furniture finish, paint or otherwise, but I’ll be trying out Shannon’s technique on the next project I paint.

There was nothing to do but take this door down to the wood before applying primer and then white paint. The Festool RO90, with its 3″ round, and Delta pads, was indispensable in minimizing the amount of hand sanding required.

I would have used Shannon’s steps on the storage project for our youngest granddaughter. I made this project from poplar, and it painted up nicely.

Next time I see Audrey I’ll have to ask her if she thinks this painted chest qualifies as fine furniture. She seems to like it.


Jim Randolph is a veterinarian in Long Beach, Mississippi. His earlier careers as lawn mower, dairy farmer, automobile mechanic, microwave communications electronics instructor and journeyman carpenter all influence his approach to woodworking. His favorite projects are furniture built for his wife, Brenda, and for their children and grandchildren. His and Brenda’s home, nicknamed Sticks-In-The-Mud, is built on pilings (sticks) near the wetlands (mud) on a bayou off Jourdan River. His shop is in the lower level of their home.Questions and comments on woodworking may be written below in the comments section. Questions about pet care should be directed to his blog on pet care, www.MyPetsDoctor.com. We regret that, because of high volume, not all inquiries can be answered personally.

Dec 042018
 

No Southern-fried Southern boy wants to be called a Yankee, but we share the characteristics of shrewdness and thrift. Thus, each month we include a money-saving tip. It’s OK if you call me “cheap.

You know me. I throw next to nothing away. If I have to get rid of something, I first ask, “Can this be recycled?

Not only do I dislike discarding usable items, I’m not above picking up good materials from other people’s trash. More on
that next month.

Some see it as a contradiction to me to promote this column as “cheap” and “money-saving,” then recommend Festool, but, as many others can attest along with me, Festool purchases are an investment in value, not just an ordinary tool with an extraordinary price.

Some of my earliest Festools came protected in anti-corrosion paper. Any time I get some of this kind of paper, I hoard it. Think of it as adding to the value.

A box full of genuine Festool anti-corrosion paper collected after a tool shipment.

Step One is to seal it in one or more Ziploc bags to help retain the active ingredients.

A free zipper-locking bag provides long-lasting protection for one’s valuable protective paper.

The tools it originally protected may not need it after they leave the vicinity of the Atlantic Ocean, but both ferrous and iron-free tools around your shop can certainly benefit.

Have an old iron plane that mostly sits on a shelf? Wrap it up in corrosion-inhibiting paper.

These papers are technologically advanced. They start with kraft paper that scrapbookers would call “acid-free,” but, without getting bogged down in details, there is a lot more to it. Ingredients are added that vaporize over time, releasing the anti-corrosion effect as the calendar ticks by. Close the item and its protective paper in a  zipper-locking bag, and the vapors are trapped and “recycled” (although not permanently).

Not surprisingly, makers of fine planes and other metal tools also use corrosion resistance to protect their products in transit. There is no need for that protection to end with the shipping process, however. The Lie-Nielsen Card Scrapers pictured below stay in their protective paper whenever not in use.

Lie-Nielsen tools use the finest of components, and come to the end user fully protected. There is no reason they can’t stay protected.


Jim Randolph is a veterinarian in Long Beach, Mississippi. His earlier careers as lawn mower, dairy farmer, automobile mechanic, microwave communications electronics instructor and journeyman carpenter all influence his approach to woodworking. His favorite projects are furniture built for his wife, Brenda, and for their children and grandchildren. His and Brenda’s home, nicknamed Sticks-In-The-Mud, is built on pilings (sticks) near the wetlands (mud) on a bayou off Jourdan River. His shop is in the lower level of their home.Questions and comments on woodworking may be written below in the comments section. Questions about pet care should be directed to his blog on pet care, www.MyPetsDoctor.com. We regret that, because of high volume, not all inquiries can be answered personally.

Dec 032018
 

Welcome to “Tips From Sticks-In-The-Mud Woodshop.” I am a hobbyist who loves woodworking and writing for those who also love the craft. I have found some ways to accomplish tasks in the workshop that might be helpful to you, and I enjoy hearing your own problem-solving ideasPlease share them in the COMMENTS section of each tip.  If, in the process, I can also make you laugh, I have achieved 100% of my goals.

Festool has solved the problem of vacuum hoses abrading the edges of your workpieces by encasing the hose in a protective sleeve. They call it the Sleeved Antistatic Hose.

However, suppose you have the older Festool hose, or the plastic hose that came with your other-branded shop vacuum. Maybe it’s complicated by working on a project that requires you to do a lot of start-and-stop sanding. How simple can we make
the solution?

I ran into those very problems when I was making the round cedar picnic table pictured below.

I think they like it!

Sanding cedar can be very tedious, as the wood is soft but the knots are hard. As I worked out little defects, I had to sand a bit, vacuum, examine, then sand more or move on to another defect. At that time, I didn’t have a dust separator on my Festool Dust Extractor, but I did have one in the ceiling, attached to a little Shop Vac Hangup.

By mounting this mini-vacuum and a dust separator in the ceiling, attached to a long, long hose, I can vacuum
almost anywhere I do benchtop work in my shop.

As it happened, though, I was working at the extreme end of the length of the hose when I had the tabletop balanced on its edge on the floor. Thus, every time I stopped vacuuming, the hose wanted to recoil out of reach.

A couple of clamps solved the problem. I got a big squeeze clamp that would accommodate the diameter of the hose without crushing it, and another clamp to hold that clamp to a nearby table. Voila! The last 18 inches of the hose were handy when I needed to remove dust, and out of the way while I was sanding.

A couple of inexpensive squeeze clamps and my hose was both protected and available.

Then, there was the matter of repeatedly starting and stopping. No problem. I have a low-amperage remote switch that allows me to activate the vac from the work site. Further, you can order them with specific channels, allowing you to control separate tools
with additional units.

Of course, Festool has that covered now, too. Any current model of dust extractor can be retrofitted with a Bluetooth remote control. You can even mount the remote switch on the hose, so it’s always handy! Click here to order or learn more.

You want even more? How about a dust separator that mounts right on your Festool extractor? Yep, they have that, too, click here. Then click here to watch a video, and prepare to be amazed at how flexible this little addition is.

Now, if I’d just had all that when I was working on the table. It might not have taken me 18 months to finish!


Jim Randolph is a veterinarian in Long Beach, Mississippi. His earlier careers as lawn mower, dairy farmer, automobile mechanic, microwave communications electronics instructor and journeyman carpenter all influence his approach to woodworking. His favorite projects are furniture built for his wife, Brenda, and for their children and grandchildren. His and Brenda’s home, nicknamed Sticks-In-The-Mud, is built on pilings (sticks) near the wetlands (mud) on a bayou off Jourdan River. His shop is in the lower level of their home.Questions and comments on woodworking may be written below in the comments section. Questions about pet care should be directed to his blog on pet care, www.MyPetsDoctor.com. We regret that, because of high volume, not all inquiries can be answered personally.

Nov 072018
 

Is plywood acceptable in fine furniture? And, while we’re at it, what is fine furniture? Is it furniture made only with hand tools? Is it made only with solid wood? Is it defined by certain joinery?

My answer to all those questions is, “Whatever gets the job done, has an eye-pleasing design, has well-fitting joints, is strong and has a beautiful finish.”

Of course, “eye-pleasing” is in the optical structure of the beholder. Even classic lines and traditional rules of proportion aren’t going to delight everyone.

How strong is strong? Some might be thinking, “It just needs to be strong enough to last until I move out of this apartment.” “Or the twenty years I live in this house.” Others want to be able to pass their handmade furniture down to their children, grandchildren and beyond. I read a piece recently in which a Japanese woodworker said that 100 year old furniture had barely begun its life, that it might be 200 years old before it really has character.

As for plywood, let’s face it: it’s hard to get stronger than quality plywood.

How beautiful does the finish have to be? It, too, should be durable. To some, that means varnish. To others, paint. Some might think an oil finish is durable enough, even if it has to be renewed periodically. Perhaps the beauty of the oil finish outranks the need for durability.

Can we agree that ill-fitting joints would universally take a piece out of the running for “fine?”

The bottom line? We’re all entitled to our own opinions, and to make and finish our furniture however we like. And, if we want to call it “fine,” after all, it’s our furniture and our viewpoint.

I considered this my very first foray into “fine” woodworking. Our son, Andy, wanted a cabinet to display his photography books, magazines and classic equipment. He sent me a sketch on a napkin and wanted to know if he could make it with a circular saw and hammer. I think that was his way of asking me if I would do it. I made it from furniture-grade oak veneer plywood with red oak solid wood banding. Andy wanted to finish it himself and sent me these photos when he was through.

Perhaps it’s a stretch to call a picnic table, much less a diminutive picnic table, “fine” furniture, but I intended this table to be an heirloom our eldest granddaughter would pass to her grandchildren and beyond. It’s plenty strong. There is no plywood. This was her second birthday party.

Nov 052018
 

Welcome to “Tips From Sticks-In-The-Mud Woodshop.” I am a hobbyist who loves woodworking and writing for those who also love the craft. I have found some ways to accomplish tasks in the workshop that might be helpful to you, and I enjoy hearing your own problem-solving ideasPlease share them in the COMMENTS section of each tip.  If, in the process, I can also make you laugh, I have achieved 100% of my goals.

A while back I showed you three ways I was experimenting with to protect my Kleenex boxes from dust. I promised that I would tell you which style of Kleenex protection won out. Not surprisingly, I chose the technique that was easiest and involved spending the least amount of time. That is, a simple cover over the Kleenex box that would allow me to just lift up the cover, select a Kleenex, drop the cover back on, and get back to work.

The most protective was also the most time-consuming, which was screwing a plastic shoebox lid down, then snapping the box part over the Kleenex. I just didn’t have the time or patience to go through the added step of securing the container.

Ditto for the other technique, which also involved unsnapping the lid, only with the shoebox upright.

Efficiency wins again!

As is often the case, the simplest way is the best way. Using this setup, the Kleenex gets dust protection, and I get quick and easy access.


Jim Randolph is a veterinarian in Long Beach, Mississippi. His earlier careers as lawn mower, dairy farmer, automobile mechanic, microwave communications electronics instructor and journeyman carpenter all influence his approach to woodworking. His favorite projects are furniture built for his wife, Brenda, and for their children and grandchildren. His and Brenda’s home, nicknamed Sticks-In-The-Mud, is built on pilings (sticks) near the wetlands (mud) on a bayou off Jourdan River. His shop is in the lower level of their home.Questions and comments on woodworking may be written below in the comments section. Questions about pet care should be directed to his blog on pet care, www.MyPetsDoctor.com. We regret that, because of high volume, not all inquiries can be answered personally.