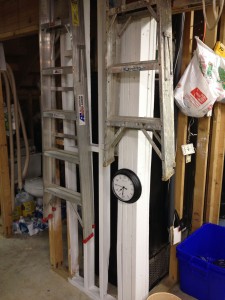
No Southern-fried Southern boy wants to be called a Yankee, but we share the characteristics of shrewdness and thrift. Thus, each month we include a money-saving tip. It’s OK if you call me “cheap.”
We’re always needing to write things down in the shop. When you need a measurement (or two, or three) to take to the chop saw, a Post-It Note stuck to the label side of your tape measure will supplement your memory. I can’t take credit for that one, but it’s been decades since I read or saw the idea somewhere, so, thank you, whoever it was.
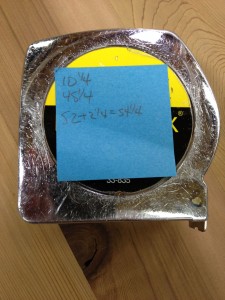
I’ve been using this idea for decades, so it’s no wonder I can’t remember where I got it. When we first moved into this new house 18½ years ago, and I was building Brenda’s studio on the third floor, I went through a lot of Post-It Notes because I didn’t want to waste a trip to the first floor and not get everything I needed. Using them for measurements is a real time and materials saver.
When you need to write more, this idea will help. Take some scratch paper and staple several pieces together. Now, punch a hole through the stack, so you can hang it on a peg or nail. If you don’t have a hole punch, a 1/4″ Forstner bit makes a smooth hole.
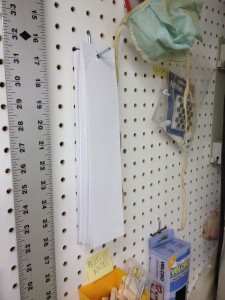
Why is my “scratch” paper so neat and uniform? It’s the perforated edges from the reminder postcards we send to pet owners each month, but any paper will do. I have to admit, this heavy card stock is nice!
You’re not through yet! Now, when you need a piece of paper, pull from the “open” side of the staple, which will release one slip at a time while continuing to hold the remaining pieces together.
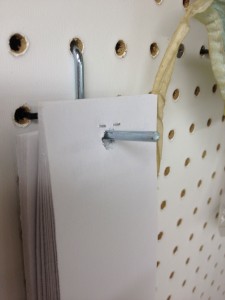
Pull from this side and the “open” part of the staple will release one slip at a time, while firmly holding the rest.
Suppose you need to write even more, or make a temporary sign. Dry-erase boards work great. Some of the ones I have were free, picked out of someone’s perfectly-good refuse on trash pickup day. The others came from drug companies, and even included markers!
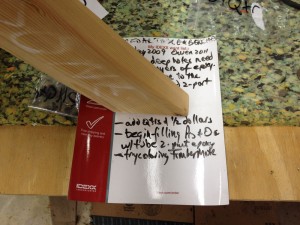
This dry-erase “board” was free from a laboratory company. It came with a marker and a plus: it’s magnetic. I use it to remind me what I wanted to do next when it’s a long time between shop visits.
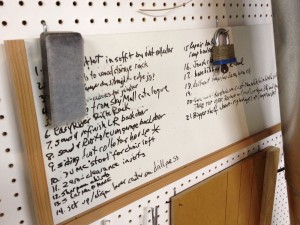
This whiteboard wasn’t exactly free, but I needed a board about 9″ wide at work, and this is what was left. By the way, the table saw made a really nice cut on this material. This one is used for long-term projects, things I want to build “someday.”
Jim Randolph is a veterinarian in Long Beach, Mississippi. His earlier careers as lawn mower, dairy farmer, automobile mechanic, microwave communications electronics instructor and journeyman carpenter all influence his approach to woodworking. His favorite projects are furniture built for his wife, Brenda, and for their children and grandchildren. His and Brenda’s home, nicknamed Sticks-In-The-Mud, is built on pilings (sticks) near the wetlands (mud) on a bayou off Jourdan River. His shop is in the lower level of their home. Questions and comments on woodworking may be written below in the comments section. Questions about pet care should be directed to his blog on pet care, www.MyPetsDoctor.com. We regret that, because of high volume, not all inquiries can be answered personally.
Welcome to “Tips From Sticks-In-The-Mud Woodshop.” I am a hobbyist, not a professional, someone who loves woodworking, just like you do. I have found some better ways to accomplish tasks in the workshop and look forward to sharing those with you each month, as well as hearing your problem-solving ideas.
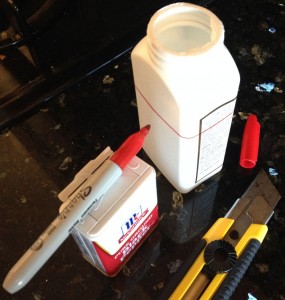
Sometimes you need to draw a line all the way around an irregular shape. In this case, I wanted to make a little cup out of this old plastic bottle. I’m recycling slivers of bar soap into new bars and trying this out for a mold.
This is my first foray into soap making. Or, should I call it soap re-making? Either way, this little trick worked quite well.
One easy way to do that is to put the bottle against a miter gauge on your band saw and push it through. Sometimes, though, the size or shape precludes that approach.
A tip I picked up from Tom Silva on This Old House is to take a flexible strip, it can be a laminate for a big circumference or a strip of cloth for a smaller dimension, and wrap it around the object. Tom was cutting a porch column to its proper length. Once the strip is pulled tight and the mating surfaces meet with perfect edge alignment, the line around the object will be straight and it’s just a matter of tracing against the strip with a pencil.
In this case, I didn’t need a lot of accuracy, and the height didn’t have to be exact. I laid a Sharpie on top of a bottle and held it steady with my right hand. With my left hand I rotated the bottle against the Sharpie. Voila! I think the bathtub is full. Now, where did I leave my rubber ducky?
Jim Randolph is a veterinarian in Long Beach, Mississippi. His earlier careers as lawn mower, dairy farmer, automobile mechanic, microwave communications electronics instructor and journeyman carpenter all influence his approach to woodworking. His favorite projects are furniture built for his wife, Brenda, and for their children and grandchildren. His and Brenda’s home, nicknamed Sticks-In-The-Mud, is built on pilings (sticks) near the wetlands (mud) on a bayou off Jourdan River. His shop is in the lower level of their home.Questions and comments on woodworking may be written below in the comments section. Questions about pet care should be directed to his blog on pet care, www.MyPetsDoctor.com. We regret that, because of high volume, not all inquiries can be answered personally.
Do you like working on your shop more than making things that come out of your shop? Whether you call it “making shop furniture” or building cabinets for the shop, do you enjoy simply improving your shop? To me, there’s something special in making the workspace better.
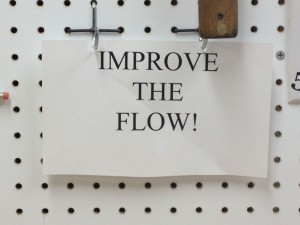
To constantly remind me to make the shop better, I have several iterations of this sign.
Of course, I think we all enjoy buying a new tool. To me, “new tools” and “improving the shop” fall in the same category.
Sometimes the two coincide. After Katrina flooded the lower level of our home, I bought some really inexpensive tools that I knew I would replace when I found exactly what I wanted. I’d never had what I considered to be a good jig saw and, since I didn’t know which one I wanted, I just bought the bottom-level Skil.
A few years ago I got the Festool bug, purchased several tools, and decided I’d get a Festool Jig Saw. I’d watched some videos of people using and talking about them and they were all ecstatic. However, I’d had a couple of conversations with Steven Johnson about his Festool jig saw and he said he liked his Bosch better, and he wanted to sell his old Festool.
That left me thinking that I still wanted a Festool jig saw, so I didn’t buy a Bosch or a Festool, I just limped along with the little Skil. After all, I didn’t need a jig saw very often. I kept meaning to look at the Bosch at the home center, but I kept forgetting.
Several weeks ago the jig saw itch came back and I asked Steve if he was still happy with his Bosch. If he was, I was going to at least look at it, and possibly buy one.
I placed my order on Thursday and the Highland Woodworking shipping department wizards (thanks, Alexandra!) had FedEx boxes to me by Monday afternoon.
I dedicated the new CT36 to the Kapex and tucked it out of the way under the bench.
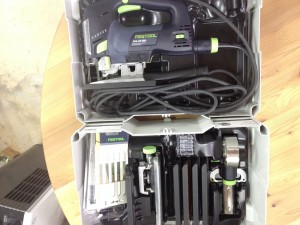
Because I’d also ordered the accessory kit for the Carvex, I had not one, but two new Systainers.
Here’s the new Carvex with the accessory kit. If you can swing it, either at the same time or later, the kit includes some must-haves that are much cheaper when purchased as this set.
I had already found myself to be annoyed by Systainers, as they were big, I didn’t have a dedicated place for them, and when stacked up on the workbench they were eating valuable real estate.
While the Rotex and ETS sanders were in use, their Systainers were consuming space on the bench. They had to go!
I’d seen other woodworkers design elaborate storage systems for their Systainers but they took up wall space or floor space or both and I wasn’t willing to sacrifice either.
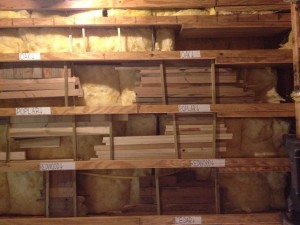
The following Saturday morning I woke up at 3:30 AM and no matter how hard I tried to go back to sleep, my mind went back to Systainer storage. “In the ceiling space,” a loud voice kept repeating. I was already using ceiling space for scrap wood storage, but there was plenty of space left. For wood cutoffs I had created this system, which depended on the pieces sitting on narrow strips of wood. That still works well for wood scraps, but it was obvious the strips would move when inserting and removing a Systainer, especially with the weight of the tool inside.
This system in the ceiling of our garage works great for scrap wood storage. I wanted to put Systainers here, too, but needed an immovable support. More “noodling” required, as Steven Johnson would say.
The mind is an amazing thing, and neither medical nor psychological science has been able to illuminate more than the surface of its secrets. Between my 3:30 AM wake-up and my 5 AM get-up, I had a fully-designed, hinged system for the Systainers that I call “hatches.” Brenda and I are big fans of the 2004-2010 television drama Lost.
Thoroughly obsessed with “improving the shop,” a week later I’ve left work early three evenings, I have “hatches” for all of the Systainers, and I’m trying to figure out where to put hatches for the DeWalt drills, the biscuit jointer I almost never use, and a few other small tools.
Here are the Domino, Rotex and ETS Sander Systainers tucked away until they’re needed. The sanders are used so much that their Systainers will probably stay empty. The Domino can quickly be pulled out when it’s needed, and put away when it’s not. The Carvex and its accessory kit’s hatches are in another location.
—
Jim Randolph is a veterinarian in Long Beach, Mississippi. His earlier careers as lawn mower, dairy farmer, automobile mechanic, microwave communications electronics instructor and journeyman carpenter all influence his approach to woodworking. His favorite projects are furniture built for his wife, Brenda, and for their children and grandchildren. His and Brenda’s home, nicknamed Sticks-In-The-Mud, is built on pilings (sticks) near the wetlands (mud) on a bayou off Jourdan River. His shop is in the lower level of their home. Questions and comments on woodworking may be written below in the comments section. Questions about pet care should be directed to his blog on pet care, www.MyPetsDoctor.com. We regret that, because of high volume, not all inquiries can be answered personally.
No Southern-fried Southern boy wants to be called a Yankee, but we share the characteristics of shrewdness and thrift. Thus, each month we include a money-saving tip. It’s OK if you call me “cheap.”
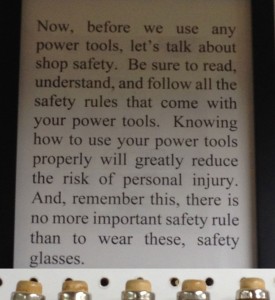
You know how easy it is to say to yourself, “This little task is going to take only a minute, and my safety glasses are on the far side of the shop, I’ll just knock this out real quick.”?
The ultimate woodworker, the one we all want to be when we grow up made this saying famous by repeating it week after week on The New Yankee Workshop. We are wise to heed it.
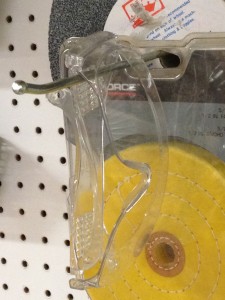
You can buy safety glasses for cheap. Position some around the shop so that they are never far from where you are working.
You can have one or two pair of really good goggles or safety glasses, and still have some of these for those out-of-the-way places in the shop that might tempt you to work without going and getting the good ones.
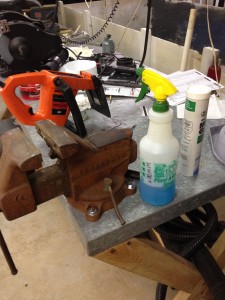
And, while you’re at it, place some small squirt bottles of Windex around the shop. You won’t want to wear those safety glasses if you can’t see out of them. Inability to see clearly is a safety hazard, too.
I have one bottle of Windex here on my metalworking table and another near the sink. From this table I’m not far from the vision protectors I use most.
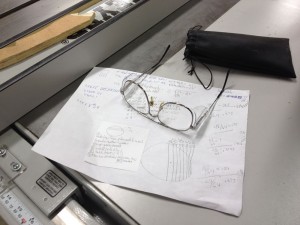
I have some really expensive safety glasses, because I believe our eyesight is worth it. They are prescription, so I can see really well. They stay clean and protected in their bag, and they reside next to the table saw.
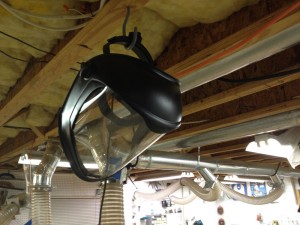
This is a moderately-priced face shield. I didn’t want to go so cheap that the shield would soon scratch or discolor and be useless. Another plus: replacement shields are available for this unit.
Jim Randolph is a veterinarian in Long Beach, Mississippi. His earlier careers as lawn mower, dairy farmer, automobile mechanic, microwave communications electronics instructor and journeyman carpenter all influence his approach to woodworking. His favorite projects are furniture built for his wife, Brenda, and for their children and grandchildren. His and Brenda’s home, nicknamed Sticks-In-The-Mud, is built on pilings (sticks) near the wetlands (mud) on a bayou off Jourdan River. His shop is in the lower level of their home. Questions and comments on woodworking may be written below in the comments section. Questions about pet care should be directed to his blog on pet care, www.MyPetsDoctor.com. We regret that, because of high volume, not all inquiries can be answered personally.
Welcome to “Tips From Sticks-In-The-Mud Woodshop.” I am a hobbyist, not a professional, someone who loves woodworking, just like you do. I have found some better ways to accomplish tasks in the workshop and look forward to sharing those with you each month, as well as hearing your problem-solving ideas.
I have often said that the most valuable thing I took with me from my time in the Air Force was a concept of safety. I especially am reminded of it at the beginning of an electrical repair. When I was an Air Force microwave communications instructor, we never entered an equipment room without removing our rings and watches. Having conductive parts attached to your body when working in the bowels of electronic equipment is never a good idea.
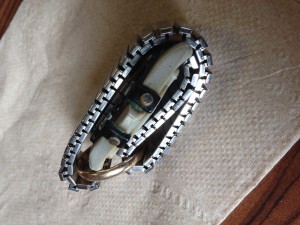
Air Force Technical Sgt. Dominicus Maters showed me this trick back in the 1970s when we both worked in Jones Hall on Keesler AFB. A Twist-O-Flex watchband and a wedding ring make a secure pair in your pocket.
When I turn on a grinder, I never do so until I have first protected my eyes. Once, in college, I didn’t, and a piece of wire wheel flew out and embedded itself right in my left cornea. Stupid.
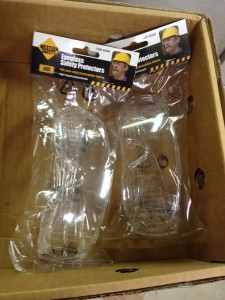
Recently our youngest son sent a video of his own son sanding an axle for his Pinewood Derby car. Without eye protection. I was then inspired to purchase a potentially sight-saving gift for each of our four grandchildren, our two sons and our two daughters-in-love: Eye safety for the whole family, regardless of age or gender.
Looking out for your children’s and grandchildren’s eyesight and safety gives a whole new meaning to “CARE” package.
—
Jim Randolph is a veterinarian in Long Beach, Mississippi. His earlier careers as lawn mower, dairy farmer, automobile mechanic, microwave communications electronics instructor and journeyman carpenter all influence his approach to woodworking. His favorite projects are furniture built for his wife, Brenda, and for their children and grandchildren. His and Brenda’s home, nicknamed Sticks-In-The-Mud, is built on pilings (sticks) near the wetlands (mud) on a bayou off Jourdan River. His shop is in the lower level of their home. Questions and comments on woodworking may be written below in the comments section. Questions about pet care should be directed to his blog on pet care, www.MyPetsDoctor.com. We regret that, because of high volume, not all inquiries can be answered personally.
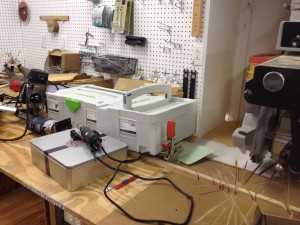
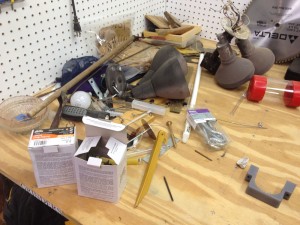
If I don’t know what to do with it, or it doesn’t already have an assigned place, or I’m not sure whether I want to keep it, this is the corner where “it” goes.
Do you have a junk corner like this? My junk corner includes some things that don’t have a specified storage location, things I’m not sure I even want to keep and things that defy categorization. Several things in this pile will be placed in storage drawers that need to have a new label printed and applied before they’re stored.
Right now, my shop is a mess. I’m deep into a round cedar picnic table with three curved benches for our two youngest grandchildren, and there’s certainly no time for straightening, and very little time for cleaning. If you’ve read this post, you know how much the mess is bothering me.
Interim storage.
If it comes out of the wayback of my car and isn’t going upstairs with me, it usually ends up in “Interim Storage.” Of course, if it’s a new tool that was delivered to work, chances are good that I’ll take it over to the shop space and unpack it before going upstairs for the night. I might even fire it up and try it out on a piece of scrap. Recently, when I got a supplemental holddown for the Kapex, I had to go install it and clamp a piece of scrap wood down. It was my woodworking fun for the day.
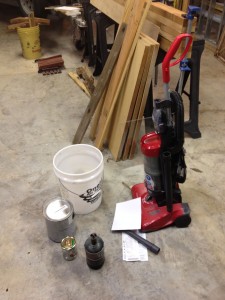
The corner of my workbench differs from this other spot, which is where I put things right behind my car that I just don’t have time to put away yet. These things are in the way, so they will be addressed before long. Think of it as “interim storage.”
—
Jim Randolph is a veterinarian in Long Beach, Mississippi. His earlier careers as lawn mower, dairy farmer, automobile mechanic, microwave communications electronics instructor and journeyman carpenter all influence his approach to woodworking. His favorite projects are furniture built for his wife, Brenda, and for their children and grandchildren. His and Brenda’s home, nicknamed Sticks-In-The-Mud, is built on pilings (sticks) near the wetlands (mud) on a bayou off Jourdan River. His shop is in the lower level of their home. Questions and comments on woodworking may be written below in the comments section. Questions about pet care should be directed to his blog on pet care, www.MyPetsDoctor.com. We regret that, because of high volume, not all inquiries can be answered personally.
No Southern-fried Southern boy wants to be called a Yankee, but we share the characteristics of shrewdness and thrift. Thus, each month we include a money-saving tip. It’s OK if you call me “cheap.”
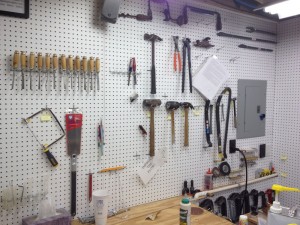
Good light reflection is supplied by white pegboard on all shop walls.
To make the most of the light fixtures installed, almost everything in my shop is white, or very light-colored. I purchased white pegboard, which cost more initially, but saved a ton of time and mess compared to painting natural, dark brown pegboard and dealing with the inevitable runs as paint drips from the peg holes. When we first moved to this home on the bayou, bass fishing was my number one hobby, and I never intended to get so heavy into woodworking and furniture-making, much less having virtual visitors in my shop. If I’d known, I might have put a white ceiling in before installing the lights.
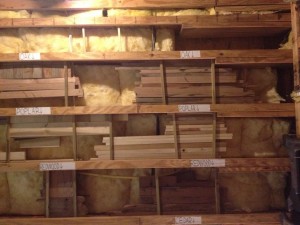
On the other hand, if I had covered the ceiling, I’d have lost all of this good storage space.
Wooden tool cabinets are either painted white or finished in their natural, light wooden color.
Everything that can be a lighter color is painted or covered to maximize reflection of light.
—
Jim Randolph is a veterinarian in Long Beach, Mississippi. His earlier careers as lawn mower, dairy farmer, automobile mechanic, microwave communications electronics instructor and journeyman carpenter all influence his approach to woodworking. His favorite projects are furniture built for his wife, Brenda, and for their children and grandchildren. His and Brenda’s home, nicknamed Sticks-In-The-Mud, is built on pilings (sticks) near the wetlands (mud) on a bayou off Jourdan River. His shop is in the lower level of their home. Questions and comments on woodworking may be written below in the comments section. Questions about pet care should be directed to his blog on pet care, www.MyPetsDoctor.com. We regret that, because of high volume, not all inquiries can be answered personally.