

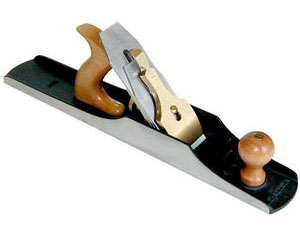
 This month, moving somewhat incrementally up the bench plane scale relative to my previous bench plane article, we’ll talk about the Lie-Nielsen No. 6 Fore Plane. Even though it’s somewhat obvious that this is the next larger plane, compared to the article on the No. 5 (in the standard 1 – 8 nomenclature), personally I find the changes feel more significant than many of the earlier incremental steps in the plane lineup. This is likely due to the extra length and width of the plane’s sole, the increased width of the iron, additional weight, and the noticeable extra room for my hand on the handle. The No. 6 is 18” long, has an A2 cryogenically treated tool-steel iron that is 2-3/8” wide and .140” thick, and the plane weighs in at 7-1/2 lbs. The lever cap is bronze, and adds a visual beauty that complements the cherry handle and knob. The body of the No. 6 is cast from ductile iron, as are all of Lie-Nielsen’s iron bench planes, which is significantly stronger and more durable than the cast iron/grey iron used in the Bailey/Stanley versions of these planes. If you can handle witnessing the carnage of an old Stanley plane’s grey iron casting, take a look at the video Chris Schwarz created a couple of years ago. It’s amazing how the brittle cast iron/grey iron responded to the sharp rap of a hammer, which is not too dissimilar from what could occur from an accidental drop on a concrete floor. Even though we all do our best to protect our tools, the Lie-Nielsen ductile iron planes provide an extra level of confidence, knowing the odd drop to the floor will ding the body rather than destroying the plane.
In addition to the “basic” (really not anything basic about it, but just a way of differentiating) Lie-Nielsen No. 6, you can add higher angled frogs in both 50-degree & 55-degree versions. The “basic” No. 6, with it’s 45-degree frog, is great on the majority of soft/hard woods, but the higher angled frogs can certainly help to tame some tough-to-handle figured woods. A toothed blade is another offered addition, which can be seen as close to a necessity, when working the craziest grained woods.
In my shop, I personally use the No. 6 as if it were a bit of a chameleon. In one form I’ll set it up and use it essentially as a large Jack Plane with the more prominently curved iron, to readily remove material from boards, primarily working across the grain on the initial stages of flattening. The other setup I find useful is what might be categorized as a small version of a Jointer Plane, even though I haven’t found any written history to show with certainty that our woodworking predecessors also used the No. 6 in this fashion. With the size and weight of the No. 6, compared to the larger jointers (No. 7 & No. 8), there are a couple of reasons that it may just be the perfect tool for you. The first could be that the primary work is with wood that is shorter in length, like that which might be used when making small dovetailed boxes, where it doesn’t demand the longest planes to obtain a sufficiently flat surface. Another might be that someone is either a bit slight in stature, or perhaps has an injury/condition that might otherwise prevent the regular lifting of the heavier planes. This might just allow someone to continue his or her trade/hobby, since it could apply less strain/stress to the problematic area, when either carrying or transporting the plane. While the decreased weight comparison is valid, I find it equally important to also discuss the increase in size/weight vs. the No. 5 Jack Plane. I find the additional weight is extremely advantageous, especially when working across the grain, as I find it helps utilize the momentum you’ve initiated, and requires less continued force to keep the plane from “stalling” than a lighter plane. I see the extra mass as even more important when working with a substantially curved iron, as I usually have it set fairly aggressive, removing a thicker cross-grain type of shaving. While I certainly never set this type of curved iron to take a full-width cut, as it would just stop cold, working through the thicker wood fibers is quite a bit more difficult than taking a whispy shaving, common on a much less curved iron. So, depending on the situation, the No. 6 can be represented either lighter/smaller or heavier/larger and it can fit a wide range of uses.
When I setup my No. 6 for jointing type work, I’ll either just knock off the corners of the iron or apply a very small camber (slight radius) to the cutting edge of the iron, both of which helps prevent track marks from the corners of the iron. I usually prefer to go with the small camber shape as it is also very useful, and quick, when I’m using the plane to square up the long edges on a board. When setting it up for use as a Larger Jack Plane, I go heavier on the cambering of the iron, shaping the cutting end of the iron into an arc, to the tune of an 8”radius. I recommend purchasing a second iron for the plane, if you intend to utilize both Jack and smoothing/Jointer functionality, as changing back and forth between iron shapes would waste your time and rapidly use up the iron.
Below are the two shapes of irons side-by-side.
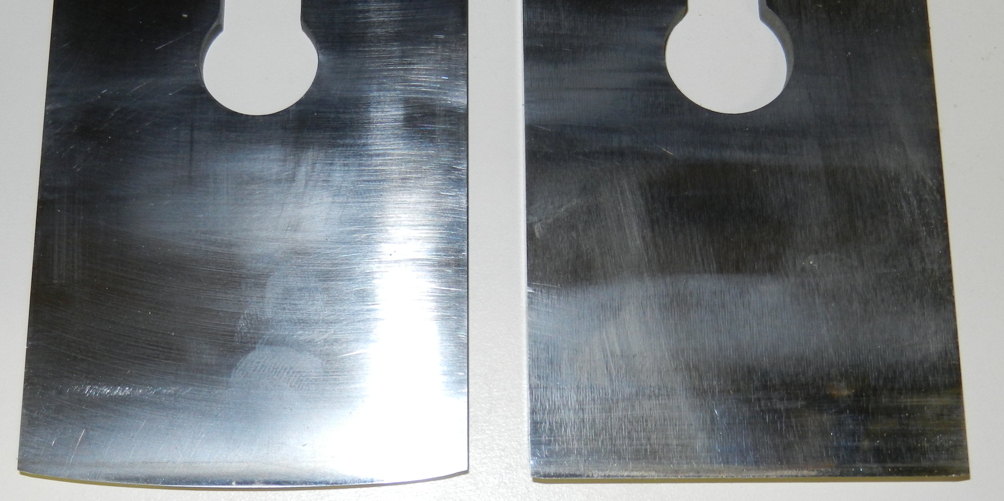
Curved by Flat
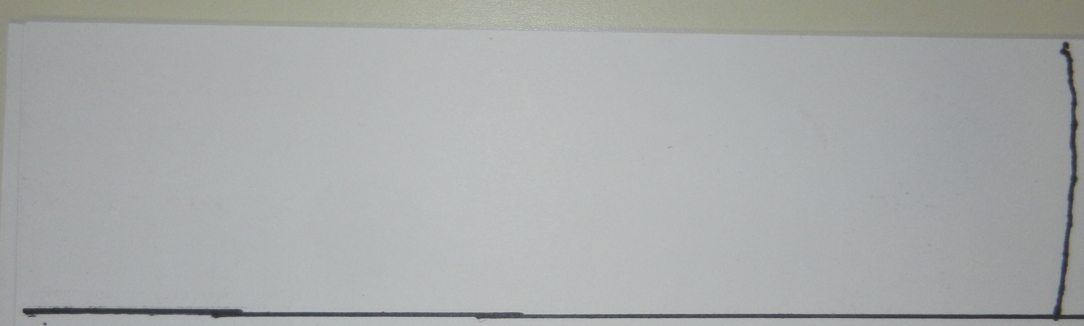
When removing the steel for the larger camber shape, I take light passes on my powered grinder and work back to an arc I’ve transferred to the back of the iron, using a template. Trying to remove this much material by hand, from a fresh square-ended plane iron, would certainly test your patience, your hands, and your stones. The template is easily made. Take a piece of string and tie it around a Sharpie (or whatever you’ll use to draw), and mark the string where it is 8” from the pen.
String marked for arcs
You can either hold the string down on a piece of card-stock (or just plain paper), or you can use a tack to hold the string in place. With the string secured at the mark, and stretched lightly so there is no slack, put the pen’s tip onto your paper or card-stock.
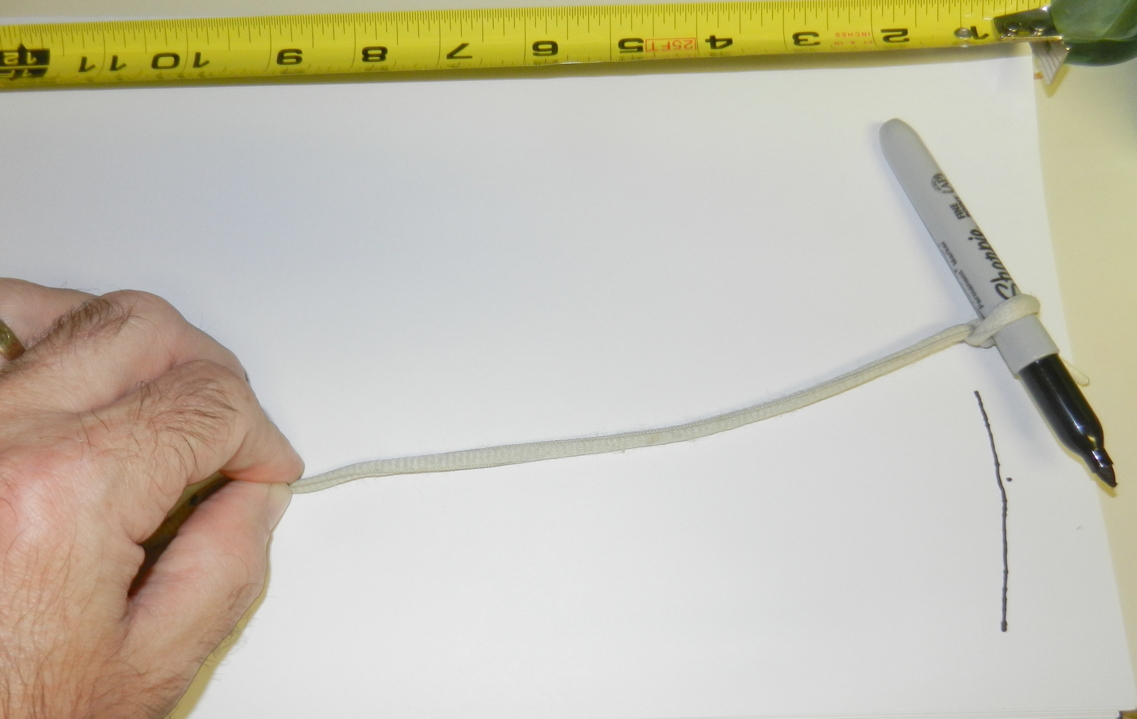
Holding string at mark
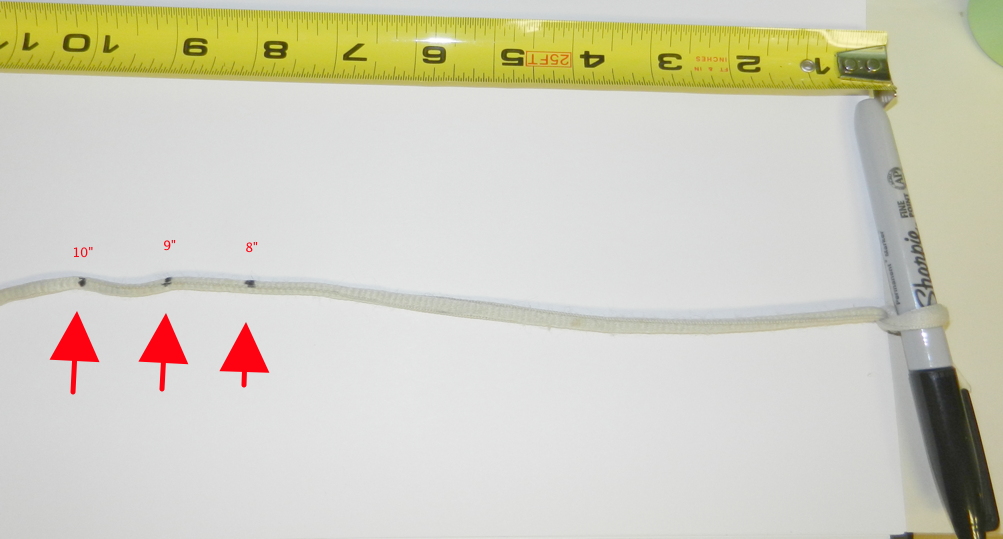
Move the pen back and forth while keeping the string taught, and you’ll have an arc pattern of an 8” radius. If this curve looks too dramatic, you can test out other larger radii (below picture shows 8”, 9” & 10”).
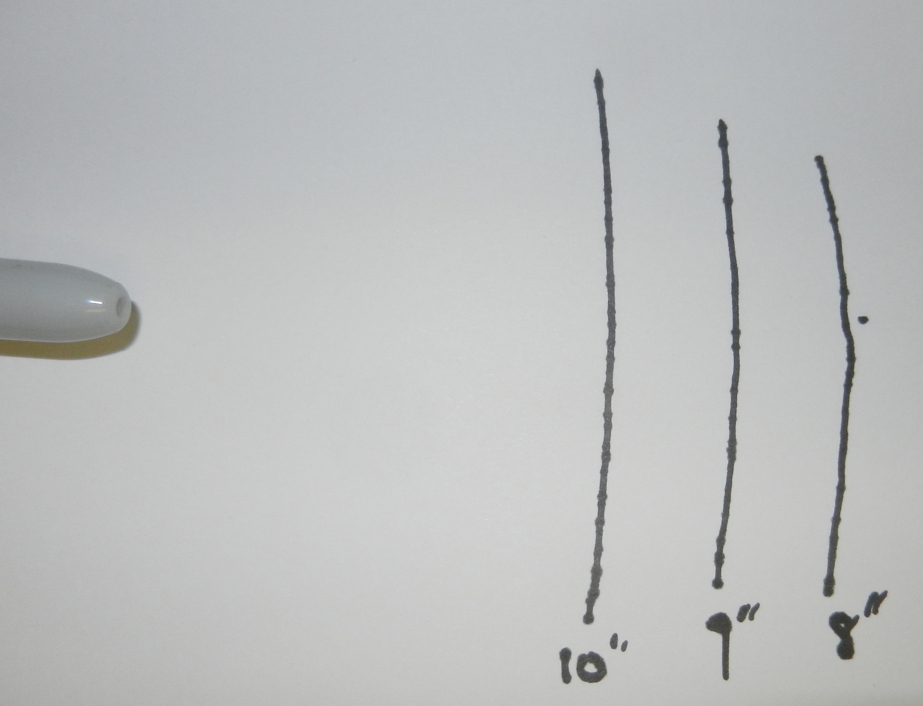
Three-arcs by measuring and making additional marks along the string, until you find what works for you. Once you’ve completed your pattern, take a pair of scissors or alternate cutting device, and trim along the arc you’ve drawn. I find it can be useful to lay the plane’s iron on the paper/card stock, and draw along the two long sides, extending these lines so they are longer than 8”.
You can do this by measuring and making additional marks along the string, until you find what works for you. Once you’ve completed your pattern, take a pair of scissors or an alternate cutting device, and trim along the arc you’ve drawn. I find it can be useful to lay the plane’s iron on the paper/card stock, and draw along the two long sides, extending these lines so they are longer than 8”.
Side lines and arc
I then attach the string close to the centerline, at one end, and draw my arc. This helps align the arc on the plane iron, so I can get the curve fairly consistent. One last tip is to place the pattern so the end of the arc is at the end of your iron. This will create an arc where you remove very little, if any, from the center of the iron. There is no reason to waste away any more steel than is required for the shape you are after. The A2 iron comes from the factory with a 25-degree bevel. For the best results, a 10-degree micro bevel should be created on the bevel side of the iron with a 1000-grit stone, and then honed to 8000-grit. The section of the back, closest to the cutting edge, is lapped flat at the toolworks with 600-grit. As you likely know, the back of the iron is just as critical in the sharpening process, as the bevel side. With this, you should also hone the back up to 8000-grit. I use the ruler-trick technique developed by David Charlesworth, to facilitate the honing on the back of the iron. This elevates the iron minutely, allowing only the very end of the iron to make contact with the stone. Using these techniques, the sharpening process takes very little time, and provides a razor sharp iron. The crew at each of the Lie-Nielsen Hand Tool Events regularly demonstrate hand sharpening, while describing each step in great detail, as well as the setup process for installing a freshly sharpened iron into a plane. I’m sure we’ve all heard the old adage “a picture is worth a thousand words”, and to expand on this, seeing this sharpening process in person would likely multiply this again by 100. If you ever have the chance, find a way to attend a Lie-Nielsen event, as this can help to quickly eliminate any issues, especially with the Lie-Nielsen team ready to answer questions. This information on sharpening is also available on DVDs and on Lie-Nielsen’s Youtube channel.
After sharpening and setting up the plane, there is one other thing I like to do, especially when using a plane with a lot of surface area (but it also works for just about any plane). I take a block of paraffin and rub it on the sole of the plane, both in front of and behind the iron.
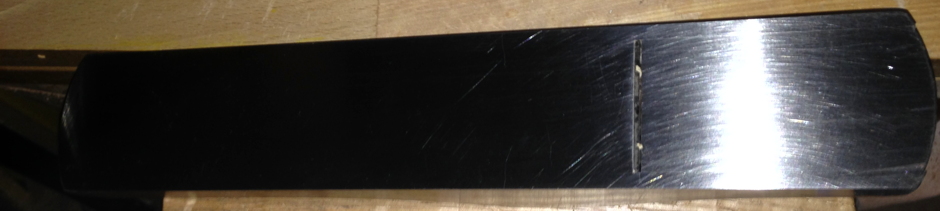
Plane no wax
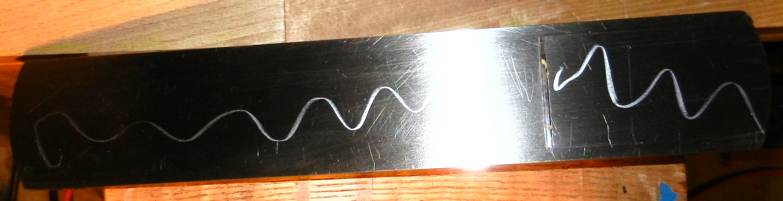
Plane wax
Now I’m not talking about getting crazy, and trying to cover every square inch of the sole with wax, just a quick wavy line down the sole. It makes such a huge difference, that I council my students to make sure they hold onto the plane when trying it for the first time after applying. They usually look at me with disbelief, prior to testing the plane with wax, but I’ve seen the look of terror in their eyes when they’ve come close to launching one of my planes off of the workbench. Seriously, the difference this little bit of wax makes is unbelievable!
Whether you intend to use the Lie-Nielsen No. 6 in a more traditional form, or really in any other conceivable iteration, it is a joy to use such a nicely balanced and functional hand plane. It can stand alone or fill a void between your current tools. All in all, you’ll find it a nice addition to your shop.
I hope you enjoyed the article and please let me know if you have any questions or comments.
Lee Laird
Excellent article! I’ve been up and down trying to decide on my next plane purchase. Do I get the #8 or do I give up the extra length and go for the #6. Your article definitely convinced me that the #6 is my next purchase.
Thanks for some great advice and tips.