Now that I’ve watched a few scroll saw demos (day 1 & day 2), I feel much more comfortable trying it myself. We have never had a suitable star for the top of our tree, and I thought I could design a simple pattern and make it myself.
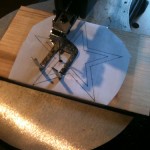
We had a bunch of old pallets in the basement, so I grabbed some of the wider pieces, cleared out all the nails, ran it through the planer a few times, and had my board ready to cut. For the design, I thought a star outline might be pretty, so I drew a star, and then drew a larger star around it. This would require some tight angle maneuvering as well as an interior cut that would help me to practice detaching and reattaching the blade. No problem!
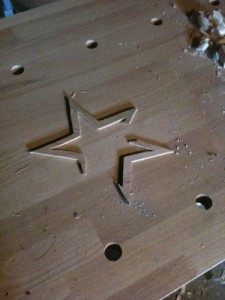
The first attempt was…a good learning experience. After a few too-tight cuts, I have learned that my scroll saw shades to the left, and I need to be consciously making adjustments for that. I’ll have to check if I can do some alignment on the saw that will help this, but for now, it just requires me to be a diligent scroller, which is an okay thing to practice, I think. Unfortunately I learned this the hard way, when one of the walls of my star cut a little too close, and broke.

While looking at that photo in confusion a few times, I realized it is creating an optical illusion that sometimes looks like I cut a star out of my workbench. I assure you, this is not the case.
After my first not-entirely-successful attempt, I got out another piece of the pallet, drew a similar design, and did not plane the board quite as thin. This one was going to work.
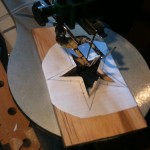
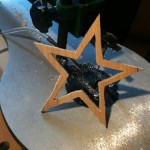
I drilled a hole in the center and cut out the inside of the star, then I continued with the outside edges. I developed a technique where I would cut a “turn-around hole” at all the sharp corners, so I could back into it and avoid having to make a more-than-90 degree turn that might have tested my beginner skills. Luckily there was a lot of waste space in which to make these extra cuts. Before I knew it, the star was cut out and ready for sanding.
One of the great bonuses you get when you purchase the Rikon 16″ Scroll Saw combo from Highland Woodworking is the flex shaft kit, which gives you a lot of options for sanding and polishing your projects once you are done cutting them on the Scroll Saw.
Once the star was all sanded and smooth, I did a quick metallic silver paint job (we like our Christmas trees somewhat garish) and glued on a clothespin to attach it. I had completed my first scrollsawing project! And I’m all ready to go back for more.
Here’s a brief demonstration of the flex shaft driving a carbide cutter on a simple project – it really helps with finishing:
This is a five day series of videos. To start at Day 1, click here. To see the previous post, click here. To see the next post, click here.


