No Southern-fried Southern boy wants to be called a Yankee, but we share the characteristics of shrewdness and thrift. Thus, each month we include a money-saving tip. It’s OK if you call me “cheap.”
It’s all well and good to make nest boxes for cavity-nesting birds to raise young in, but, we frugal woodworkers don’t want to break the bank doing it.
“Used” treated lumber is plentiful, fences fall down every day. But experts recommend that chemicals and paint be avoided in nest boxes. You won’t find much used cedar and redwood lying around. However, if you’re willing to work a little, you can make usable wood out of what you have, or what you find. The key is being able to remove the metal and rot.
Because the cedar I was working with had been construction lumber, it was chock full of staples and nails.

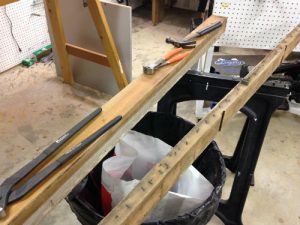
Step One was to set up some horses and an assembly line of disassembly.
First, I took out the obvious metal. A tiny screwdriver is good for getting under the staples with minimal marring of the wood. Tip: lift one side of the staple, then use pliers to remove the other side; it will be more likely to come out in one piece. The good news about staples is they don’t do much damage to power tool blades if you miss one.
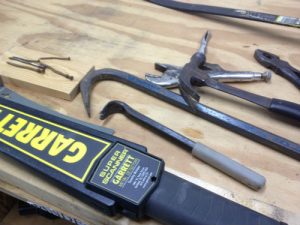
Step Two is to find the major metal. I don’t think you can do this part without a metal detector. Well, you could, but you’d have a big pile of cedar sawdust when you finished.

Fortunately, all I had to remove was toenails in the two ends and nails for the framing member that helped to support the screen, but the nails seemed to go in every direction. Once they were localized with the scanner, I made my best guess about where they ended and carefully made a square cut. I didn’t want to lose any material by unnecessary squaring later. But! I didn’t use the miter saw for that step. Rather, I marked lines all the way around the board and used a metal-cutting blade in the sabre saw. It’s a good thing, too, because I was off by about 1/2″, and an expensive blade could have been wasted.

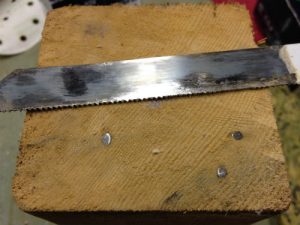
I cut this where I hoped the nails ended, trying to save as much cedar as I could. Oops!
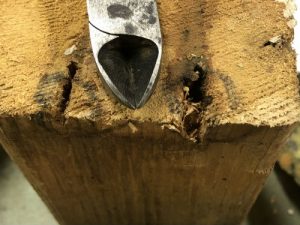
Now I had these little pieces to dig out. First, you need access. Remove some wood all around each nail. Over time, I’ve done that with a Dremel bur, an old, beat-up chisel, a pocket knife and even diagonal-cutting pliers (dikes). Access allows you to get a grip on the nail. In this case, I knew the fragments were short and wouldn’t provide much resistance to being pulled. They came out easily.

Dikes allowed me to nibble away a little wood around each nail fragment, then pull the piece easily.
The long fragments weren’t too hard, either, as I was able to use a punch to make them back up enough that the heads protruded from the surface of the 4 x 4. You can see the two pairs of end cutters I use in the first photo. The finesse goal with end “cutters” is not to cut, but to grip firmly enough that they don’t slip, and pull the nail out with a rocking, lever motion.
Jim Randolph is a veterinarian in Long Beach, Mississippi. His earlier careers as lawn mower, dairy farmer, automobile mechanic, microwave communications electronics instructor and journeyman carpenter all influence his approach to woodworking. His favorite projects are furniture built for his wife, Brenda, and for their children and grandchildren. His and Brenda’s home, nicknamed Sticks-In-The-Mud, is built on pilings (sticks) near the wetlands (mud) on a bayou off Jourdan River. His shop is in the lower level of their home.Questions and comments on woodworking may be written below in the comments section. Questions about pet care should be directed to his blog on pet care, www.MyPetsDoctor.com. We regret that, because of high volume, not all inquiries can be answered personally.

