Molly Bagby is an employee at Highland Woodworking who recently finished up a 2 Week Basic Woodworking course at Center for Furniture Furniture Craftsmanship (CFC). Although she grew up at Highland Woodworking from a mere 1 week old, her knowledge of woodworking skills is limited. With this class, she was able to change that. You can follow her on Instagram @HighlandWoodwoman.
To read my previous post on Mortise and Tenon Joinery, click here
At the start of week 2, I felt it was finally time to move on to dovetails, something I had been dreading because it was already about 5 days after Peter had done his first demo on how to make them. Luckily, one of Peter’s most important teachings is that the student should feel comfortable in each step of the process and not have to rush through any of it, so he was happy to go through the process step by step with me.
Specific Tools I Used for Dovetails
- Sliding T-Bevel
- Dovetail Saw
- Knew Concepts Coping Saw
- Sliding T-Bevel
- And my secret weapon, the David Barron Magnetic Dovetail Saw Guide
The first step in marking out dovetails is to figure out what angle you want the dovetail to be. For learning purposes, we made a 1:7 angle, which we first drew out on paper and then recorded that angle with the sliding t-bevel, to transfer to the wood.
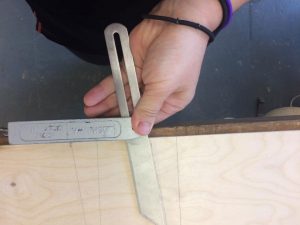
As I may have said before, I am a very visual learner and since I had never used some of these tools before, instead of having Peter demonstrate them multiple times, I took pictures of “how they work.” For example, the sliding T-Bevel seems like it can go in a million directions and figuring out what side needed to lay on the wood for proper marking of the dovetails proved to be a challenge for me. But once I took a picture of it in action, I was able to reference it for future layouts.
As I learned the hard way, the goal for cutting dovetails is to try and get a finished fit right off the saw so then you have to do less chiseling. I didn’t trust myself with the saw right away and so my cuts usually ended up being way off the line I had marked for myself. At least I was almost always following one of Peter’s most important rules of not cutting/paring away the pencil lines!
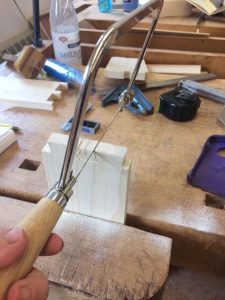
Cutting out the waste with a fret saw
When cleaning up the tails, one of Peter’s tricks to get a nice clean edge is to square a new visual guideline with a sharp pencil a few inches from the tails. After marking out your new lines, put the wood piece into the vise so that your new lines are perpendicular to the vise and you will be able to get a nice, straight cut down your new pencil line to the shoulder. The most important part of the cut is the positioning of the elbow and hand that is holding the chisel, as illustrated below.
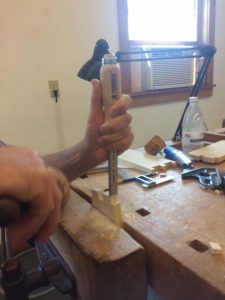
Ideal hand positioning for cleaning up the tails with a chisel
When I first started my dovetails, I took the long route and marked both my tails and pins at the same time. Then I learned that by the time you’re done with your tails, they are a lot less likely to fit the original pin sizes you created. You’re better off marking and cutting your tails first, and then marking your pins based on the size of the tails you just cut.
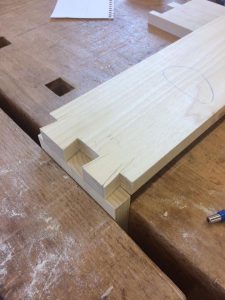
Mark your pins by tracing the tails you just created
Again, one of Peter’s most important steps in cutting both tails and pins, is to make sure you saw the waste up to the pencil line, but DO NOT REMOVE THE PENCIL LINE.
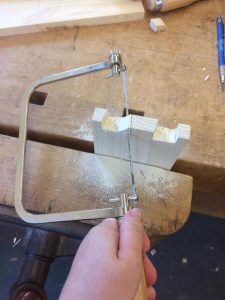
Removing the waste of the pins
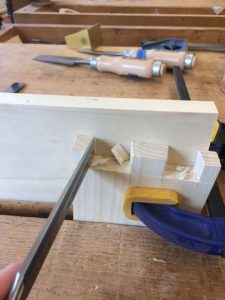
Paring back the pins with a chisel (note the vise setup with backing board)
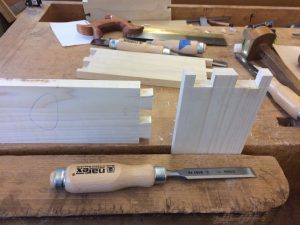
Are they ready to be put together and joined?
Unfortunately, there was a point where I wasn’t using a backing board when paring away the waste on my pins (as pictured above) and I ended up chiseling across and going off the far side. When this happened, Peter got really excited because it made for a great class tutorial on fixing cracks.
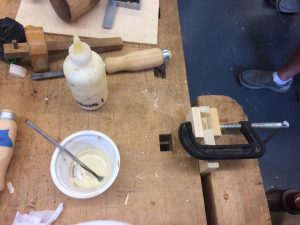
Crack Fix: With thinned out Titebond glue, brush the glue onto the surface and then push it down into the crack with the brush. Remove excess glue off the end grain surface, clamp up and let dry. Make sure you clean your glue brush while waiting for your piece to dry!
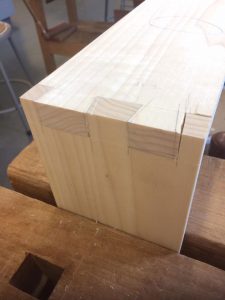
The first dovetail I’ve ever made with just a small gap on the right side.
I started my dovetail practice on a Monday, and the next Tuesday I received a package from Highland Woodworking containing a Lie-Nielsen Dovetail Saw and a David Barron Magnetic Dovetail Saw Guide. Let me just say, that with these 2 amazing tools, I was able to speed up my dovetail making two-fold! Not to mention that I already had 1 set of dovetails down, so it is always easier once you know what you’re doing.
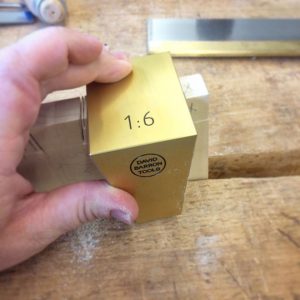
The David Barron Magnetic Dovetail Guide is an amazing time-saving jig for cutting dovetails precisely and quickly!
For the rest of the week I used my David Barron Dovetail Guide on all of my practice and project dovetails. I occasionally felt like Peter was giving me the side eye when he saw me using the jig, but it made my process so much less stressful and I was able to make my project dovetails a lot more quickly!
When I first watched Peter demonstrating dovetails, I got really nervous that they were going to be hard and complicated. Once I started practicing them, they came very quickly to me and I actually enjoyed making them a lot more than mortise and tenon joints! I also enjoy how they’re so pleasing to the eye!


Sounds fun with your first dovetail experience. Nothing wrong with using a magnetic guide when you first started. But Peter was right if he encouraged you to stop using it when you got home and continued your practice. It is like bike training wheels, nothing more.
Of course, you can keep using the guide, just like many choosing to cut dovetails with a jig and router. It is a free choice. The difference? You can’t boast your achievement as a true hand-cut dovetailer if you rely on a guide. You still are a dovetailer. Still, is the difference important? It’s again a choice you would decide for yourself.