Welcome to “Tips From Sticks-In-The-Mud Woodshop.” I am a hobbyist who loves woodworking and writing for those who also love the craft. I have found some ways to accomplish tasks in the workshop that might be helpful to you, and I enjoy hearing your own problem-solving ideas. Please share them in the COMMENTS section of each tip. If, in the process, I can also make you laugh, I have achieved 100% of my goals.
One day Brenda said, “I think Frida Kahlo is too wide to sit on the 2x4s on the cedar deck now.”
She was referring to the kitten we rescued two years ago. Frida and Maxx like to prowl on the screened area off our bedroom, walking on the framing so they can be as close to the outdoors as possible without being in harm’s way.
Brenda’s idea was for a little corner shelf, something unobtrusive. That meant brackets were out, and a floating shelf was in.
Now, you can buy floating shelf hardware, and there are some nice metal pieces available that make the job nearly foolproof. For starters, their brackets are already perpendicular to the supporting rod, so you don’t have to worry about your shelf pointing “up” or “down.”
Regular readers, though, know that I’m not going to spend money when I have a solution on hand already. And, in this case, I did.
The Domino came to mind. After all, those metal items are essentially tenons, as is every means of mounting a floating shelf.
To use Steve Johnson’s term, I had to “noodle” on this for a bit to decide exactly how to pull it off. After all, a 90i corner wasn’t going to allow moving a board onto tenons that are also 90i to each other without some compensation. It soon became clear that Dominos on one side could slide right into Domino slots, but the other side would have to have some sliding accommodation. This called for a mockup.
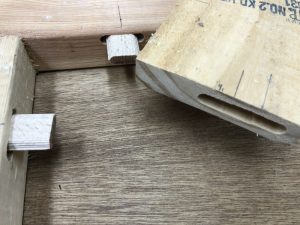
Cedar is expensive, and cutting into one’s house can be scary. I wasn’t up for any mistakes. I had this old 2×4 frame sitting in lumber storage. I figured it would suffice to test my theories on Domino placement. And, it did!
The plan wasn’t too geometrically challenging. With the biggest Dominos a Festool DF500 uses, one side of the board would need to slide about 3/4″ in order to seat the tenons on both sides. Two adjacent Domino slots on the sliding side and we were set.
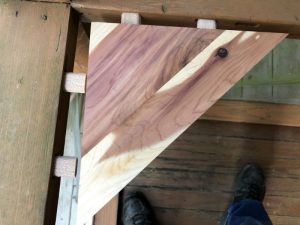
The real test: cutting into the cedar and the house. I was lucky, everything worked exactly like it did on the mockup.
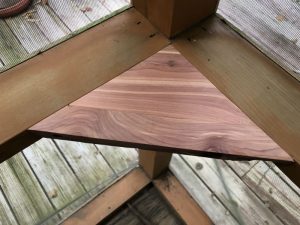
The dry fit is good. Glue and clamps should make the fit even better.
Now it was time to “noodle” (no, Steve, I’m not threatening to steal your word) on a way to clamp this thing. The obvious-but-impractical way was to cut holes in the screen and attach the clamps directly to the 2x4s. I immediately ruled that out. Then, I just held a clamp up to the shelf and it came to me: attach a temporary board with screws where the holes won’t show, under the 2x4s, and hook the clamps to those.
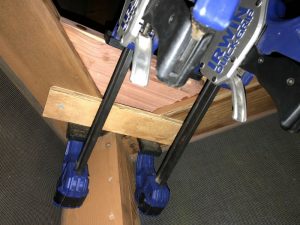
It worked!
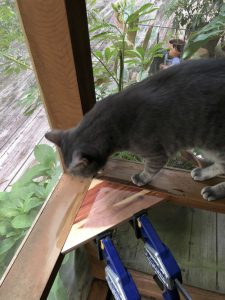
For a finish to look good on the shelf, it’s imperative that every bit of glue is cleaned. Max helps ensure I don’t miss any places. He looks out for his little sister’s interest. Construction was too much noise and commotion for her. A little semi-transparent stain and Frida will be sitting on her new shelf in no time.)
Jim Randolph is a veterinarian in Long Beach, Mississippi. His earlier careers as lawn mower, dairy farmer, automobile mechanic, microwave communications electronics instructor and journeyman carpenter all influence his approach to woodworking. His favorite projects are furniture built for his wife, Brenda, and for their children and grandchildren. His and Brenda’s home, nicknamed Sticks-In-The-Mud, is built on pilings (sticks) near the wetlands (mud) on a bayou off Jourdan River. His shop is in the lower level of their home.Questions and comments on woodworking may be written below in the comments section. Questions about pet care should be directed to his blog on pet care, www.MyPetsDoctor.com. We regret that, because of high volume, not all inquiries can be answered personally.

