This is the second post in a series – to read the first entry in the series, click here.
Today was an endurance day. A Windsor Chair Kit sanding endurance day. I knew the sanding would require a lot of effort, and even more patience, and now that I’ve made some headway, I feel like I’ve run a marathon.
As a beginner woodworker, I was not confident about how best to approach the sanding. It seems like when I sand something, it goes very quickly from “not done” to “overdone” and I am perhaps not paying close enough attention at every stage to stop before I’ve created a sanding divot. Does a woodworker eventually gain a ‘sanding eye’? Is this one of the downfalls of using a power sander that I would not have to deal with if I were instead sanding by hand?
I emailed Chris Benner, the maker of these chair kits, for some advice on sanding the chair. These were his comments:
This is the most labor intensive part of the build. I start with a super heavy grit to get the router lines out, 36 or 40 grit. I know that is rough stuff but all the lines need to come out, or they will show though the paint, or stain. Even when they seem to be gone, take a wet rag and wet it down. If they are not gone the water will raise the grain and they will show. The most difficult part of this sanding is the fact that the legs are hard maple and the seat is pine. As you are sanding the legs the pine is going to want to dip out. Once I know all the router lines are out I move to 80 then 120 and finish with that if I’m painting the chair. I go to 180 to 220 if I’m going to stain it.
When sanding the sides and bottom, I usually do this before the chair is put together. Sand them starting with 80 grit then work your way up.
Look here for more clear pictures on how much they sanded the seat: www.windsorchaironline.com.
The instructions also mention the option of planing the base of the seat if you want to go the more traditional route, but I feel like that is another few steps down my path to more experienced woodworking, and I stick with my non-traditional Festool power sander.
Once the base and sides look smooth and finished to my untrained eye (but feel much better to my semi-trained hands), I turn off the sander and focus on the next step: gluing up the base. I did a dryfit of this operation last time, and I feel somewhat prepared, and only a little bit nervous.
Unfortunately, I’ve saved this part for after dinner, and then end up putting it off until even later, thinking it will be a fine process to do right before heading up to bed. Once I actually get started down in the shop, I realize how incorrect this assessment was: driving the legs into the stretcher assembly and the base requires some hard (and therefore quite loud) hits with a mallet, and once the legs are in and through the base, driving the wedges into the pre-split legs is also not a quiet process. But the glue is drying, so I soldier on, believing apologies later will be easier than dealing with a half-glued project.
The last step after I drive the wedges as far as they will go with the mallet is to use a chisel to drive the wedges in even further, and then cut off the leg and the wedge as close to the seat as possible. This is where my saw improvisation skills will really come in handy. I start with the most-nearby-to-my-project saw, a Crown Dovetail saw. This saw is not made for this task. I really should practice Frank Klausz’s method of handcutting dovetails that I viewed at Woodworking in America last year and give this saw a real workout that it can excel at, but instead I’m trying to cut off a piece of hard maple at an awkward angle at 10:45pm. After 5 minutes of struggling with what is certainly the wrong tool, I switch to a standard coping saw and have much more success.
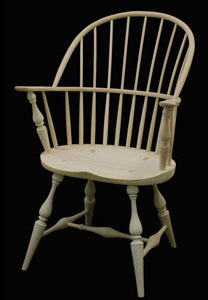
When I step back and take a look at my day’s work, it occurs to me that it is actually starting to take shape and look like an actual chair. When the glue is dry and the seat is sanded, I may give it a sit and get re-inspired. There really is something about making something you can pick up with your hands that is incredibly satisfying. I think I’m starting to see what all the woodworking excitement is all about.
This is the second post in a series – to read the next entry, click here. To read the first entry in the series, click here.


Kelley,
I’m really enjoying the read. Glad to see you are pushing into new territory, and succeeding. Keep up the great work!
Best,
Lee