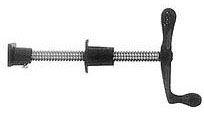
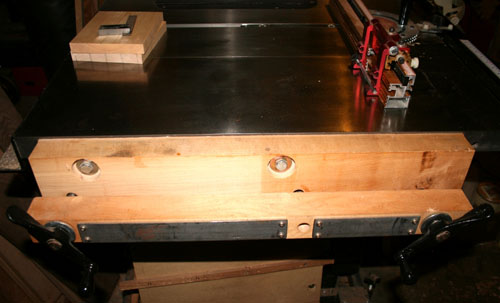
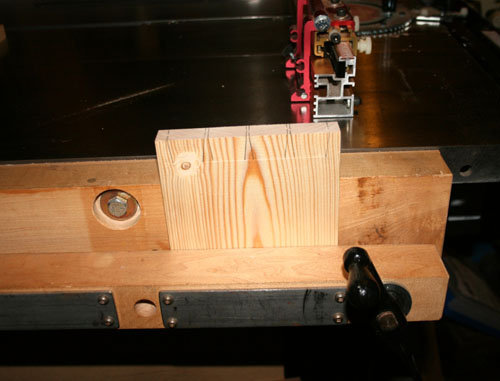
 Some folks are lucky enough to have a fully stocked workshop, with a dedicated workbench to hold work pieces for hand cutting dovetails. For those who aren’t as lucky, I came up with a plan that allowed me to supplement my work holding abilities. My shop was part of a garage, with a couple of go-to machines – Table saw, Band saw and Drill press. There was no extra room for a work bench, and I’ve been seeking a solution for my work holding situation. After working on my table saw, I noticed the wings had pre-cut holes, since they are setup to work on either side of the table. After seeing I had attachment points, I started looking for “screws” I could use in my “dovetailing vise”. The solution I came up with was to use veneering press screws that had adequate capacity for dovetailing most projects. These screws come with a mating piece which acts as a nut for the screw.
I cut a piece of 8/4 Maple, wide enough to attach just shy of flush to the table saw’s wing (didn’t want there to be a chance of wood movement that might throw off a cut on my saw) and to house the mating pieces for the screws. I clamped this piece of Maple to the edge of my table saw wing, so I could leave marks on the wood for drilling. I drilled and countersunk holes large enough for the bolt’s head and washer to sit below the “clamping” surface. I used a washer and an aircraft nut on each bolt, so they would not loosen with vibration. Next I drilled three holes on my drill press just slightly larger in diameter than the press screws, in a location low enough that the screw’s “nuts” would not hit the table wing. The mating “nuts” for the screws required a slightly different technique, since they are not cylindrical. I started by using a forstner bit to drill out a hole slightly larger diameter than the “nut’s” conical section and just slightly deeper than the “nut’s” depth, minus the thickness of the square lip. Once that was completed, I threaded the nut onto the screw until it was tight. This allowed me to mark for the two holes used to hold the “nuts” in place. Before I installed the two “nuts”, I cut another piece of 8/4 Maple to use as the outer vise jaw. I cut this second piece the same length as the first, but only about 2″ in width. I clamped the outer jaw over the previously drilled holes for the press screws. I took the same drill bit as was used for the holes, and put it into the holes from the back side, spinning lightly to leave a mark on the inside edge of the outer jaws. I took the drill bit and the outer jaws over to the drill press to make holes that would be in the same plane as those drilled earlier. I made sure to remember to slide a washer over each press screw, before putting everything together. After each veneer screw is almost completely inserted, I re-install the free rotating piece that comes with each screw. This will reduce the likelyhood that the screw will unscrew completely.

I’m sure someone will recognize that I drilled three holes, but am only using two press screws. In actuality, I initially bought two press screws. After setting the screws about 20″ apart, I noticed some flex in the outer jaw, even though I was using 8/4 Maple. As many of the dovetailed items I make are less than 6″ in width, I decided to add another screw hole about 6″ away from one of the first screws. I purchased a third press screw so I would have the mating “nut” to install in the back side of the “extra” hole. This provides me flexibility. Since the mid hole isn’t centered, it provides me with openings in three sizes, to limit the flex that occurs when the opening is much larger than the work pieces.

The press screws I purchased are the 12″ versions. If you follow this link:
http://www.highlandwoodworking.com/veneering-clamps.aspx
you’ll find three sizes available, 9″, 12″ & 18″.
Good luck!
Lee Laird has enjoyed woodworking for over 20 years. He is retired from the U.S.P.S. and works for Lie-Nielsen Toolworks as a show staff member, demonstrating tools and training customers.

