If you’re anything like me, you’ve probably at least had thoughts of trying your hand at a woodworking project that breaks away from the square/rectangular form. You may have even gone so far as to buy an old used spokeshave, only to find an ill-fitting replacement blade, or even more likely, a mouth as wide as the Grand Canyon. Ok, maybe not quite that wide, but it behaves like that is the case.
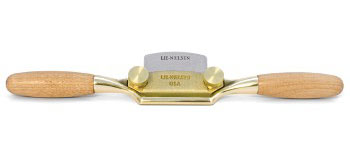 I’ve been there and done that as well. I have a number of old spokeshaves still hanging around from years gone by, where some had bits of odd replacement parts, a super wide mouth, and just never worked very well. Enter Lie-Nielsen’s collaboration with Brian Boggs on spokeshaves. There are three distinct versions (Flat, Curved & Concave) of these spokeshaves, but I will focus on the Flat spokeshave in this article.
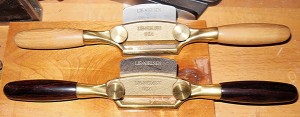
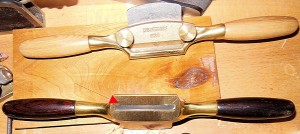
The Boggs Flat spokeshave is a truly awesome tool that not only works wonderfully, but is also both beautiful and balanced in the hands. Amazingly, while this tool is 10” long, it weighs in at only 12 ounces. This is mainly due to the bronze body and cap. The iron in this spokeshave is A2 tool steel, comes with a 25-degree bevel from the factory, and is bedded at 40 degrees with the bevel down. The handles are made from hickory, but cocobolo is sometimes available (I upgraded my Flat spokeshave to cocobolo, so I could tell the curved sole from the flat version with a quick glance), at an additional charge. The mouth of the spokeshave is extremely fine and set up to handle a shaving in the .008” – .010” range.
When I first received my Boggs spokeshaves, I was amazed at just how tiny the mouth-size looked when compared to any of my old “beaters”. If I hadn’t already known the tool was set up, I’d have thought the mouth was too tight. That is, until I put it to work. This truly is a perfect sized mouth for really fine work.
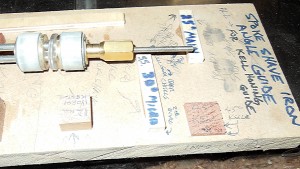
The spokeshave’s A2 iron, with its short edge-to-back stature, can cause sharpening troubles for some. I use my Kell jig, which readily clamps onto the sides of the iron, while still projecting the proper amount of iron. I also made a Kell sharpening setup jig, based along the lines of the Lie-Nielsen plane/chisel angle setting jig, designed by Deneb Puchalski. Different brands of honing guides have different amounts of iron projection needed, to end up with the same honing angle. I made two stops on this jig for the Lie-Nielsen spokeshave irons. One so I can apply a 10-degree micro-bevel, and the other to refresh the 25-degree baseline bevel, after the micro-bevel has grown too large to be efficient.
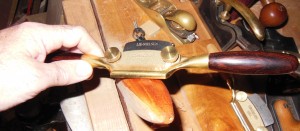
Once the iron is sharpened, it is extremely easy to set up the spokeshave for work. I carefully feed the iron up through the bottom of the sole, so I’m less likely to ding the just-sharpened edge. Once the iron is up in the spokeshave body, I hold the iron while I set the sole on a piece of wood I know to be flat. I hold the sole down while putting very light pressure on the center-back portion of the iron. I then snug up the two thumbscrews, to hold the iron in place. It’s not necessary to put a lot of force on these, as you just need it to keep the iron in place during use. I would certainly avoid using any wrench or pliers to tighten these down. Now it’s time to see how the spokeshave performs. If you want a completely even depth of cut across the iron, you can lightly tap the iron laterally, as needed. Depending on the thickness of the material I’m working (if the material is fairly thick, I prefer to keep the iron set for an equal depth of cut all the way across), I will adjust the iron so one side projects out further than the other. When doing this, I aim for a very light cut on one side, and a slightly deeper cut on the other. Remember, the max depth of cut is only about .010”. This still allows me to quickly remove wood from an area that needs a bit more taken off, while coming back in with the other side of the iron and taking final finish shavings.
The Boggs Flat spokeshave is primarily used on the outside of curves, or when you need to take a straight square piece to round or oval.
Since the sole is only 1” deep, you CAN get into some very shallow inside curves, but the curved version is better geared for this work. Even with the tight mouth opening, I still try to work with the grain, but some woods can still be a bit cantankerous. If this is the case, some skewing of the spokeshave will usually help create better results. I also find a light touch with the spokeshave works much better than applying too much pressure. When the iron is nice and sharp, the spokeshave’s own weight is sufficient to obtain the best surface, and control.
I hope you enjoyed the article, and let me know if you have any questions.
Click to take a closer look at the Lie-Nielsen Boggs Flat Spokeshave.
Click to see Highland Woodworking’s entire selection of Lie-Nielsen hand tools.
Lee Laird has enjoyed woodworking for over 20 years. He is retired from the U.S.P.S. and works for Lie-Nielsen Toolworks as a show staff member, demonstrating tools and training customers. You can email him at lee@lie-nielsen.com or follow him on Twitter at twitter.com/is9582


